m (→References) |
|||
| Line 1: | Line 1: | ||
| + | {{for|her character biography|Sintharia}} |
||
| − | :''This is about the dungeon hub. For the raid known in-game as "Tempest Keep", see [[Eye (Tempest Keep)]].'' |
||
| + | {{npcbox |
||
| − | {{infobox instance |
||
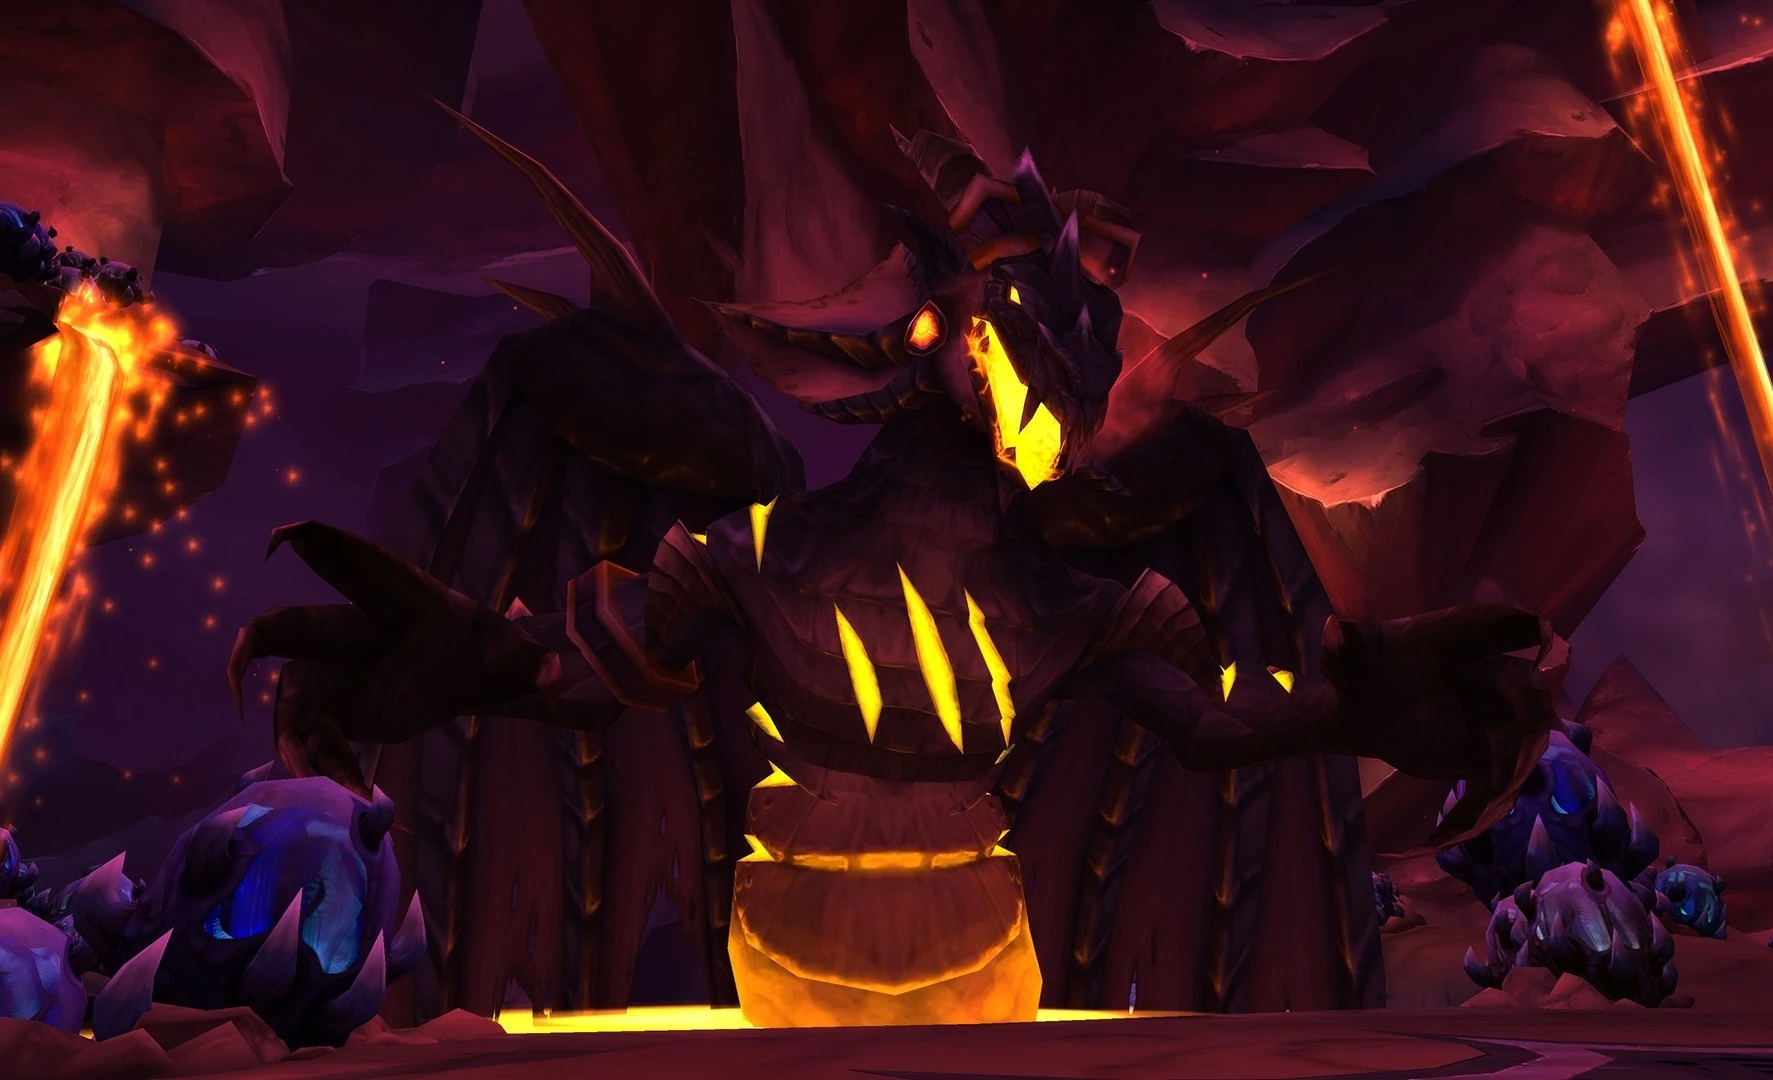
| + | |image = Sinestra.jpg |
||
| − | |name=Tempest Keep |
||
| + | |name = Sinestra |
||
| − | |aka=TK, several instances |
||
| + | |title = Consort of Deathwing |
||
| − | |ss=Tempestkeep-ingame.jpg |
||
| + | |gender = Female |
||
| − | |caption=Tempest Keep in-game |
||
| + | |race = Black wyrm |
||
| − | |loc=[[Netherstorm]] |
||
| + | |creature = Dragonkin |
||
| − | |ruler=[[Kael'thas Sunstrider]] |
||
| + | |level = ?? |
||
| − | |races={{Race|Blood Elf }}<br/>{{Race|Satyr }}<br/>{{RaceIconExt|Mo'arg|Small}} [[Mo'arg]]<br/>{{RaceIconExt|Gan'arg|Small}}[[Gan'arg]]<br/>{{RaceIconExt|Imp|Small}}[[Demon]] |
||
| + | |type = Boss |
||
| − | |boss= |
||
| + | |faction = Combat |
||
| − | |type= |
||
| + | |location = [[Twilight Caverns]], [[Bastion of Twilight]] |
||
| − | |level=69-70++ |
||
| + | |aggro = {{aggro|-1|-1}} |
||
| − | |players=5-25 |
||
| + | |health = 42,950,000 (10)<br/>128,838,000 (25) |
||
| − | |key={{Item|Warpforged Key}} ([[Heroic]] mode) |
||
| + | |mana = |
||
| + | |instance=Bastion of Twilight |
||
}} |
}} |
||
| + | '''Sinestra''' is a heroic-mode only boss in the [[Bastion of Twilight]], described as similar to [[Algalon the Observer]] in [[Ulduar]]. She is only accessible after [[Cho'gall (tactics)|Cho'gall]] is defeated. |
||
| − | {{Tempest Keep wings}} |
||
| − | [[File:Tempest Keep Instance Map.jpg|thumb|Tempest Keep map]] |
||
| − | [[File:Tempestkeep.jpg|thumb|Tempest Keep Map<br/>BlizzCon 2005 (Better resolution |
||
| − | [http://www.blizzplanet.com/content/wow/unreleased-instances/outland/tempest-keep/tempest-keep-wings.jpg here]) ]] |
||
| + | The world first kill was made by [[Paragon]] of [[Lightning's Blade-EU]] on January 20, 2011. |
||
| − | '''Tempest Keep''' is a former [[naaru]] [[Dimensional Ship|fortress]] in the [[Netherstorm]] in [[Outland]]. This crystalline fortress is now ruled by [[Kael'thas Sunstrider]], the lord of the [[Blood elf|blood elves]], and dominated by scores of his brethren. The structure is divided into three wings - satellites of the gigantic structure - with the fourth wing, [[the Exodar]], now in the world of Azeroth as the [[Draenei]] capital. |
||
| + | Originally Deathwing's Prime Consort, Sinestra created the first twilight dragons, but was later obliterated by one of her terrifying creations. Now a ravaged husk reanimated by insidious magic, Sinestra oversees the creation of new twilight clutches. <ref>[[Encounter Journal]]</ref> |
||
| − | The three remaining wings are differentiated by the different color themes: |
||
| − | *[[Botanica]]: Light blue |
||
| − | *[[Arcatraz]]: Red |
||
| − | *[[Mechanar]]: Light purple |
||
| + | ==Attacks and abilities== |
||
| − | ''Tip'': One easy way to remember which is which is to look at their placement on the map. Starting at the top and working clockwise are '''B''' for [[Botanica]], '''A''' for [[Arcatraz]], and '''M''' for [[Mechanar]], spelling the mnemonic "BAM". |
||
| + | ===Stage One: I Will Deal With You Myself!=== |
||
| + | At the outset of the battle, Sinestra is weakened from past battles and from nurturing the Twilight brood. She begins with only 60% of her maximum health, and her damage dealt is reduced by by 40%. |
||
| + | *{{abilities|Wrack|Sinestra causes a random player to suffer Shadow damage every 2 sec. for 1 min. with the damage taken increasing rapidly. When a player dispels Wrack, it bounces to two nearby allies of the afflicted player. Wrack retains its remaining duration but returns to its original damage values.|type=healer|type2=magic|id=89421|image=ability_creature_cursed_03}} |
||
| − | == Dungeon denizens == |
||
| + | *{{abilities|Flame Breath|Sinestra unleashes a torrent of flame that sweeps across her platform, inflicting 95000 to 105000 Fire damage to all enemies.|id=18435|image=spell_fire_fire}} |
||
| − | * {{RaceIconExt|Abyssal|Small}} [[Abyssal]]s |
||
| + | *{{abilities|Twilight Slicer|Sinestra summons two shadowy orbs, each of which fixates on a player and begins to pursue that player. These spheres are linked together by a cutting beam of pure twilight energy that inflicts 46250 to 53750 Shadow damage per 5 sec. to any player who comes into contact with the beam.Each sphere also pulses twilight energy, inflicting 27000 to 33000 Shadow damage every 0.5 sec in a 5 yard radius. The orbs dissipate after 15 sec.|type=deadly|id=92852|image=spell_shadow_shadowmend}} |
||
| − | * {{RaceIconExt|Air|Small}} [[Air elemental]]s |
||
| + | *{{abilities|Twilight Blast|When Sinestra cannot reach anyone in melee range, she blasts an enemy for 166250 to 183750 Shadow damage.|id=87947|image=spell_fire_twilightpyroblast}} |
||
| − | * {{RaceIconExt|Ancient|Small}} [[Ancient]] (one, [[Warp Splinter]]) |
||
| + | *[[Twilight Whelp]]s – Sinestra periodically calls forth a set of five Twilight Whelps to attack intruders. |
||
| − | * {{RaceIconExt|ArcaneGuardian|Small}} [[Arcane guardian]]s |
||
| + | **{{abilities|Twilight Spit|The Twilight Whelps spit shadowy bile on their target, inflicting 3800 to 4200 Shadow damage and increasing the target's Shadow damage taken by 10%. This effect stacks.|type=tank|id=89299|image=spell_fire_twilightflamebreath}} |
||
| − | * {{RaceIconExt|ArcaneTitan|Small}} [[Arcane titan]] (one, [[Mechano-Lord Capacitus]]) |
||
| + | **{{abilities|Twilight Essence|When a Twilight Whelp dies, the essence instilled in it by Sinestra leaks out, forming a bubbling puddle beneath its corpse. If this essence touches any other dead Twilight Whelp, that Whelp reanimates. Each pool of Twilight Essence expands over time. The pools inflict 9250 to 10750 Shadow damage every 2 sec.|type=tank|id=88146|image=spell_fire_twilightnova}} |
||
| − | * {{RaceIconExt|DrakonidBlack|Small}} [[Black dragonflight|Black]] [[drakonid]]s |
||
| − | * {{RaceIcon|BloodElf|Male|Small}}{{RaceIcon|BloodElf|Female|Small}} [[Blood elves]] |
||
| − | ** {{RaceIconExt|Kael'thas|Small}} [[Kael'thas]] |
||
| − | * {{RaceIcon|Broken|Male|Small}} [[Broken]] (one, [[Udalo]]) |
||
| − | * {{RaceIconExt|Doomguard|Small}} [[Doomguard]]s |
||
| − | * {{RaceIconExt|Dragonhawk|Small}} [[Dragonhawk]]s |
||
| − | * {{RaceIcon|Man'ari eredar|Male|Small}} [[Man'ari eredar]] |
||
| − | * {{RaceIconExt|Ethereal|Small}} [[Ethereal]]s |
||
| − | * {{RaceIconExt|Felguard|Small}} [[Felguard]]s |
||
| − | * {{RaceIconExt|FelReaver|Small}} [[Fel reaver]] (one, [[Void Reaver]]) |
||
| − | * {{RaceIconExt|Fire|Small}} [[Fire elemental]]s |
||
| − | * {{RaceIconExt|Flamewaker|Small}} [[Flamewaker]]s |
||
| − | * {{RaceIconExt|Fleshbeast|Small}} [[Fleshbeast]]s |
||
| − | * {{RaceIconExt|FloatingEye|Small}} [[Floating eye]]s |
||
| − | * {{RaceIconExt|Gan'arg|Small}} [[Gan'arg]] |
||
| − | * {{RaceIcon|Gnome|Male|Small}} [[Gnome]] (one, [[Millhouse Manastorm]]) |
||
| − | * {{RaceIconExt|Imp|Small}} [[Imp]]s |
||
| − | * {{RaceIconExt|Larva|Small}} [[Larva]]e |
||
| − | * {{RaceIconExt|Lasher|Small}} [[Lasher]]s |
||
| − | * {{RaceIconExt|ArcaneWraith|Small}} [[Arcane wraith]]s |
||
| − | * {{RaceIconExt|Mana|Small}} [[Mana surge]] |
||
| − | * {{RaceIconExt|Mo'arg|Small}} [[Mo'arg]] |
||
| − | * {{RaceIconExt|Orchid|Small}} [[Orchid]]s |
||
| − | * {{RaceIconExt|Phoenix|Small}} [[Phoenix]]es |
||
| − | * {{RaceIconExt|QirajiProphet|Small}} [[Qiraji prophet]] (one, [[Harbinger Skyriss]]) |
||
| − | * {{RaceIconExt|Satyr|Small}} [[Satyr]] |
||
| − | * {{RaceIconExt|Shivarra|Small}} [[Shivarra]] (one, [[Dalliah the Doomsayer]]) |
||
| − | * {{RaceIconExt|Succubus|Small}} [[Succubi]] |
||
| − | * {{RaceIconExt|Treant|Small}} [[Treant]]s |
||
| − | * {{RaceIconExt|DrakonidViolet|Small}} [[Twilight dragonflight|Twilight]] [[drakonid]]s |
||
| − | * {{RaceIconExt|Voidcaller|Small}} [[Voidcaller]]s |
||
| − | * {{RaceIconExt|VoidLord|Small}} [[Void lord]]s |
||
| − | * {{RaceIconExt|VoidTerror|Small}} [[Void terror]]s |
||
| − | * {{RaceIconExt|Voidwraith|Small}} [[Voidwraith]] (one, [[Zereketh the Unbound]]) |
||
| − | * {{RaceIconExt|WarpStalker|Small}} [[Warp stalker]]s |
||
| − | * {{RaceIconExt|Wrathguard|Small}} [[Wrathguard]] (one, [[Wrath-Scryer Soccothrates]]) |
||
| + | ===Stage Two: I Tire of This!=== |
||
| − | == Summary == |
||
| + | When Sinestra is brought to 30% health, she draws upon ambient energy to restore her power and erects a shield to protect herself. |
||
| − | *'''Layout:''' Three 5-man wings, One 25-man raid |
||
| − | **'''[[The Mechanar]]''' (Level 69-72 mobs). |
||
| − | ***'''First Layer Bosses''': [[Gatewatcher Gyro-Kill]], [[Gatewatcher Iron-Hand]], [[Mechano-Lord Capacitus]] |
||
| − | ***'''Second Layer Bosses''': [[Nethermancer Sepethrea]], [[Pathaleon the Calculator]] |
||
| − | **'''[[The Botanica]]''' (Level 70-72 mobs). |
||
| − | ***'''Bosses:''' [[Commander Sarannis]], [[High Botanist Freywinn]], [[Thorngrin the Tender]], [[Laj]], [[Warp Splinter]] |
||
| − | **'''[[The Arcatraz]]''' (Level 70-72 mobs) |
||
| − | ***'''Bosses:''' [[Zereketh the Unbound]], [[Wrath-Scryer Soccothrates]], [[Dalliah the Doomsayer]], [[Warden Mellichar]] Event. The [[Warden Mellichar]] Event include the spawn of: random boss (70+) - [[Millhouse Manastorm]] (friendly gnome) - random boss (72+) - random boss (72+) - [[Harbinger Skyriss]] |
||
| − | **'''[[Eye (Tempest Keep)|The Eye]]''' (25-man raid wing) |
||
| − | ***'''Bosses:''' [[Al'ar]], [[Void Reaver]], [[High Astromancer Solarian]], [[Kael'thas Sunstrider (tactics)|Kael'thas Sunstrider]] |
||
| − | * In order to access the Tempest Keep you will either need a [[flying mount]] (druids can use [[flight form]]), or as of [[patch 2.4.0]] be summoned from a warlock that is currently inside. |
||
| − | * Populated with [[blood elf|blood elves]]. |
||
| + | *'''A Clash of Flame and Twilight''' |
||
| − | == History == |
||
| + | **The red dragon [[Caelen]] comes to the party's aid and engages in a magical duel with Sinestra. The duelist with the most mana gains the upper hand. |
||
| − | The mighty Tempest Keep was created by the enigmatic [[Naaru]], sapient beings of pure energy and the sworn enemies of the [[Burning Legion]]. As a base of operations for the Naaru, the structure itself possesses the technology to teleport through alternate dimensions, traveling from one location to another in the blink of an eye. |
||
| + | **{{abilities|Pyrrhic Focus|Calen burns his own health reserves to restore his mana. His focus also increases healing done to Calen by 500%.|type=healer|id=87323|image=spell_fire_immolation}} |
||
| + | **{{abilities|Mana Barrier|A powerful barrier envelops Sinestra, continually replenishing any lost health at the expense of her mana.|type=dps|id=70842|image=spell_shadow_detectlesserinvisibility}} |
||
| + | *[[Pulsing Twilight Egg]] – Sinestra has stored vast reserves of twilight energy in these massive eggs. |
||
| − | With [[Outland]] serving as the strategic battlefront in the ongoing Burning Crusade, the Naaru used Tempest Keep to reach the shattered land. However, when the Naaru set out from their stronghold, [[Kael'thas Sunstrider|Prince Kael'thas]] and his blood elves quickly raided the dimensional fortress and assumed control over its satellite structures. Guided by some unknown purpose, Kael’thas manipulates the keep’s otherworldly technologies, using them to harness the chaotic energies of the Netherstorm itself. |
||
| + | **{{abilities|Twilight Carapace|The Pulsing Twilight Eggs are normally impervious to all damage. In moments of dire need, Sinestra directly siphons from the eggs and causes their Twilight Carapace to drop temporarily.|type=dps|id=87654|image=spell_fire_twilightfireward}} |
||
| + | *[[Twilight Spitecaller]] – These twilight dragonkin periodically stream into the room during the clash between Calen and Sinestra. |
||
| + | **{{abilities|Unleash Essence|The Twilight Spitecaller releases a torrent of twilight energy that afflicts all nearby enemies, inflicting damage equal to 10% of each target's maximum health every 1 sec. Conventional interrupts cannot prevent the casting of the spell, but other effects that cause loss of control may be effective.|type=deadly|id=90028|image=spell_fire_twilightnova}} |
||
| + | **{{abilities|EnrageIndomitable|If a Twilight Spitecaller is incapacitated for more than a brief period of time, it regains control through a surge of sheer will. The Spitecaller becomes immune to all bonds and restraints until a player removes this effect, and inflicts 40000 Shadow damage and knocks back players within 8 yards.|type=enrage|id=90045|image=spell_shaman_improvedreincarnation}} |
||
| + | *[[Twilight Drake]] – Twilight Drakes swoop in from the sides of the cavern during the clash between Calen and Sinestra. |
||
| − | Though Kael’thas and his minions maintain a tight hold on the keep, a band of [[Draenei]] hijacked one of its satellite structures, the [[Exodar]], and used it to escape Outland. In seeking out other worlds, the Draenei, led by the ancient prophet, [[Velen]], hoped to find allies who would stand with them against the Legion and its nihilistic Crusade. The Exodar was damaged in the escape, and eventually crashlanded on [[Azeroth (world)|Azeroth]]. |
||
| + | **{{abilities|Twilight Breath|The Drake's breath inflicts 38400 to 41600 Shadow damage in a 25 yard 60 degree cone in front of it.|id=76817|image=spell_fire_twilightflamebreath}} |
||
| + | **{{abilities|Absorb Essence|If a Twilight Drake comes into contact with a pool of Twilight Essence, it siphons that energy and causes the pool to shrink and eventually vanish entirely. Each charge of Essence absorbed increases the Drake's damage by 10%, and its health by 10%. This effect stacks.|type=tank|id=90107|image=spell_shadow_shadowpower}} |
||
| + | ===Stage Three: Now Die!=== |
||
| − | ==Functioning== |
||
| + | Once the players destroy the [[Pulsing Twilight Eggs]], Sinestra brings her magical duel with Calen to an end and attacks the players with her full fury. Empowered by the twilight eggs from which she reclaims her siphoned energy, Sinestra no longer deals reduced damage. |
||
| − | Tempest Keep can be accurately described as an enchanted fortress. It has the ability to Travel along the [[Twisting Nether]] - a realm of intense energy that links all the worlds of the [[Great Dark]] together. This is where the term "inter-dimensional" comes from. A "space ship" would simply traverse the distance of the great dark from point A to point B. Tempest keep uses the Twisting nether to travel almost instantaneously from place to place. In essence, it is a self-contained [[Dark Portal]] which operates on the same principle. |
||
| + | *{{abilities|Essence of the Red|Calen bestows a blessing of Alexstrasza upon the raid, granting all players 100% melee, ranged, and spell haste, and causing them to regain 5% of their maximum mana per second. Essence of the Red lasts for 3 min.|id=95401|image=spell_fire_lavaspawn}} |
||
| − | == Evolution of the concept == |
||
| + | *{{abilities|Wrack|Sinestra causes a random player to suffer Shadow damage every 2 sec. for 1 min. with the damage taken increasing rapidly. When a player dispels Wrack, it bounces to two nearby allies of the afflicted player. Wrack retains its remaining duration but returns to its original damage values.|type=healer|type2=magic|id=89421|image=ability_creature_cursed_03}} |
||
| − | [[Image:TempestkeepArtwork.jpg|thumb|Tempest Keep artwork]] |
||
| + | *{{abilities|Flame Breath|Sinestra unleashes a torrent of flame that sweeps across her platform, dealing 95000 to 105000 Fire damage to all enemies.|id=18435|image=spell_fire_fire}} |
||
| − | Tempest Keep was originally stated to be the "Dimensional Ship" which the [[Naaru]] provided for the [[draenei]]'s flight from [[Argus]].<ref>[http://www.worldofwar.net/video/files.php?temp_view=files.php&game=&id=10 WorldofWar.net Interview with Tom Chilton]</ref> When the orcs were corrupted by [[Kil'jaeden]], it was believed that many draenei hid away in the Keep for many decades. |
||
| + | *{{abilities|Twilight Slicer|Sinestra summons two shadowy orbs, each of which fixates on a player and begins to pursue that player. These spheres are linked together by a cutting beam of pure twilight energy that inflicts 46250 to 53750 Shadow damage per 5 sec. to any player who comes into contact with the beam.Each sphere also pulses twilight energy, inflicting 27000 to 33000 Shadow damage every 0.5 sec in a 5 yard radius. The orbs dissipate after 15 sec.|type=deadly|id=92852|image=spell_shadow_shadowmend}} |
||
| + | *{{abilities|Twilight Blast|When Sinestra cannot reach anyone in melee range, she blasts an enemy for 166250 to 183750 Shadow damage.|id=87947|image=spell_fire_twilightpyroblast}} |
||
| + | *[[Twilight Whelp]]s – Sinestra periodically calls forth a set of five Twilight Whelps to attack intruders. |
||
| − | Metzen: ''The draenei nether-ship you've been hearing about is far more than it seems. It's part of a larger dimension-traveling fortress called Tempest Keep that essentially teleports through alternate realities. It doesn't bank and roll or shoot photon torpedoes (not yet, anyway).'' <ref>[http://forums.worldofwarcraft.com/thread.aspx?fn=wow-general&t=8333849&p=1&tmp=1#post8333849 Metzen statement on worldofwarcraft.com forums]</ref>. |
||
| + | **{{abilities|Twilight Spit|The Twilight Whelps spit shadowy bile on their target, inflicting 3800 to 4200 Shadow damage and increasing the target's Shadow damage taken by 10%. This effect stacks.|type=tank|id=89299|image=spell_fire_twilightflamebreath}} |
||
| + | **{{abilities|Twilight Essence|When a Twilight Whelp dies, the essence instilled in it by Sinestra leaks out, forming a bubbling puddle beneath its corpse. If this essence touches any other dead Twilight Whelp, that Whelp reanimates. Each pool of Twilight Essence expands over time. The pools inflict 9250 to 10750 Shadow damage every 2 sec.|type=tank|id=88146|image=spell_fire_twilightnova}} |
||
| + | ==Strategy== |
||
| − | [[Image:TempestKeepConcept.jpg|thumb|left|Tempest Keep Artwork]] |
||
| + | ===Phase 1=== |
||
| − | In a direct contradiction to the previous information about Tempest Keep, it was revealed in ''[[Rise of the Horde]]'' that [[Oshu'gun]], the gigantic crystal in [[Nagrand]] revered by the orcs as their "Mountain of Spirits," was in fact the vessel that provided [[Velen]] and the draenei their escape from Argus, not Tempest Keep. It was also revealed in the Blizzard short "[[Unbroken (story)|Unbroken]]" that Velen and the survivors did not flock to Tempest Keep to hide, but rather hid somewhere in the [[Zangarmarsh]] (possibly the hidden [[Telredor]], or the [[Orebor Harborage]] on the border with the [[Blade's Edge Mountains]]). The story regarding Tempest Keep was changed accordingly; in ''[[The Burning Crusade]]'' manual, Tempest Keep was described as a naaru dimensional fortress that did not arrive on Draenor until ''after'' its destruction/transformation into Outland. The portion referring to Velen and the draenei raid on the Exodar in order to escape Outland was only slightly modified to fit the changed situation. |
||
| + | The entire fight is a severe dps check, but phase 1 may be the most important. The boss has a somewhat significant aggro radius and you’ll want to have your whole raid within about 10 or 15 yards of the boss. Have your tank give a 5 second countdown while the raid times their most powerful spells and abilities to hit the boss simultaneously. You’ll need to do all you can to maximize your raid’s dps in this phase. Use raid wide movement increase buffs like Stampeding Roar to help DPSers move in close to the boss faster after the pull. The raid should maintain an even spread in front of the boss without being too stacked up. Do not stand too close to the boss, but try to stay within 10 or 15 yards. You’ll want to assign your healing as follows: |
||
| − | == References== |
||
| − | * [http://www.nytimes.com/2006/05/09/technology/10warcraftqa.web.html?pagewanted=4&ei=5070&en=e67c63d354d60016&ex=1148529600 NYTimes] |
||
| − | {{Reflist}} |
||
| + | 1 healer for the main tank as well as a beacon if available. |
||
| + | 1 healer for the offtank as well as a second beacon if available. |
||
| − | {{Tempest Keep Subzones}} |
||
| + | |||
| − | {{Netherstorm}} |
||
| + | 3 healers with Wrack > Raid > Tanks priority. This means that these healers make sure to top of players with the Wrack debuff first, then other non-tanks, then tanks. |
||
| − | {{Instancefooter|The Burning Crusade}} |
||
| + | |||
| − | [[Category:Burning Crusade]] |
||
| + | You’ll need to train a primary and secondary dispeller for wrack as well. The primary dispeller should be a dps class like a shadow priest. The secondary or backup dispeller can be a healer. The general rule of thumb for wrack is that it should be dispelled after being on its target for 10 seconds. If wrack is on a player for longer than 10 seconds, the player risks being killed by the damage. If it is dispelled long before 10 seconds, the raid may end up with too many wracks out at one time and being overwhelmed. The easiest and best way to gain an advantage on wrack, is to extend the duration or time of the first application of wrack each time it goes out. This means if Sinestra casts wrack on a warrior, at around 10 seconds that warrior should use shield wall to keep the debuff longer. This will result in a much easier time dispelling the wrack when it has split multiple times. This goes for any class with abilities that will lower the damage for wrack. It is additionally helpful to have holy priests guardian spirit the first wrack victim so that they can hold the debuff for even one more tick. Raid healers should make sure to keep players with Wrack topped off as much as possible. The number one ability players need to keep their eyes open for are the Twilight Orbs. When these spawn, it is important that players don’t immediately panic and scatter away from them. A small purple beam will form between the orb and player it is fixated on. Recognizing which player is fixated is key to reacting properly to these orbs. Players who are not targeted by the orb must not only get away from the orb, but also make sure they are not between the two orbs. There is around a 3 second grace period between when the beam forms and when the Orbs begin to pulse and slicer between them forms. The players who are fixated should run away from the raid and kite the orbs to the back of the room. In order to increase dps these players should kite around each other halfway through their path and begin returning to the raid. When done properly the orbs will despawn before coming back into the raid and the players can start dpsing again quickly. The whelps that spawn in this phase should be picked up by the offtank and held in the raid. It is ok to dps these, but do not kill them yet. Healers should stand closer to the offtank so that the whelps are easier to pick up and keep off of the healers. The goal of phase 1 is to bring Sinestra to 30% health and start phase 2 before a third set of whelps and before a second Wrack debuff go out. This may require a bit of practice to achieve, but will soon become easily repeatable. |
||
| − | [[Category:Forts]] |
||
| + | |||
| − | [[Category:Netherstorm]] |
||
| + | ===Phase 2=== |
||
| + | |||
| + | Phase 2 is an add phase. Start it off by having the raid move to the back of the room. This is where Calen will spawn his Fiery Barrier and the raid must be underneath it to survive Twilight Extinction. The offtank should bring the whelps to the very back of the shield. Once under the bubble, ranged dps should begin to attack Sinestra. She will be invulnerable to damage, but attacking her is necessary to bring down the Twilight Carapace buff on the Pulsing Twilight Eggs. While ranged are doing this, Melee should be AoEing down the Twilight Whelps in one pile. Each time a Twilight Whelp dies, it will turn into a pool of Twilight Essence. If a whelp dies in another whelp’s Twilight Essence, both will respawn. Because of this, all of the whelps that you aoe here will respawn later, but that will not be an issue. The raid will need to split up during this phase and it’s important for each player to know where they need to be. Once twilight extinction has gone out and the whelps are mostly AoE’d down, the tank should move to the middle of the room and prepare to pick up Twilight Drakes. Melee will stay in the back of the room and prepare to dps and stun Twilight Spitecallers. Ranged will split into two groups and move to the walkways to DPS the Pulsing Twilight Eggs. Make sure the split is even so that ranged can hopefully kill each egg in one add wave. Place a healer with each ranged group in case Unleash Essence is cast on the raid. The rest of the healers should be in the back of the room healing melee, the tank, and Calen. If Calen is being healed and Sinestra is being dpsed, the eggs will lose their Twilight Carapace buff for 30 seconds. With very good dps, the ranged groups can kill both eggs in this time. If successful, phase 3 will begin and the raid can move into positions. If unsuccessful in killing both eggs, ranged should begin dpsing Sinestra again while the raid contends with more adds and waits for the Twilight Carapace buff to fall again. During this phase the Twilight Drakes can simply be tanked, but the Spitecallers in the back have an extremely harmful ability called Unleash Essence that must not be allowed to cast. Melee will need to set up a stun rotation to keep these mobs from using this ability. In addition, spitecallers can spawn quite fast making it difficult to keep up with killing them if dps is low. Once both Twilight Eggs have been killed, there will be a 30 second grace period to finish killing any adds left alive before phase 3 starts. Use this time to quickly kill off the remaining Spitecallers and Twilight Drakes. Remember that the whelps will respawn and must be picked up by the offtank again. |
||
| + | |||
| + | ===Phase 3=== |
||
| + | |||
| + | Phase 3 is Identical to phase 1, but much longer. The raid will begin this phase by being granted with the Essence of the Red buff. This will increase all haste by 100% and give casters infinite mana. The buff is necessary to heal through the damage in this phase and to meet the soft enrage timer. At the start of phase 3, have the raid move back into their phase 1 positions. Wrack, Orbs, and Flame Breath should all be handled just as they were in phase 1. The whelps however, will be treated differently. The offtank will pick these up and tank them in the back of the room. In order to keep the whelps from being killed on top of each other and resurrecting in this phase, they will be pulled off the tank by pre-assigned dpsers and killed off solo in their own areas. Ideally, the whelps should be killed in as compact an area as possible. This is because the void zones that the whelps create upon death will grow indefinitely throughout the fight. Eventually, this can severely limit the safe size of the room and make it quite difficult to move with Twilight Orbs. After three minutes, the Essence of the Red buff will fade and your raid will want to have the boss as low as possible when this happens. The last few percent of the fight without the buff will be extremely brutal. Make sure to use raid cooldowns such as Aura Mastery or Barrier for Flame Breath as healing after it will be difficult. Set up a Tranquility and Hymn rotation to top the raid off after each Flame Breath. It is a good idea to offtank the last two set of whelps in order to maximize dps on the boss. Unless the offtank is a pally, and can bubble off debuffs, they will likely have very high Twilight Spit stacks. Between the third and fourth wave of whelps, the Offtank should taunt Sinestra off of the maintank and allow the maintank to pick up the the rest of the Twilight Whelps. Simply hold these in melee range while the raid focuses on burning down the boss. |
||
| + | |||
| + | This fight will not be easy. The damage is high, the coordination is rigid, and the mechanics are very unforgiving. It’s no wonder Sinestra was tough enough to survive Deathwing. It may take your raid quite some time to down this boss, but don’t let frustration get the better of you. It is overall a fun fight that will really test your skills. Thanks for checking us out here at L2R. We hope this guide was helpful and we’ll see you at the next boss. |
||
| + | |||
| + | |||
| + | Source - http://www.learntoraid.com |
||
| + | |||
| + | ==Quotes== |
||
| + | ;Aggro |
||
| + | *{{text|yell|We were fools to entrust an imbecile like Cho'gall with such a sacred duty. I will deal with you intruders myself!}} |
||
| + | |||
| + | ;Summoning Adds |
||
| + | *{{text|yell|Feed, children! Take your fill from their meaty husks!}} |
||
| + | |||
| + | ;Special |
||
| + | *{{text|yell|The energy infuse within my clutch is mine to reclaim!}} |
||
| + | *{{text|yell|SUFFER!}} |
||
| + | *{{text|yell|FEEL MY HATRED!}} |
||
| + | |||
| + | ;Phase 2 |
||
| + | :{{text|yell|Sinestra|I tire of this. Do you see this clutch amidst which you stand? I have nurtured the spark within them, but that life-force is and always will be mine. Behold, power beyond your comprehension!}} |
||
| + | :{{text|yell|Calen|Heroes! You are not alone in this dark place!}} |
||
| + | |||
| + | ;As Calen battles Sintharia |
||
| + | :{{text|yell|Calen|Sintharia! Your master owes me a great debt... one that I intend to extract from his consort's hide!}} |
||
| + | :{{text|yell|Sinestra|This will be your tomb as well as theirs!}} |
||
| + | |||
| + | ;Recharging |
||
| + | *{{text|yell|Calen|Flame of life, burn within me and renew my vigor!}} |
||
| + | |||
| + | ;Winning |
||
| + | :{{text|yell|Calen|You are weakening, Sintharia! Accept the inevitable!}} |
||
| + | :{{text|yell|Sinestra|You mistake this for weakness? Fool!}} |
||
| + | |||
| + | ;Losing |
||
| + | :{{text|yell|Calen|Heroes! My power wanes....}} |
||
| + | :{{text|yell|Sinestra|My brood will feast upon your essence!}} |
||
| + | |||
| + | ;Calen dies prematurely |
||
| + | *{{text|yell|Calen|All is lost.... Forgive me, my Queen....}} |
||
| + | |||
| + | ;Phase 3 |
||
| + | :{{text|yell|Sinestra|Enough! Drawing upon this source will set us back months. You should feel honored to be worthy of its expenditure. Now... die!}} |
||
| + | :{{text|yell|Calen|The fires dim, champions.... Take this, the last of my power. Succeed where I have failed. Avenge me. Avenge the world....}} |
||
| + | |||
| + | ;Killing a player |
||
| + | *{{text|yell|My brood will feed on your bones!}} |
||
| + | *{{text|yell|Powerless...}} |
||
| + | |||
| + | ;Death |
||
| + | *{{text|yell|Deathwing! I have fallen.... The brood... is lost.}} |
||
| + | |||
| + | ==Loot== |
||
| + | {{lootbox|Heroic |
||
| + | |Belt of the Fallen Brood |
||
| + | |Bindings of Bleak Betrayal |
||
| + | |Boots of Az'galada |
||
| + | |Bracers of the Dark Mother |
||
| + | |Bracers of the Mat'redor |
||
| + | |Caelestrasz's Will |
||
| + | |Crown of the Twilight Queen |
||
| + | |Dargonax's Signet |
||
| + | |Nightmare Rider's Boots |
||
| + | |Shard of Woe |
||
| + | |Shroud of Endless Grief |
||
| + | |Twilight Scale Leggings |
||
| + | |War-Torn Crushers |
||
| + | }} |
||
| + | |||
| + | ==Related Achievements== |
||
| + | *{{achievement|Heroic: Sinestra}} |
||
| + | *{{achievement|I Can't Hear You Over the Sound of How Awesome I Am}} |
||
| + | *{{achievement|Realm First! Sinestra}} |
||
| + | |||
| + | ==Trivia== |
||
| + | She uses the same animation set as [[Kil'jaeden]]. |
||
| + | |||
| + | ==Videos== |
||
| + | |||
| + | ===10-man Heroic=== |
||
| + | {{Youtubelink|gFSCT8QRjdU|desc=[http://www.vagrantcorps.com/ Vagrant Corps] - 1080p}} |
||
| + | |||
| + | ===25-man Heroic=== |
||
| + | {{Youtubelink|ncOTyhI-H7o|desc=Blood Legion}} |
||
| + | {{Youtubelink|ZCjUYMSNq5Y|desc=Vodka}} |
||
| + | {{Youtubelink|k41MEXva_gM|desc=EG}} |
||
| + | |||
| + | == Patch changes == |
||
| + | *{{Patch 4.1.0|note= |
||
| + | ** Twilight Slicer is now less likely to target two healers at once. |
||
| + | ** Wrack will avoid jumping to tanks.}} |
||
| + | *{{Patched|date=2011-01-18|bluenote=Many adjustments to the behavior of various mechanics in the Sinesetra encounter have been made.}} |
||
| + | *{{Patch 4.0.3a|note=Added.}} |
||
| + | |||
| + | == External links == |
||
| + | <!-- Read http://www.wowpedia.org/Wowpedia:External_links before posting your links here. |
||
| + | Links that do not conform to the rules will be DELETED. |
||
| + | Repeat violations may result in a BAN. |
||
| + | Have a nice day. :) --> |
||
| + | {{Elinks-NPC|45213}} |
||
| + | {{elink|icon=L2R|site=Learntoraid.com|link=http://www.learntoraid.com/2011/02/22/lady-sinestra-video-strategy-guide-heroic|desc=Lady Sinestra Strategy Guide}} |
||
| + | [[Category:Black dragons]] |
||
| + | [[Category:Bosses]] |
||
| + | [[Category:The Bastion of Twilight mobs]] |
||
Revision as of 21:56, 15 November 2011
- For her character biography, see Sintharia.
 | |||||||
| Title | <Consort of Deathwing> | ||||||
| Gender | Female | ||||||
| Race | Black wyrm (Dragonkin) | ||||||
| Level | ?? Boss | ||||||
| Reaction | Alliance Horde | ||||||
| Location | Twilight Caverns, Bastion of Twilight | ||||||
| |||||||
Sinestra is a heroic-mode only boss in the Bastion of Twilight, described as similar to Algalon the Observer in Ulduar. She is only accessible after Cho'gall is defeated.
The world first kill was made by Paragon of Lightning's Blade-EU on January 20, 2011.
Originally Deathwing's Prime Consort, Sinestra created the first twilight dragons, but was later obliterated by one of her terrifying creations. Now a ravaged husk reanimated by insidious magic, Sinestra oversees the creation of new twilight clutches. [1]
Attacks and abilities
Stage One: I Will Deal With You Myself!
At the outset of the battle, Sinestra is weakened from past battles and from nurturing the Twilight brood. She begins with only 60% of her maximum health, and her damage dealt is reduced by by 40%.
 Wrack — Sinestra causes a random player to suffer Shadow damage every 2 sec. for 1 min. with the damage taken increasing rapidly. When a player dispels Wrack, it bounces to two nearby allies of the afflicted player. Wrack retains its remaining duration but returns to its original damage values.
- Flame Breath — Sinestra unleashes a torrent of flame that sweeps across her platform, inflicting 95000 to 105000 Fire damage to all enemies.
- Twilight Slicer — Sinestra summons two shadowy orbs, each of which fixates on a player and begins to pursue that player. These spheres are linked together by a cutting beam of pure twilight energy that inflicts 46250 to 53750 Shadow damage per 5 sec. to any player who comes into contact with the beam.Each sphere also pulses twilight energy, inflicting 27000 to 33000 Shadow damage every 0.5 sec in a 5 yard radius. The orbs dissipate after 15 sec.
- Twilight Blast — When Sinestra cannot reach anyone in melee range, she blasts an enemy for 166250 to 183750 Shadow damage.
- Twilight Whelps – Sinestra periodically calls forth a set of five Twilight Whelps to attack intruders.
- Twilight Spit — The Twilight Whelps spit shadowy bile on their target, inflicting 3800 to 4200 Shadow damage and increasing the target's Shadow damage taken by 10%. This effect stacks.
- Twilight Essence — When a Twilight Whelp dies, the essence instilled in it by Sinestra leaks out, forming a bubbling puddle beneath its corpse. If this essence touches any other dead Twilight Whelp, that Whelp reanimates. Each pool of Twilight Essence expands over time. The pools inflict 9250 to 10750 Shadow damage every 2 sec.
Stage Two: I Tire of This!
When Sinestra is brought to 30% health, she draws upon ambient energy to restore her power and erects a shield to protect herself.
- A Clash of Flame and Twilight
- The red dragon Caelen comes to the party's aid and engages in a magical duel with Sinestra. The duelist with the most mana gains the upper hand.
- Pyrrhic Focus — Calen burns his own health reserves to restore his mana. His focus also increases healing done to Calen by 500%.
- Mana Barrier — A powerful barrier envelops Sinestra, continually replenishing any lost health at the expense of her mana.
- Pulsing Twilight Egg – Sinestra has stored vast reserves of twilight energy in these massive eggs.
- Twilight Carapace — The Pulsing Twilight Eggs are normally impervious to all damage. In moments of dire need, Sinestra directly siphons from the eggs and causes their Twilight Carapace to drop temporarily.
- Twilight Spitecaller – These twilight dragonkin periodically stream into the room during the clash between Calen and Sinestra.
- Unleash Essence — The Twilight Spitecaller releases a torrent of twilight energy that afflicts all nearby enemies, inflicting damage equal to 10% of each target's maximum health every 1 sec. Conventional interrupts cannot prevent the casting of the spell, but other effects that cause loss of control may be effective.
- EnrageIndomitable — If a Twilight Spitecaller is incapacitated for more than a brief period of time, it regains control through a surge of sheer will. The Spitecaller becomes immune to all bonds and restraints until a player removes this effect, and inflicts 40000 Shadow damage and knocks back players within 8 yards.
- Twilight Drake – Twilight Drakes swoop in from the sides of the cavern during the clash between Calen and Sinestra.
- Twilight Breath — The Drake's breath inflicts 38400 to 41600 Shadow damage in a 25 yard 60 degree cone in front of it.
- Absorb Essence — If a Twilight Drake comes into contact with a pool of Twilight Essence, it siphons that energy and causes the pool to shrink and eventually vanish entirely. Each charge of Essence absorbed increases the Drake's damage by 10%, and its health by 10%. This effect stacks.
Stage Three: Now Die!
Once the players destroy the Pulsing Twilight Eggs, Sinestra brings her magical duel with Calen to an end and attacks the players with her full fury. Empowered by the twilight eggs from which she reclaims her siphoned energy, Sinestra no longer deals reduced damage.
- Essence of the Red — Calen bestows a blessing of Alexstrasza upon the raid, granting all players 100% melee, ranged, and spell haste, and causing them to regain 5% of their maximum mana per second. Essence of the Red lasts for 3 min.
- Wrack — Sinestra causes a random player to suffer Shadow damage every 2 sec. for 1 min. with the damage taken increasing rapidly. When a player dispels Wrack, it bounces to two nearby allies of the afflicted player. Wrack retains its remaining duration but returns to its original damage values.
- Flame Breath — Sinestra unleashes a torrent of flame that sweeps across her platform, dealing 95000 to 105000 Fire damage to all enemies.
- Twilight Slicer — Sinestra summons two shadowy orbs, each of which fixates on a player and begins to pursue that player. These spheres are linked together by a cutting beam of pure twilight energy that inflicts 46250 to 53750 Shadow damage per 5 sec. to any player who comes into contact with the beam.Each sphere also pulses twilight energy, inflicting 27000 to 33000 Shadow damage every 0.5 sec in a 5 yard radius. The orbs dissipate after 15 sec.
- Twilight Blast — When Sinestra cannot reach anyone in melee range, she blasts an enemy for 166250 to 183750 Shadow damage.
- Twilight Whelps – Sinestra periodically calls forth a set of five Twilight Whelps to attack intruders.
- Twilight Spit — The Twilight Whelps spit shadowy bile on their target, inflicting 3800 to 4200 Shadow damage and increasing the target's Shadow damage taken by 10%. This effect stacks.
- Twilight Essence — When a Twilight Whelp dies, the essence instilled in it by Sinestra leaks out, forming a bubbling puddle beneath its corpse. If this essence touches any other dead Twilight Whelp, that Whelp reanimates. Each pool of Twilight Essence expands over time. The pools inflict 9250 to 10750 Shadow damage every 2 sec.
Strategy
Phase 1
The entire fight is a severe dps check, but phase 1 may be the most important. The boss has a somewhat significant aggro radius and you’ll want to have your whole raid within about 10 or 15 yards of the boss. Have your tank give a 5 second countdown while the raid times their most powerful spells and abilities to hit the boss simultaneously. You’ll need to do all you can to maximize your raid’s dps in this phase. Use raid wide movement increase buffs like Stampeding Roar to help DPSers move in close to the boss faster after the pull. The raid should maintain an even spread in front of the boss without being too stacked up. Do not stand too close to the boss, but try to stay within 10 or 15 yards. You’ll want to assign your healing as follows:
1 healer for the main tank as well as a beacon if available.
1 healer for the offtank as well as a second beacon if available.
3 healers with Wrack > Raid > Tanks priority. This means that these healers make sure to top of players with the Wrack debuff first, then other non-tanks, then tanks.
You’ll need to train a primary and secondary dispeller for wrack as well. The primary dispeller should be a dps class like a shadow priest. The secondary or backup dispeller can be a healer. The general rule of thumb for wrack is that it should be dispelled after being on its target for 10 seconds. If wrack is on a player for longer than 10 seconds, the player risks being killed by the damage. If it is dispelled long before 10 seconds, the raid may end up with too many wracks out at one time and being overwhelmed. The easiest and best way to gain an advantage on wrack, is to extend the duration or time of the first application of wrack each time it goes out. This means if Sinestra casts wrack on a warrior, at around 10 seconds that warrior should use shield wall to keep the debuff longer. This will result in a much easier time dispelling the wrack when it has split multiple times. This goes for any class with abilities that will lower the damage for wrack. It is additionally helpful to have holy priests guardian spirit the first wrack victim so that they can hold the debuff for even one more tick. Raid healers should make sure to keep players with Wrack topped off as much as possible. The number one ability players need to keep their eyes open for are the Twilight Orbs. When these spawn, it is important that players don’t immediately panic and scatter away from them. A small purple beam will form between the orb and player it is fixated on. Recognizing which player is fixated is key to reacting properly to these orbs. Players who are not targeted by the orb must not only get away from the orb, but also make sure they are not between the two orbs. There is around a 3 second grace period between when the beam forms and when the Orbs begin to pulse and slicer between them forms. The players who are fixated should run away from the raid and kite the orbs to the back of the room. In order to increase dps these players should kite around each other halfway through their path and begin returning to the raid. When done properly the orbs will despawn before coming back into the raid and the players can start dpsing again quickly. The whelps that spawn in this phase should be picked up by the offtank and held in the raid. It is ok to dps these, but do not kill them yet. Healers should stand closer to the offtank so that the whelps are easier to pick up and keep off of the healers. The goal of phase 1 is to bring Sinestra to 30% health and start phase 2 before a third set of whelps and before a second Wrack debuff go out. This may require a bit of practice to achieve, but will soon become easily repeatable.
Phase 2
Phase 2 is an add phase. Start it off by having the raid move to the back of the room. This is where Calen will spawn his Fiery Barrier and the raid must be underneath it to survive Twilight Extinction. The offtank should bring the whelps to the very back of the shield. Once under the bubble, ranged dps should begin to attack Sinestra. She will be invulnerable to damage, but attacking her is necessary to bring down the Twilight Carapace buff on the Pulsing Twilight Eggs. While ranged are doing this, Melee should be AoEing down the Twilight Whelps in one pile. Each time a Twilight Whelp dies, it will turn into a pool of Twilight Essence. If a whelp dies in another whelp’s Twilight Essence, both will respawn. Because of this, all of the whelps that you aoe here will respawn later, but that will not be an issue. The raid will need to split up during this phase and it’s important for each player to know where they need to be. Once twilight extinction has gone out and the whelps are mostly AoE’d down, the tank should move to the middle of the room and prepare to pick up Twilight Drakes. Melee will stay in the back of the room and prepare to dps and stun Twilight Spitecallers. Ranged will split into two groups and move to the walkways to DPS the Pulsing Twilight Eggs. Make sure the split is even so that ranged can hopefully kill each egg in one add wave. Place a healer with each ranged group in case Unleash Essence is cast on the raid. The rest of the healers should be in the back of the room healing melee, the tank, and Calen. If Calen is being healed and Sinestra is being dpsed, the eggs will lose their Twilight Carapace buff for 30 seconds. With very good dps, the ranged groups can kill both eggs in this time. If successful, phase 3 will begin and the raid can move into positions. If unsuccessful in killing both eggs, ranged should begin dpsing Sinestra again while the raid contends with more adds and waits for the Twilight Carapace buff to fall again. During this phase the Twilight Drakes can simply be tanked, but the Spitecallers in the back have an extremely harmful ability called Unleash Essence that must not be allowed to cast. Melee will need to set up a stun rotation to keep these mobs from using this ability. In addition, spitecallers can spawn quite fast making it difficult to keep up with killing them if dps is low. Once both Twilight Eggs have been killed, there will be a 30 second grace period to finish killing any adds left alive before phase 3 starts. Use this time to quickly kill off the remaining Spitecallers and Twilight Drakes. Remember that the whelps will respawn and must be picked up by the offtank again.
Phase 3
Phase 3 is Identical to phase 1, but much longer. The raid will begin this phase by being granted with the Essence of the Red buff. This will increase all haste by 100% and give casters infinite mana. The buff is necessary to heal through the damage in this phase and to meet the soft enrage timer. At the start of phase 3, have the raid move back into their phase 1 positions. Wrack, Orbs, and Flame Breath should all be handled just as they were in phase 1. The whelps however, will be treated differently. The offtank will pick these up and tank them in the back of the room. In order to keep the whelps from being killed on top of each other and resurrecting in this phase, they will be pulled off the tank by pre-assigned dpsers and killed off solo in their own areas. Ideally, the whelps should be killed in as compact an area as possible. This is because the void zones that the whelps create upon death will grow indefinitely throughout the fight. Eventually, this can severely limit the safe size of the room and make it quite difficult to move with Twilight Orbs. After three minutes, the Essence of the Red buff will fade and your raid will want to have the boss as low as possible when this happens. The last few percent of the fight without the buff will be extremely brutal. Make sure to use raid cooldowns such as Aura Mastery or Barrier for Flame Breath as healing after it will be difficult. Set up a Tranquility and Hymn rotation to top the raid off after each Flame Breath. It is a good idea to offtank the last two set of whelps in order to maximize dps on the boss. Unless the offtank is a pally, and can bubble off debuffs, they will likely have very high Twilight Spit stacks. Between the third and fourth wave of whelps, the Offtank should taunt Sinestra off of the maintank and allow the maintank to pick up the the rest of the Twilight Whelps. Simply hold these in melee range while the raid focuses on burning down the boss.
This fight will not be easy. The damage is high, the coordination is rigid, and the mechanics are very unforgiving. It’s no wonder Sinestra was tough enough to survive Deathwing. It may take your raid quite some time to down this boss, but don’t let frustration get the better of you. It is overall a fun fight that will really test your skills. Thanks for checking us out here at L2R. We hope this guide was helpful and we’ll see you at the next boss.
Source - http://www.learntoraid.com
Quotes
- Aggro
- We were fools to entrust an imbecile like Cho'gall with such a sacred duty. I will deal with you intruders myself!
- Summoning Adds
- Feed, children! Take your fill from their meaty husks!
- Special
- The energy infuse within my clutch is mine to reclaim!
- SUFFER!
- FEEL MY HATRED!
- Phase 2
- Sinestra yells: I tire of this. Do you see this clutch amidst which you stand? I have nurtured the spark within them, but that life-force is and always will be mine. Behold, power beyond your comprehension!
- Calen yells: Heroes! You are not alone in this dark place!
- As Calen battles Sintharia
- Calen yells: Sintharia! Your master owes me a great debt... one that I intend to extract from his consort's hide!
- Sinestra yells: This will be your tomb as well as theirs!
- Recharging
- Calen yells: Flame of life, burn within me and renew my vigor!
- Winning
- Calen yells: You are weakening, Sintharia! Accept the inevitable!
- Sinestra yells: You mistake this for weakness? Fool!
- Losing
- Calen yells: Heroes! My power wanes....
- Sinestra yells: My brood will feast upon your essence!
- Calen dies prematurely
- Calen yells: All is lost.... Forgive me, my Queen....
- Phase 3
- Sinestra yells: Enough! Drawing upon this source will set us back months. You should feel honored to be worthy of its expenditure. Now... die!
- Calen yells: The fires dim, champions.... Take this, the last of my power. Succeed where I have failed. Avenge me. Avenge the world....
- Killing a player
- My brood will feed on your bones!
- Powerless...
- Death
- Deathwing! I have fallen.... The brood... is lost.
Loot
Related Achievements
Trivia
She uses the same animation set as Kil'jaeden.
Videos
10-man Heroic
Template:Youtubelink
25-man Heroic
Template:Youtubelink Template:Youtubelink Template:Youtubelink
Patch changes
- Patch 4.1.0 (2011-04-26):
- Twilight Slicer is now less likely to target two healers at once.
- Wrack will avoid jumping to tanks.
- Template:Patched
- Patch 4.0.3a (2010-11-23): Added.