MightyBotto (talk | contribs) |
Strikeblaze (talk | contribs) |
||
| Line 1: | Line 1: | ||
| + | {{Stub/Strategy}} |
||
| − | {{tocright}}{{lang|fr=Clairi%C3%A8res_de_Tirisfal}} |
||
| + | {{for|character biography|Deathwing}} |
||
| + | {{npcbox |
||
| + | |name=Deathwing |
||
| + | |image = Spine of Deathwing.jpg |
||
| + | |race = Black wyrm |
||
| + | |creature = Dragonkin |
||
| + | |type = Boss |
||
| + | |level = ?? |
||
| + | |location = [[Dragon Soul (instance)|The Dragon Soul]] |
||
| + | |faction = Combat |
||
| + | |health = 166K–30M (1M–33.3M Heroic) |
||
| + | |status = Killable |
||
| + | |instance = The Dragon Soul |
||
| + | }} |
||
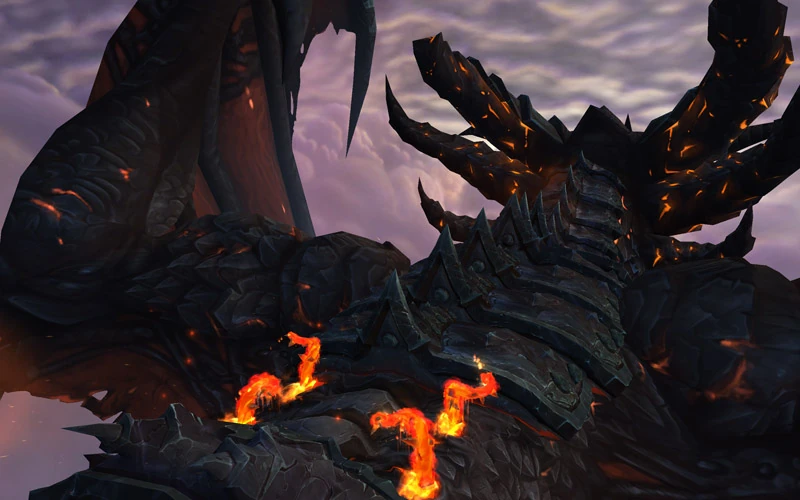
| + | The '''Spine of Deathwing''' is the first of two confrontations with [[Deathwing]] in the [[Dragon Soul (instance)|Dragon Soul]] raid. The battle begins in [[The Skyfire]] as players leap onto the Destroyer's back, attempting to weaken his armor enough for their allies to attack, and ends when he is defeated and crashes into the [[The Maelstrom (Dragon Soul)|Maelstrom]]. |
||
| + | ==Description== |
||
| − | On the northern coast of [[Lordaeron]] lies the eerie '''Tirisfal Glades'''. Home to the [[Forsaken]], servants of the Banshee Queen [[Sylvanas Windrunner]], the wooded hills are seeped through with the curse of the [[Lich King]]'s plague. The sky over Tirisfal is eternally gloomy and tinted a blighted green, and the trees and other flora desperately cling to their last shreds of life. |
||
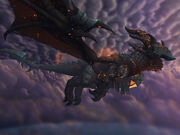
| + | [[File:Spine of Deathwing Full Body.jpg|thumb|Deathwing heading toward the Maelstrom.]] |
||
| + | The first stage occurs as players are flying on the airship ''Skyfire'', chasing down Deathwing while his [[Twilight's Hammer]] drake riders are swooping in to harry the pursuit. In the second stage, players paratroop commando-style onto Deathwing’s back and start ripping up his armor, trying to pry a hole big enough to give [[Thrall]] a clean shot with the [[Demon Soul|Dragon Soul]]. During this phase, players are actually riding on Deathwing as he’s swooping around and trying to knock the players off with barrel rolls and such. Players will have to hang on at key points in the fight to avoid falling while also tangling with all kinds of monstrosities that are rising out of Deathwing’s corrupted magma blood. Once the players get enough of Deathwing’s armor off, Thrall blasts Deathwing with the Dragon Soul and sends him crash-landing into the [[Maelstrom]].<ref>http://www.mmo-champion.com/content/2459-Patch-4.3-Interview-with-Greg-Street-(Ghostcrawler)</ref><ref>http://www.mmo-champion.com/content/2467-The-Deathwing-Raid-Interview-with-Scott-Mercer-SPOILERS</ref> |
||
| + | ==Abilities== |
||
| − | Although tainted and melancholy, Tirisfal still very much has its' own unique, haunting beauty, particularly in such areas as the stony North Coast, the village of Brill, and the deep atmosphere of the ruined Agamand Mills. |
||
| + | * {{abilities|Barrel Roll|Throughout the encounter, Deathwing tries to throw players from his back when he senses that they are all standing on the same side of his spine. During a barrel roll, all players and other creatures not attached to his back are thrown off.|type=important|type2=deadly|image=achievement_bg_returnxflags_def_wsg|id=}} |
||
| + | * {{abilities|Elementium Reinforced Plates|The glancing strike from the Dragon Soul has destroyed one of the large armor plates on Deathwing's back and loosened another three. Players must remove all of these plates to give Thrall a chance to get a clear shot.|type=important}} |
||
| + | ** {{abilities|Burning Tendons|Players expose Burning Tendons when they pry up one of Deathwing's armor plates. Destroying these fibrous strands is the key to removing an armor plate.|type=dps}} |
||
| + | *** {{abilities|Seal Armor Breach|After the players pry up an armor plate, the Burning Tendons rapidly pull the plate closed, protecting the tendons from further damage and preventing the plate from flying off.|image=ability_deathwing_sealarmorbreachtga|id=}} |
||
| + | * {{abilities|Deathwing's Immune System|The creatures that comprise Deathwing's Immune System emerge from the holes in his back left by torn off armor plates. Deathwing defends himself with increasing intensity as more plates are torn off.}} |
||
| + | ** {{abilities|Grasping Tendrils|These tendrils sprout from holes in Deathwing's back that aren't currently occupied by Corruption tentacles. The Tendrils grasp any player that wander too close, reducing their movement speed by 50% and inflicting 6000<ref group="note">Raid Finder: 6499, 10-man heroic: 12000, 25-man: 6499, 25-man heroic: 13000</ref> Fire damage every 5.20 sec. until they move away. This effect prevents players from being thrown off Deathwing's back.|image=ability_deathwing_grasping_tendrils|id=}} |
||
| + | ** {{abilities|Corruption|These tentacles are dramatic physical manifestations of the Old God Corruption that runs rampant through Deathwing's body. They emerge first from the holes in his back left by armor plates, and they seal the wound completely, preventing any other creatures from emerging from it.}} |
||
| + | *** {{abilities|Searing Plasma|The Corruption coats the victim in the searing blood of Deathwing. The thick blood will absorb up to 200000<ref group="note">10-man heroic: 280000, 25-man: 300000, 25-man heroic: 420000</ref> healing done to the target and causes the victim to cough up blood. The violent coughing periodically inflicts 10000<ref group="note">10/25-man heroic: 12000</ref> Physical damage ever 10 sec.|notes=This ability is not used on Raid Finder difficulty.|type=healer|image=spell_fire_ragnaros_lavabolt|id=}} |
||
| + | *** {{abilities|Fiery Grip|The Corruption grips victims with a whip-like cord of plasma, stunning them for up to 30 sec and inflicting 60000<ref group="note">10/25-man heroic: 90000</ref> Fire damage every 3.50 sec. The corruption must channel to maintain this effect, and players may break by inflicting significant damage to the tentacle. This effect prevents players from being thrown off Deathwing's back.|notes=This ability is not used on Raid Finder difficulty.|image=ability_deathwing_fierygrip|id=}} |
||
| + | ** {{abilities|Hideous Amalgamation|These unstable creatures are a patchwork of Elementium Armor fragments and pieces of the former Dragon's body held together by his molten blood.|type=important|type2=tank}} |
||
| + | *** {{abilities|Absorb Blood|The Amalgamation absorbs nearby Corrupted Blood residue. The Amalgamation grows more unstable with each Residue absorbed, increasing its damage by 10% and attack speed by 10%. At 9 stacks it becomes superheated.|image=inv_misc_volatilefire|id=}} |
||
| + | *** {{abilities|Superheated Nucleus|The core of the Amalgamation becomes critically unstable, causing it to inflict 15000<ref group="note">Raid Finder: 11375, 10-man heroic: 30000, 25-man: 17500, 25-man heroic: 35000</ref> Fire damage to all enemies every 3 sec. If players destroy the Amalgamation in this state, then it will trigger a Nuclear Blast.|image=inv_elemental_primal_fire|id=}} |
||
| + | *** {{abilities|Nuclear Blast|The superheated nucleus of the Amalgamation triggers a massive explosion, inflicting 375000<ref group="note">Raid Finder: 243750</ref> Fire damage to targets within 10 yds. This powerful blast pries up one of Deathwing's Elementium plates if it is within range.|type=important|type=deadly|image=inv_gizmo_supersappercharge|id=}} |
||
| + | *** {{abilities|Degradation|Destroyed Amalgamations degrade the maximum health of all enemy targets by 6%. This effect occurs regardless of the state of the nucleus and stacks up to 15 times.|type=heroic|type2=healer|image=ability_warlock_backdraft|id=}} |
||
| + | *** {{abilities|Blood Corruption: Death|Deathwing's corruption courses through your veins. This corruption takes hold if it is not removed quickly, infecting the player with the Blood of Deathwing. When dispelled this effect jumps to a new target and can mutate into Blood Corruption: Earth.|type=magic|type2=heroic|type3=healer|image=ability_deathwing_bloodcorruption_earth|id=}} |
||
| + | **** {{abilities|Blood of Deathwing|The blood of Deathwing explodes violently from your veins, inflicting 875000 Fire damage to you and several other players.|type=deadly|type=heroic|image=ability_deathwing_bloodcorruption_earth|id=}} |
||
| + | *** {{abilities|Blood Corruption: Earth|A shadow of Neltharion courses through your veins. This corruption takes hold if it is not removed quickly, infecting the player with the Blood of Neltharion. When dispelled this effect jumps to a new target and can mutate into Blood Corruption: Death.|type=magic|type2=heroic|type3=healer|image=inv_elemental_mote_nether|id=}} |
||
| + | **** {{abilities|Blood of Neltharion|The barest hint of a shadow of the former Earth-Warder suffuses your blood. Damage taken from all sources is reduced by 10%. This effect can stack up to 3 times.|type=heroic|image=inv_elemental_mote_nether|id=}} |
||
| + | ** {{abilities|Corrupted Blood|These living globs of Deathwing's blood appear fragile, but leave behind an indestructible residue when killed.|type=tank}} |
||
| + | *** {{abilities|Burst|Corrupted Blood explodes when destroyed, inflicting 10000<ref group="note">Raid Finder: 13000, 10-man heroic: 14000, 25-man: 20000, 25-man heroic: 28000</ref> Physical damage to nearby enemies within 200 yards.|image=spell_shaman_firenova|id=}} |
||
| + | *** {{abilities|Residue|Destroying a Corrupted Blood leaves behind an indestructible residue. It slowly creeps toward the nearest hole in Deathwing's Back where it reconstitutes into a new Corrupted Blood.|image=spell_fire_fire|id=105223}} |
||
| + | ;Notes |
||
| − | Tirisfal Glades is home not only to the Forsaken, but to their enemies as well. The deranged [[Scarlet Crusade]] has several outposts here, including the seat of their religious faith, the [[Scarlet Monastery]]. The minions of the [[Scourge]] are also ever present, tainting the derelict farmsteads and dilapidated mills with their foul presence. |
||
| + | {{reflist|group="note"}} |
||
| + | ==Strategy== |
||
| − | == Characteristics == |
||
| + | *[[File:Stub.png|20px]] ''Spine of Deathwing is the First of the two encounters dealing with Neltharion or Deathwing the Destroyer, in which the raid must remove three of Deathwing's Armored plates, through a process of dealing with different adds through out the encounter. |
||
| + | When you start the encounter you will go through a small cut scene, which you should get out of right away as it will give you more time to get your bearings right before you land of Deathwing's Back, Once the raid lands on his back, you will encounter four Grasping Tendrils, Killing the Tendrils will result in spawning a Hideous Amalgamation for every Tendril killed, as well as Corrupted Blood from the holes that the Tendrils were killed, These two Adds are the key to destroying his armored plates and need to be managed correctly. |
||
| − | {| cellpadding="2" |
||
| − | |----- |
||
| − | | |
||
| − | {| cellspacing="2" width="100%" |
||
| − | |----- bgcolor="#000000" |
||
| − | | Zone Name || Faction || Kingdom || Races || Level Range |
||
| − | | Location |
||
| − | |----- bgcolor="#303030" |
||
| − | | '''Tirisfal Glades''' || {{Horde Icon Small}} [[Horde]] |
||
| − | | [[Undercity]] |
||
| − | | {{Race Icon Undead Male Small}}{{Race Icon Undead Female Small}} [[Forsaken|Undead]] |
||
| − | | 1-12 || Northwestern [[Lordaeron]] |
||
| − | |} |
||
| − | |----- |
||
| − | |} |
||
| + | To manage these adds correctly it is best to kill three Tendrils (Nominate which one you do not wish to kill) and then trigger a Barrel Roll, by having the entire raid move to either the left or right side of the boss to knock all the adds off the bosses back, however so that the raid does not fly off as well, you should stack on top of where a Tendril use to be, as this will root you in place, after the barrel roll is complete, simply return into the middle of Deathwing's back, unless triggering a barrel roll, Your raid should always be in the middle. After the barrel roll has occurred, kill the last Tendril (Which will spawn another Tendril because there are none alive, ignore this unless it channels Fiery Grip, in which the range should do some instant casts till it stops channeling) and spawn the Hideous Amalgamation, The tank should move this add all the way to the armored plate near Deathwing's Head, DPS Should damage it down to roughly 25-20% health and full DPS stop on the Amalgamation, instead, they should start killing the Corrupted Bloods which will little fires on the ground, the tank needs to move the Amalgamation over the fires so that it will stack Absorb Blood, once the Amalgamation gains 9 stacks, Proceed to killing it immediately as it will pulse an AoE over the raid. Once the Amalgamation dies, It will cast Nuclear Blast, in which all DPS and Range should Run towards the back of Deathwing's Spine, after the Nuclear Blast is cast, it will blow open a piece of his armour plate, and his Burning Tendon will become exposed, killing this will cause his armor plate to fall off. The rest is simply rinse and repeat, Kill a Tendril, Stand in it, Barrel Roll, Kill another Tendril, and Start the whole process over. Ideally you will want to kill the Burning Tendon in one strike, as such, it is best to blow all damage cool downs on the first Plate, Potions on the second plate, and Lust on the third plate. |
||
| − | == History == |
||
| − | [[image:Tirisfal Glades.jpg|thumb|Tirisfal Glades]] |
||
| − | Tirisfal Glades was once a peaceful vale just west of the capital of [[Lordaeron]]. It was a place of power for centuries, being the seat of the [[Guardians of Tirisfal]], who secretly waged their war against darkness. Under the rule of [[King Terenas]], Tirisfal became a land of peaceful farms and small towns, its people living happily for generations. Unfortunately, it was one of the first places to fall to [[Arthas]]' armies after he ransacked Lordaeron, and its people were killed and risen as slaves to the [[Lich King]]. Just after the Third War ended, the Lich King began losing power thanks to the spell of [[Illidan Stormrage]]. With that, a number of [[undead]] managed to break free of his control and form the [[Forsaken]]. The rebel undead managed to take control of Tirisfal and establish it as their home territory. However, the blighted lands of Tirisfal are far from safe, even for the Forsaken who now rule it. The land is still plagued with hideous mutants, mindless soldiers from the Lich King's [[Scourge]], and members of the [[Scarlet Crusade]], which regularly attack from their base in the Scarlet Monastery. |
||
| + | On a side note, healers will have to deal with a debuff called Searing Plasma, In which simply needs to be healed and removed as soon as possible. As stated before, any time the Tendril's do Fiery Grip, Simply hit then enough that they stop channeling it, killing should be avoided but should not be too much of a problem should one die, as the Off tank can simply hold onto the second Amalgamation that will either fall to its death or become a second blast should the raid not kill the Tendon in one attempt. Controlling the adds is key to defeating this boss, and is not hard at all to do. '' |
||
| − | ==Geography== |
||
| − | == |
+ | ==Quotes== |
| + | ;Intro |
||
| − | [[image:Tirisfal_Map.jpg|thumb|left|300px|Map of Tirisfal Glades]] |
||
| + | *{{text|yell|Your tenacity is admirable, but pointless! You ride into the jaws of the apocalypse!}} |
||
| − | {{clrl}} |
||
| − | *[http://wow.gamona.de/worldmap2/map_tirisfal.html Detailed area map (lists all creatures)] |
||
| − | [http://wow.gamepressure.com/map.asp?ID=23 Topographic map of Tirisfal Glades] |
||
| + | ;About to spin |
||
| − | === Sub-Regions === |
||
| + | *{{text|bossemote|Deathwing howls loudly}} |
||
| − | {| cellspacing="8px"; style="background: #444;" |
||
| + | *{{text|bossemote|Deathwing lets loose a gargantuan scream}} |
||
| + | |||
| + | ;Player is Thrown Off |
||
| + | *{{text|yell|You are less than dust, fit only to be brushed from my back.}} |
||
| + | *{{text|yell|Huah! I didn't realize you fools were still there.}} |
||
| + | *{{text|yell|Your efforts are insignificant! I carry you to your deaths!}} |
||
| + | *{{text|yell|Cling while you can, heroes! You and [[Azeroth (world)|your world]] [[Hour of Twilight|are doomed]]!}} |
||
| + | |||
| + | ==Loot== |
||
| + | |||
| + | Like many final bosses of raid instances, the item levels of the gear from Deathwing are higher than gear from the rest of the instance - in this case, six item levels higher. |
||
| + | |||
| + | {| class = darktable |
||
| + | ! Raid Finder (ilvl 390)!! Normal (ilvl 403) !! Heroic (ilvl 416) !! Description |
||
|- |
|- |
||
| + | | [[Backbreaker Spaulders (Raid Finder)]] || [[Backbreaker Spaulders]] || [[Backbreaker Spaulders (heroic)]] || |
||
| − | ||[[Agamand Family Crypt]]||[[Agamand Mills]]||[[Balnir Farmstead]]||[[Brightwater Lake]] |
||
|- |
|- |
||
| + | | [[Gauntlets of the Golden Thorn (Raid Finder)]] || [[Gauntlets of the Golden Thorn]] || [[Gauntlets of the Golden Thorn (heroic)]] || |
||
| − | ||[[Brill]]||[[Brill Town Hall]]||[[The Bulwark]]||[[Cold Hearth Manor]] |
||
|- |
|- |
||
| + | | [[Gloves of Liquid Smoke (Raid Finder)]] || [[Gloves of Liquid Smoke]] || [[Gloves of Liquid Smoke (heroic)]] || |
||
| − | ||[[Crusader Outpost]]||[[Crusader's Outpost]]||[[Deathknell]]||[[Faol's Rest]] |
||
|- |
|- |
||
| + | | [[Belt of Shattered Elementium (Raid Finder)]] || [[Belt of Shattered Elementium]] || [[Belt of Shattered Elementium (heroic)]] || |
||
| − | ||[[Gallows' End Tavern]]||[[Garren's Haunt]]||[[Gunther's Retreat]]||[[Nightmare Vale]] |
||
|- |
|- |
||
| + | | [[Molten Blood Footpads (Raid Finder)]] || [[Molten Blood Footpads]] || [[Molten Blood Footpads (heroic)]] || |
||
| − | ||[[Night Web's Hollow]]||[[The North Coast]]||[[Ruins of Lordaeron]]||[[Scarlet Watch Post]] |
||
|- |
|- |
||
| + | | [[Eye of Unmaking (Raid Finder)]] || [[Eye of Unmaking]] || [[Eye of Unmaking (heroic)]] || |
||
| − | ||[[Shadow Grave]]||[[Solliden Farmstead]]||[[Stillwater Pond]]||[[Terrace of Repose]] |
||
|- |
|- |
||
| + | | [[Heart of Unliving (Raid Finder)]] || [[Heart of Unliving]] || [[Heart of Unliving (heroic)]] || |
||
| − | ||[[Venomweb Vale]]||[[Whispering Gardens]]||[[Whispering Shore]] |
||
| + | |- |
||
| + | | [[Resolve of Undying (Raid Finder)]] || [[Resolve of Undying]] || [[Resolve of Undying (heroic)]] || |
||
| + | |- |
||
| + | | [[Will of Unbinding (Raid Finder)]] || [[Will of Unbinding]] || [[Will of Unbinding (heroic)]] || |
||
| + | |- |
||
| + | | [[Wrath of Unchaining (Raid Finder)]] || [[Wrath of Unchaining]] || [[Wrath of Unchaining (heroic)]] || |
||
| + | |- |
||
| + | | || [[Essence of Destruction]] || [[Essence of Destruction]] || |
||
|} |
|} |
||
| − | == |
+ | ==Videos== |
| − | * [[Scarlet Monastery]] |
||
| − | ===Raid Dungeons=== |
||
| − | None |
||
| − | ===Half-Dungeons/Elite Areas=== |
||
| − | None |
||
| − | |||
| − | ===Battlegrounds=== |
||
| − | None |
||
| − | |||
| − | === Travel Hubs === |
||
| − | [[image:Dark Glade.jpg|thumb|Tirisfal Glades]] |
||
| − | ==== {{Horde Icon Small}} [[Zeppelin]] tower south of Brill ==== |
||
| − | * [[Grom'gol Base Camp]], [[Stranglethorn Vale]] |
||
| − | * [[Orgrimmar]], [[Durotar]] |
||
| − | |||
| − | ==== {{Horde Icon Small}} [[Flight path]]s from [[the Undercity]] ==== |
||
| − | * [[The Sepulcher]], [[Silverpine Forest]] |
||
| − | * [[Tarren Mill]], [[Hillsbrad Foothills]] |
||
| − | * [[Hammerfall]], [[Arathi Highlands]] |
||
| − | * [[Kargath]], [[The Badlands]] |
||
| − | * [[Revantusk Village]], [[The Hinterlands]] |
||
| − | * [[Lights Hope Chapel]], [[Eastern Plaguelands]] |
||
| − | |||
| − | === Regions Adjacent to Tirisfal Glades=== |
||
| − | |||
| − | {| cellpadding="2" |
||
| − | |----- |
||
| − | | |
||
| − | {| cellspacing="2" width="100%" |
||
| − | |----- bgcolor="#000000" |
||
| − | | Zone Name || Faction || Level Range || Direction || Access |
||
| − | |----- bgcolor="#303030" |
||
| − | | [[Durotar]] || {{Horde Icon Small}} || 1-12 |
||
| − | | Southwest across the ocean || By zeppelin only |
||
| − | |----- bgcolor="#303030" |
||
| − | | [[Silverpine Forest]] || {{Horde Icon Small}} |
||
| − | | 10-20 || South |
||
| − | | By foot, or by flight path from the Undercity |
||
| − | |----- bgcolor="#303030" |
||
| − | | [[Stranglethorn Vale]] |
||
| − | | {{Horde Icon Small}} {{Alliance Icon Small}} |
||
| − | | 32-45 || Far to the south |
||
| − | | By zeppelin only to Grom'Gol Base Camp |
||
| − | |----- bgcolor="#303030" |
||
| − | | [[Western Plaguelands]] |
||
| − | | {{Horde Icon Small}} {{Alliance Icon Small}} |
||
| − | | 51-58 || East || By foot only |
||
| − | |----- bgcolor="#303030" |
||
| − | | [[Eversong Woods]] || {{Horde Icon Small}} |
||
| − | | 10-20 || |
||
| − | | Portal located in Ruins of Lordaeron, to the west near the entrance of the ruins, direct teleport to the Silvermoon. |
||
| − | |} |
||
| − | |} |
||
| − | |||
| − | == Notable Characters == |
||
| − | Tirisfal Glades is home to several forsaken of status. From the base camp in Deathknell, [[Executor Arren]] sends promising young forsaken out into the world. In Brill, [[Executor Zygand]] leads the effort to reclaim Tirisfal from the Scarlet Crusade, and at the Bulwark, [[High Executor Derrington]] seeks to eradicate the foothold the Scourge has established in the Plaguelands. |
||
| − | |||
| − | For a complete list of characters, see [[List of Tirisfal Glades NPCs]]. |
||
| − | |||
| − | == Quests == |
||
| − | *{{questlong|Horde|5|Gordo's Task}} - Collect 3 Gloom Weed and deliver them to Junior Apothecary Holland in the Brill graveyard. |
||
| − | **{{questlong|Horde|6|Doom Weed}} - Collect 10 Doom Weed and deliver them back to Junior Apothecary Holland. |
||
| − | *{{questlong|Horde|6|A Putrid Task}} - Bring 7 Putrid Claws to Deathguard Dillinger in Brill. |
||
| − | *{{questlong|Horde|6|A New Plague}} - Apothecary Johaan in the town of Brill wants you to collect 5 Vials of Darkhound Blood. |
||
| − | **{{questlong|Horde|9|A New Plague}} - Apothecary Johaan of the town of Brill needs 5 Vile Fin Scales from Murlocs in Tirisfal Glades. |
||
| − | ***{{questlong|Horde|11|A New Plague}} - Apothecary Johaan in the town of Brill wants you to bring him 4 samples of venom from a Vicious Night Web Spider. |
||
| − | ****{{questlong|Horde|11|A New Plague}} - Bring Johaan's Special Drink to the Captured Mountaineer. |
||
| − | |||
| − | *{{questlong|Horde|7|A Letter Undelivered}} - Find Yvette Farthing, and deliver to her the letter from Thurman Agamand. |
||
| − | *{{questlong|Horde|7|Fields of Grief}} - Steal 10 pumpkins from the farm to the west, just north of Deathknell and take them to Apothecary Johaan in Brill. |
||
| − | **{{questlong|Horde|7|Fields of Grief}} - Take the Laced Pumpkin to the Captured Scarlet Zealot who is being held in the cellar of the Gallow's End Tavern. |
||
| − | *{{questlong|Horde|7|Proof of Demise}} - Bring 10 Scarlet Insignia Rings to Deathguard Burgess in Brill. |
||
| − | *{{questlong|Horde|8|At War With The Scarlet Crusade}} - Executor Zygand of Brill wants you to kill 10 Scarlet Warriors. |
||
| − | **{{questlong|Horde|9|At War With The Scarlet Crusade (2)}} - Executor Zygand in Brill wants you to kill Captain Perrine, 3 Scarlet Zealots and 3 Scarlet Missionaries. |
||
| − | ***{{questlong|Horde|10|At War With The Scarlet Crusade (3)}} - Executor Zygand in Brill has commissioned you to slay Captain Vachon and 5 Scarlet Friars. |
||
| − | ****{{questlong|Horde|12|At War With The Scarlet Crusade (4)}} - Executor Zygand in the town of Brill wants you to assassinate Captain Melrache and his two bodyguards. |
||
| − | |||
| − | *{{questlong|Horde|8|The Mills Overrun}} - Gather 5 Notched Ribs and 3 Blackened Skulls, then return to Deathguard Dillinger in Brill. |
||
| − | *{{questlong|Horde|8|The Chill of Death}} - Bring five Duskbat Pelts and some Coarse Thread to Gretchen Dedmar in Brill. |
||
| − | *{{questlong|Horde|8|Graverobbers}} -Kill Rot Hide Graverobbers and Rot Hide Mongrels. Bring 8 Embalming Ichors to Magistrate Sevren in Brill. |
||
| − | *{{questlong|Horde|8|The Prodigal Lich}} - Present Sevren's Orders to Bethor Iceshard in the Undercity. |
||
| − | **{{questlong|Horde|8|The Lich's Identity}} - Bring the Lich's Spellbook to Bethor Iceshard in the Undercity. |
||
| − | ***{{questlong|Horde|8|Return the Book}} - Return Gunther's Spellbook to him, on the island of Gunther's Retreat. |
||
| − | ****{{questlong|Horde|12|Proving Allegiance}} - Summon Lillith Nefara and kill her. |
||
| − | *****{{questlong|Horde|12|The Prodigal Lich Returns}} - Bring the Nether Gem to Bethor Iceshard in the Undercity. |
||
| − | |||
| − | *{{questlong|Horde|9|Forsaken Duties}} - Speak with Deathguard Linnea. |
||
| − | **{{questlong|Horde|9|Return to the Magistrate}} - Return to Magistrate Sevren in Brill. |
||
| − | |||
| − | *{{questlong|Horde|10|Speak with Sevren}} - Speak with Magistrate Sevren in Brill. |
||
| − | **{{questlong|Horde|13|The Family Crypt}} - Kill 8 Wailing Ancestors and 8 Rotting Ancestors. Kill Captain Dargol, and bring his skull to Magistrate Sevren in Brill. |
||
| − | |||
| − | *{{questlong|Horde|10|Wanted: Maggot Eye}} - Kill Maggot Eye and return to Executor Zygand in Brill with his paw for a reward. |
||
| − | *{{questlong|Horde|10|Delivery to Silverpine Forest}} - Take Apothecary Johaan's findings to Apothecary Renferrel in Silverpine Forest. |
||
| − | *{{questlong|Horde|10|The Haunted Mills}} - Slay Devlin Agamand, and bring Devlin's Remains to Coleman Farthing in Brill. |
||
| − | *{{questlong|Horde|11|Rear Guard Patrol}} - Kill 8 Bleeding Horrors and 8 Wandering Spirits, then report back to Linnea at her camp. |
||
| − | *{{questlong|Horde|11|Deaths in the Family}} - Bring Gregor's Remains, Nissa's Remains and Thurman's Remains to Coleman Farthing in Brill. |
||
| − | |||
| − | *{{questlong|Horde|55|A Plague Upon Thee}} - Gather 100 Plagueland Termites. |
||
| − | **{{questlong|Horde|55|A Plague Upon Thee}} - Find someplace suitable to place the Barrel of Plagueland Termites. |
||
| − | ***{{questlong|Horde|55|A Plague Upon Thee}} - Release the Plagueland Termites in the Northridge Lumber Mill. |
||
| + | ===10-man Normal PTR=== |
||
| − | ==Resources== |
||
| + | {{Youtubelink|W5uJwZDjANE|desc=[http://www.vagrantcorps.com/ Vagrant Corps] - 1080p}} |
||
| − | [[image:Mass Graves.jpg|thumb|Mass Graves]] |
||
| + | {{Youtubelink|yLu5pWvDpD8|desc=N1kftw}} |
||
| − | * [[Cloth]] |
||
| − | ** [[Linen Cloth]] |
||
| − | * [[Herb]]s |
||
| − | ** [[Peacebloom]] |
||
| − | ** [[Silverleaf]] |
||
| − | ** [[Earthroot]] |
||
| − | * [[Leather]] |
||
| − | ** [[Ruined Leather Scraps]] |
||
| − | ** [[Light Leather]] |
||
| − | * [[Ore]] |
||
| − | ** [[Copper Vein]] |
||
| + | ==Patches and hotfixes== |
||
| − | == Wild Creatures == |
||
| + | *{{Hotfix|date=2011-12-02|link=http://us.battle.net/wow/en/blog/4023884|bluenote=Players should no longer get disconnected once they release their spirit after jumping or falling off Deathwing.}} |
||
| − | [[image:Venomweb Vale.jpg|thumb|Venomweb Vale]] |
||
| + | *{{Patch 4.3.0|note=Added.}} |
||
| − | *[[Bat]]s |
||
| − | *[[Darkhound]]s |
||
| − | *[[Ghost]]s |
||
| − | *[[Ghoul]]s |
||
| − | *[[Gnoll]]s |
||
| − | *[[Murloc]]s |
||
| − | *[[Shark]]s |
||
| − | *[[Skeleton]]s |
||
| − | *[[Spider]]s |
||
| − | *[[Wolf|Wolves]] |
||
| − | *[[Zombie]]s |
||
| + | ==References== |
||
| − | == Notes, Tips, & Additional Info == |
||
| + | {{Reflist}} |
||
| − | * See [http://worldofwarcraft.gameamp.com/guide/viewGuides/106.php Quest Quide / '''Leveling Guide''', Tirisfal Glades] |
||
| − | * Tirisfal has the game's highest level-gap jump at the zone border with the [[Western Plaguelands]], which is a 40 level jump from 10 to 50. Beware! |
||
| + | ==External links== |
||
| − | {{Tirisfal Glades}} |
||
| + | <!-- Read http://www.wowpedia.org/Wowpedia:External_links before posting your links here. |
||
| − | {{Eastern Kingdoms}} |
||
| + | Links that do not conform to the rules will be DELETED. |
||
| + | Repeat violations may result in a BAN. |
||
| + | Have a nice day. :) --> |
||
| + | {{elinks-NPC|53879|armory=1}} |
||
| + | ;Guides |
||
| + | {{elink|icon=icyveinscom|site=Icy Veins|link=http://www.icy-veins.com/spine-of-deathwing-detailed-strategy|desc=Comprehensive Spine of Deathwing strategy guide (includes perspective guides for tanks, healers, and DPS)}} |
||
| − | [[Category: |
+ | [[Category:Bosses]] |
| − | [[Category: |
+ | [[Category:Black dragons]] |
| − | [[Category: |
+ | [[Category:The Dragon Soul mobs| ]] |
| − | [[Category:Forsaken territories]] |
||
| − | [[Category:Starting areas]] |
||
Revision as of 01:02, 12 December 2011
- For character biography, see Deathwing.
 | |||
| Race | Black wyrm (Dragonkin) | ||
| Level | ?? Boss | ||
| Location | The Dragon Soul | ||
| Status | Killable | ||
| |||
The Spine of Deathwing is the first of two confrontations with Deathwing in the Dragon Soul raid. The battle begins in The Skyfire as players leap onto the Destroyer's back, attempting to weaken his armor enough for their allies to attack, and ends when he is defeated and crashes into the Maelstrom.
Description

Deathwing heading toward the Maelstrom.
The first stage occurs as players are flying on the airship Skyfire, chasing down Deathwing while his Twilight's Hammer drake riders are swooping in to harry the pursuit. In the second stage, players paratroop commando-style onto Deathwing’s back and start ripping up his armor, trying to pry a hole big enough to give Thrall a clean shot with the Dragon Soul. During this phase, players are actually riding on Deathwing as he’s swooping around and trying to knock the players off with barrel rolls and such. Players will have to hang on at key points in the fight to avoid falling while also tangling with all kinds of monstrosities that are rising out of Deathwing’s corrupted magma blood. Once the players get enough of Deathwing’s armor off, Thrall blasts Deathwing with the Dragon Soul and sends him crash-landing into the Maelstrom.[1][2]
Abilities
 Barrel Roll — Throughout the encounter, Deathwing tries to throw players from his back when he senses that they are all standing on the same side of his spine. During a barrel roll, all players and other creatures not attached to his back are thrown off.
- Elementium Reinforced Plates — The glancing strike from the Dragon Soul has destroyed one of the large armor plates on Deathwing's back and loosened another three. Players must remove all of these plates to give Thrall a chance to get a clear shot.
- Burning Tendons — Players expose Burning Tendons when they pry up one of Deathwing's armor plates. Destroying these fibrous strands is the key to removing an armor plate.
- Seal Armor Breach — After the players pry up an armor plate, the Burning Tendons rapidly pull the plate closed, protecting the tendons from further damage and preventing the plate from flying off.
- Burning Tendons
- Deathwing's Immune System — The creatures that comprise Deathwing's Immune System emerge from the holes in his back left by torn off armor plates. Deathwing defends himself with increasing intensity as more plates are torn off.
- Grasping Tendrils — These tendrils sprout from holes in Deathwing's back that aren't currently occupied by Corruption tentacles. The Tendrils grasp any player that wander too close, reducing their movement speed by 50% and inflicting 6000[note 1] Fire damage every 5.20 sec. until they move away. This effect prevents players from being thrown off Deathwing's back.
- Corruption — These tentacles are dramatic physical manifestations of the Old God Corruption that runs rampant through Deathwing's body. They emerge first from the holes in his back left by armor plates, and they seal the wound completely, preventing any other creatures from emerging from it.
- Searing Plasma — The Corruption coats the victim in the searing blood of Deathwing. The thick blood will absorb up to 200000[note 2] healing done to the target and causes the victim to cough up blood. The violent coughing periodically inflicts 10000[note 3] Physical damage ever 10 sec. This ability is not used on Raid Finder difficulty.
- Fiery Grip — The Corruption grips victims with a whip-like cord of plasma, stunning them for up to 30 sec and inflicting 60000[note 4] Fire damage every 3.50 sec. The corruption must channel to maintain this effect, and players may break by inflicting significant damage to the tentacle. This effect prevents players from being thrown off Deathwing's back. This ability is not used on Raid Finder difficulty.
- Hideous Amalgamation — These unstable creatures are a patchwork of Elementium Armor fragments and pieces of the former Dragon's body held together by his molten blood.
- Absorb Blood — The Amalgamation absorbs nearby Corrupted Blood residue. The Amalgamation grows more unstable with each Residue absorbed, increasing its damage by 10% and attack speed by 10%. At 9 stacks it becomes superheated.
- Superheated Nucleus — The core of the Amalgamation becomes critically unstable, causing it to inflict 15000[note 5] Fire damage to all enemies every 3 sec. If players destroy the Amalgamation in this state, then it will trigger a Nuclear Blast.
- Nuclear Blast — The superheated nucleus of the Amalgamation triggers a massive explosion, inflicting 375000[note 6] Fire damage to targets within 10 yds. This powerful blast pries up one of Deathwing's Elementium plates if it is within range.
- Degradation — Destroyed Amalgamations degrade the maximum health of all enemy targets by 6%. This effect occurs regardless of the state of the nucleus and stacks up to 15 times.
- Blood Corruption: Death — Deathwing's corruption courses through your veins. This corruption takes hold if it is not removed quickly, infecting the player with the Blood of Deathwing. When dispelled this effect jumps to a new target and can mutate into Blood Corruption: Earth.
- Blood of Deathwing — The blood of Deathwing explodes violently from your veins, inflicting 875000 Fire damage to you and several other players.
- Blood Corruption: Earth — A shadow of Neltharion courses through your veins. This corruption takes hold if it is not removed quickly, infecting the player with the Blood of Neltharion. When dispelled this effect jumps to a new target and can mutate into Blood Corruption: Death.
- Blood of Neltharion — The barest hint of a shadow of the former Earth-Warder suffuses your blood. Damage taken from all sources is reduced by 10%. This effect can stack up to 3 times.
- Corrupted Blood — These living globs of Deathwing's blood appear fragile, but leave behind an indestructible residue when killed.
- Burst — Corrupted Blood explodes when destroyed, inflicting 10000[note 7] Physical damage to nearby enemies within 200 yards.
- Residue — Destroying a Corrupted Blood leaves behind an indestructible residue. It slowly creeps toward the nearest hole in Deathwing's Back where it reconstitutes into a new Corrupted Blood.
- Notes
- ^ Raid Finder: 6499, 10-man heroic: 12000, 25-man: 6499, 25-man heroic: 13000
- ^ 10-man heroic: 280000, 25-man: 300000, 25-man heroic: 420000
- ^ 10/25-man heroic: 12000
- ^ 10/25-man heroic: 90000
- ^ Raid Finder: 11375, 10-man heroic: 30000, 25-man: 17500, 25-man heroic: 35000
- ^ Raid Finder: 243750
- ^ Raid Finder: 13000, 10-man heroic: 14000, 25-man: 20000, 25-man heroic: 28000
Strategy
- Spine of Deathwing is the First of the two encounters dealing with Neltharion or Deathwing the Destroyer, in which the raid must remove three of Deathwing's Armored plates, through a process of dealing with different adds through out the encounter.
When you start the encounter you will go through a small cut scene, which you should get out of right away as it will give you more time to get your bearings right before you land of Deathwing's Back, Once the raid lands on his back, you will encounter four Grasping Tendrils, Killing the Tendrils will result in spawning a Hideous Amalgamation for every Tendril killed, as well as Corrupted Blood from the holes that the Tendrils were killed, These two Adds are the key to destroying his armored plates and need to be managed correctly.
To manage these adds correctly it is best to kill three Tendrils (Nominate which one you do not wish to kill) and then trigger a Barrel Roll, by having the entire raid move to either the left or right side of the boss to knock all the adds off the bosses back, however so that the raid does not fly off as well, you should stack on top of where a Tendril use to be, as this will root you in place, after the barrel roll is complete, simply return into the middle of Deathwing's back, unless triggering a barrel roll, Your raid should always be in the middle. After the barrel roll has occurred, kill the last Tendril (Which will spawn another Tendril because there are none alive, ignore this unless it channels Fiery Grip, in which the range should do some instant casts till it stops channeling) and spawn the Hideous Amalgamation, The tank should move this add all the way to the armored plate near Deathwing's Head, DPS Should damage it down to roughly 25-20% health and full DPS stop on the Amalgamation, instead, they should start killing the Corrupted Bloods which will little fires on the ground, the tank needs to move the Amalgamation over the fires so that it will stack Absorb Blood, once the Amalgamation gains 9 stacks, Proceed to killing it immediately as it will pulse an AoE over the raid. Once the Amalgamation dies, It will cast Nuclear Blast, in which all DPS and Range should Run towards the back of Deathwing's Spine, after the Nuclear Blast is cast, it will blow open a piece of his armour plate, and his Burning Tendon will become exposed, killing this will cause his armor plate to fall off. The rest is simply rinse and repeat, Kill a Tendril, Stand in it, Barrel Roll, Kill another Tendril, and Start the whole process over. Ideally you will want to kill the Burning Tendon in one strike, as such, it is best to blow all damage cool downs on the first Plate, Potions on the second plate, and Lust on the third plate.
On a side note, healers will have to deal with a debuff called Searing Plasma, In which simply needs to be healed and removed as soon as possible. As stated before, any time the Tendril's do Fiery Grip, Simply hit then enough that they stop channeling it, killing should be avoided but should not be too much of a problem should one die, as the Off tank can simply hold onto the second Amalgamation that will either fall to its death or become a second blast should the raid not kill the Tendon in one attempt. Controlling the adds is key to defeating this boss, and is not hard at all to do.
Quotes
- Intro
- Your tenacity is admirable, but pointless! You ride into the jaws of the apocalypse!
- About to spin
- Deathwing howls loudly
- Deathwing lets loose a gargantuan scream
- Player is Thrown Off
- You are less than dust, fit only to be brushed from my back.
- Huah! I didn't realize you fools were still there.
- Your efforts are insignificant! I carry you to your deaths!
- Cling while you can, heroes! You and your world are doomed!
Loot
Like many final bosses of raid instances, the item levels of the gear from Deathwing are higher than gear from the rest of the instance - in this case, six item levels higher.
| Raid Finder (ilvl 390) | Normal (ilvl 403) | Heroic (ilvl 416) | Description |
|---|---|---|---|
| Backbreaker Spaulders (Raid Finder) | Backbreaker Spaulders (heroic) | ||
| Gauntlets of the Golden Thorn (Raid Finder) | Gauntlets of the Golden Thorn (heroic) | ||
| Gloves of Liquid Smoke (Raid Finder) | Gloves of Liquid Smoke (heroic) | ||
| Belt of Shattered Elementium (Raid Finder) | Belt of Shattered Elementium (heroic) | ||
| Molten Blood Footpads (Raid Finder) | Molten Blood Footpads (heroic) | ||
| Eye of Unmaking (Raid Finder) | Eye of Unmaking (heroic) | ||
| Heart of Unliving (Raid Finder) | Heart of Unliving (heroic) | ||
| Resolve of Undying (Raid Finder) | Resolve of Undying (heroic) | ||
| Will of Unbinding (Raid Finder) | Will of Unbinding (heroic) | ||
| Wrath of Unchaining (Raid Finder) | Wrath of Unchaining (heroic) | ||
Videos
10-man Normal PTR
Template:Youtubelink Template:Youtubelink
Patches and hotfixes
- Hotfix (2011-12-02): Players should no longer get disconnected once they release their spirit after jumping or falling off Deathwing.
- Patch 4.3.0 (2011-11-29): Added.
References
External links
- Guides