m (→External links: clean up, replaced: wowwiki.com/WoWWiki: → wowpedia.org/Wowpedia:) |
Strikeblaze (talk | contribs) |
||
| Line 1: | Line 1: | ||
| + | {{Stub/Strategy}} |
||
| − | <onlyinclude>{{{{{tpl|tooltip}}} |
||
| + | {{for|character biography|Deathwing}} |
||
| − | |mode={{{mode|}}} |
||
| + | {{npcbox |
||
| − | |arg={{{arg|}}} |
||
| + | |name=Deathwing |
||
| − | |bind=BoP |
||
| + | |image = Spine of Deathwing.jpg |
||
| − | |icon=INV_Mace_13 |
||
| + | |race = Black wyrm |
||
| − | |slot=Held In Off-hand |
||
| + | |creature = Dragonkin |
||
| − | |ilvl=115 |
||
| + | |type = Boss |
||
| − | |name=Lamp of Peaceful Repose |
||
| − | |level= |
+ | |level = ?? |
| + | |location = [[Dragon Soul (instance)|The Dragon Soul]] |
||
| − | |sell={{cost|g=2|s=20|c=45}} |
||
| + | |faction = Combat |
||
| − | |itemid=28387 |
||
| + | |health = 166K–30M (1M–33.3M Heroic) |
||
| − | |quality=Rare |
||
| + | |status = Killable |
||
| − | |attrib=+18 Intellect<br />+16 Stamina |
||
| + | |instance = The Dragon Soul |
||
| − | |effect=Equip: Increases spell power by 19.<br />Equip: Restores 6 mana per 5 sec.}}</onlyinclude> |
||
| + | }} |
||
| − | == Source == |
||
| + | The '''Spine of Deathwing''' is the first of two confrontations with [[Deathwing]] in the [[Dragon Soul (instance)|Dragon Soul]] raid. The battle begins in [[The Skyfire]] as players leap onto the Destroyer's back, attempting to weaken his armor enough for their allies to attack, and ends when he is defeated and crashes into the [[The Maelstrom (Dragon Soul)|Maelstrom]]. |
||
| − | Drops from [[Dalliah the Doomsayer]] in the [[the Arcatraz]], the 3rd wing of [[Tempest Keep]] on normal difficulty. |
||
| − | == |
+ | ==Description== |
| + | [[File:Spine of Deathwing Full Body.jpg|thumb|Deathwing heading toward the Maelstrom.]] |
||
| − | Since patch 2.0.10 this item now has +16 stamina, +18 intellect, +35 to healing and 6 mana per 5 seconds. Now much more viable. |
||
| + | The first stage occurs as players are flying on the airship ''Skyfire'', chasing down Deathwing while his [[Twilight's Hammer]] drake riders are swooping in to harry the pursuit. In the second stage, players paratroop commando-style onto Deathwing’s back and start ripping up his armor, trying to pry a hole big enough to give [[Thrall]] a clean shot with the [[Demon Soul|Dragon Soul]]. During this phase, players are actually riding on Deathwing as he’s swooping around and trying to knock the players off with barrel rolls and such. Players will have to hang on at key points in the fight to avoid falling while also tangling with all kinds of monstrosities that are rising out of Deathwing’s corrupted magma blood. Once the players get enough of Deathwing’s armor off, Thrall blasts Deathwing with the Dragon Soul and sends him crash-landing into the [[Maelstrom]].<ref>http://www.mmo-champion.com/content/2459-Patch-4.3-Interview-with-Greg-Street-(Ghostcrawler)</ref><ref>http://www.mmo-champion.com/content/2467-The-Deathwing-Raid-Interview-with-Scott-Mercer-SPOILERS</ref> |
||
| + | ==Abilities== |
||
| − | (Formerly had 8 stamina, 11 intellect, 22 healing and 3 mana per 5 seconds) |
||
| + | * {{abilities|Barrel Roll|Throughout the encounter, Deathwing tries to throw players from his back when he senses that they are all standing on the same side of his spine. During a barrel roll, all players and other creatures not attached to his back are thrown off.|type=important|type2=deadly|image=achievement_bg_returnxflags_def_wsg|id=}} |
||
| + | * {{abilities|Elementium Reinforced Plates|The glancing strike from the Dragon Soul has destroyed one of the large armor plates on Deathwing's back and loosened another three. Players must remove all of these plates to give Thrall a chance to get a clear shot.|type=important}} |
||
| + | ** {{abilities|Burning Tendons|Players expose Burning Tendons when they pry up one of Deathwing's armor plates. Destroying these fibrous strands is the key to removing an armor plate.|type=dps}} |
||
| + | *** {{abilities|Seal Armor Breach|After the players pry up an armor plate, the Burning Tendons rapidly pull the plate closed, protecting the tendons from further damage and preventing the plate from flying off.|image=ability_deathwing_sealarmorbreachtga|id=}} |
||
| + | * {{abilities|Deathwing's Immune System|The creatures that comprise Deathwing's Immune System emerge from the holes in his back left by torn off armor plates. Deathwing defends himself with increasing intensity as more plates are torn off.}} |
||
| + | ** {{abilities|Grasping Tendrils|These tendrils sprout from holes in Deathwing's back that aren't currently occupied by Corruption tentacles. The Tendrils grasp any player that wander too close, reducing their movement speed by 50% and inflicting 6000<ref group="note">Raid Finder: 6499, 10-man heroic: 12000, 25-man: 6499, 25-man heroic: 13000</ref> Fire damage every 5.20 sec. until they move away. This effect prevents players from being thrown off Deathwing's back.|image=ability_deathwing_grasping_tendrils|id=}} |
||
| + | ** {{abilities|Corruption|These tentacles are dramatic physical manifestations of the Old God Corruption that runs rampant through Deathwing's body. They emerge first from the holes in his back left by armor plates, and they seal the wound completely, preventing any other creatures from emerging from it.}} |
||
| + | *** {{abilities|Searing Plasma|The Corruption coats the victim in the searing blood of Deathwing. The thick blood will absorb up to 200000<ref group="note">10-man heroic: 280000, 25-man: 300000, 25-man heroic: 420000</ref> healing done to the target and causes the victim to cough up blood. The violent coughing periodically inflicts 10000<ref group="note">10/25-man heroic: 12000</ref> Physical damage ever 10 sec.|notes=This ability is not used on Raid Finder difficulty.|type=healer|image=spell_fire_ragnaros_lavabolt|id=}} |
||
| + | *** {{abilities|Fiery Grip|The Corruption grips victims with a whip-like cord of plasma, stunning them for up to 30 sec and inflicting 60000<ref group="note">10/25-man heroic: 90000</ref> Fire damage every 3.50 sec. The corruption must channel to maintain this effect, and players may break by inflicting significant damage to the tentacle. This effect prevents players from being thrown off Deathwing's back.|notes=This ability is not used on Raid Finder difficulty.|image=ability_deathwing_fierygrip|id=}} |
||
| + | ** {{abilities|Hideous Amalgamation|These unstable creatures are a patchwork of Elementium Armor fragments and pieces of the former Dragon's body held together by his molten blood.|type=important|type2=tank}} |
||
| + | *** {{abilities|Absorb Blood|The Amalgamation absorbs nearby Corrupted Blood residue. The Amalgamation grows more unstable with each Residue absorbed, increasing its damage by 10% and attack speed by 10%. At 9 stacks it becomes superheated.|image=inv_misc_volatilefire|id=}} |
||
| + | *** {{abilities|Superheated Nucleus|The core of the Amalgamation becomes critically unstable, causing it to inflict 15000<ref group="note">Raid Finder: 11375, 10-man heroic: 30000, 25-man: 17500, 25-man heroic: 35000</ref> Fire damage to all enemies every 3 sec. If players destroy the Amalgamation in this state, then it will trigger a Nuclear Blast.|image=inv_elemental_primal_fire|id=}} |
||
| + | *** {{abilities|Nuclear Blast|The superheated nucleus of the Amalgamation triggers a massive explosion, inflicting 375000<ref group="note">Raid Finder: 243750</ref> Fire damage to targets within 10 yds. This powerful blast pries up one of Deathwing's Elementium plates if it is within range.|type=important|type=deadly|image=inv_gizmo_supersappercharge|id=}} |
||
| + | *** {{abilities|Degradation|Destroyed Amalgamations degrade the maximum health of all enemy targets by 6%. This effect occurs regardless of the state of the nucleus and stacks up to 15 times.|type=heroic|type2=healer|image=ability_warlock_backdraft|id=}} |
||
| + | *** {{abilities|Blood Corruption: Death|Deathwing's corruption courses through your veins. This corruption takes hold if it is not removed quickly, infecting the player with the Blood of Deathwing. When dispelled this effect jumps to a new target and can mutate into Blood Corruption: Earth.|type=magic|type2=heroic|type3=healer|image=ability_deathwing_bloodcorruption_earth|id=}} |
||
| + | **** {{abilities|Blood of Deathwing|The blood of Deathwing explodes violently from your veins, inflicting 875000 Fire damage to you and several other players.|type=deadly|type=heroic|image=ability_deathwing_bloodcorruption_earth|id=}} |
||
| + | *** {{abilities|Blood Corruption: Earth|A shadow of Neltharion courses through your veins. This corruption takes hold if it is not removed quickly, infecting the player with the Blood of Neltharion. When dispelled this effect jumps to a new target and can mutate into Blood Corruption: Death.|type=magic|type2=heroic|type3=healer|image=inv_elemental_mote_nether|id=}} |
||
| + | **** {{abilities|Blood of Neltharion|The barest hint of a shadow of the former Earth-Warder suffuses your blood. Damage taken from all sources is reduced by 10%. This effect can stack up to 3 times.|type=heroic|image=inv_elemental_mote_nether|id=}} |
||
| + | ** {{abilities|Corrupted Blood|These living globs of Deathwing's blood appear fragile, but leave behind an indestructible residue when killed.|type=tank}} |
||
| + | *** {{abilities|Burst|Corrupted Blood explodes when destroyed, inflicting 10000<ref group="note">Raid Finder: 13000, 10-man heroic: 14000, 25-man: 20000, 25-man heroic: 28000</ref> Physical damage to nearby enemies within 200 yards.|image=spell_shaman_firenova|id=}} |
||
| + | *** {{abilities|Residue|Destroying a Corrupted Blood leaves behind an indestructible residue. It slowly creeps toward the nearest hole in Deathwing's Back where it reconstitutes into a new Corrupted Blood.|image=spell_fire_fire|id=105223}} |
||
| + | |||
| + | ;Notes |
||
| + | {{reflist|group="note"}} |
||
| + | |||
| + | ==Strategy== |
||
| + | *[[File:Stub.png|20px]] ''Spine of Deathwing is the First of the two encounters dealing with Neltharion or Deathwing the Destroyer, in which the raid must remove three of Deathwing's Armored plates, through a process of dealing with different adds through out the encounter. |
||
| + | |||
| + | When you start the encounter you will go through a small cut scene, which you should get out of right away as it will give you more time to get your bearings right before you land of Deathwing's Back, Once the raid lands on his back, you will encounter four Grasping Tendrils, Killing the Tendrils will result in spawning a Hideous Amalgamation for every Tendril killed, as well as Corrupted Blood from the holes that the Tendrils were killed, These two Adds are the key to destroying his armored plates and need to be managed correctly. |
||
| + | |||
| + | To manage these adds correctly it is best to kill three Tendrils (Nominate which one you do not wish to kill) and then trigger a Barrel Roll, by having the entire raid move to either the left or right side of the boss to knock all the adds off the bosses back, however so that the raid does not fly off as well, you should stack on top of where a Tendril use to be, as this will root you in place, after the barrel roll is complete, simply return into the middle of Deathwing's back, unless triggering a barrel roll, Your raid should always be in the middle. After the barrel roll has occurred, kill the last Tendril (Which will spawn another Tendril because there are none alive, ignore this unless it channels Fiery Grip, in which the range should do some instant casts till it stops channeling) and spawn the Hideous Amalgamation, The tank should move this add all the way to the armored plate near Deathwing's Head, DPS Should damage it down to roughly 25-20% health and full DPS stop on the Amalgamation, instead, they should start killing the Corrupted Bloods which will little fires on the ground, the tank needs to move the Amalgamation over the fires so that it will stack Absorb Blood, once the Amalgamation gains 9 stacks, Proceed to killing it immediately as it will pulse an AoE over the raid. Once the Amalgamation dies, It will cast Nuclear Blast, in which all DPS and Range should Run towards the back of Deathwing's Spine, after the Nuclear Blast is cast, it will blow open a piece of his armour plate, and his Burning Tendon will become exposed, killing this will cause his armor plate to fall off. The rest is simply rinse and repeat, Kill a Tendril, Stand in it, Barrel Roll, Kill another Tendril, and Start the whole process over. Ideally you will want to kill the Burning Tendon in one strike, as such, it is best to blow all damage cool downs on the first Plate, Potions on the second plate, and Lust on the third plate. |
||
| + | |||
| + | On a side note, healers will have to deal with a debuff called Searing Plasma, In which simply needs to be healed and removed as soon as possible. As stated before, any time the Tendril's do Fiery Grip, Simply hit then enough that they stop channeling it, killing should be avoided but should not be too much of a problem should one die, as the Off tank can simply hold onto the second Amalgamation that will either fall to its death or become a second blast should the raid not kill the Tendon in one attempt. Controlling the adds is key to defeating this boss, and is not hard at all to do. '' |
||
| + | |||
| + | ==Quotes== |
||
| + | ;Intro |
||
| + | *{{text|yell|Your tenacity is admirable, but pointless! You ride into the jaws of the apocalypse!}} |
||
| + | |||
| + | ;About to spin |
||
| + | *{{text|bossemote|Deathwing howls loudly}} |
||
| + | *{{text|bossemote|Deathwing lets loose a gargantuan scream}} |
||
| + | |||
| + | ;Player is Thrown Off |
||
| + | *{{text|yell|You are less than dust, fit only to be brushed from my back.}} |
||
| + | *{{text|yell|Huah! I didn't realize you fools were still there.}} |
||
| + | *{{text|yell|Your efforts are insignificant! I carry you to your deaths!}} |
||
| + | *{{text|yell|Cling while you can, heroes! You and [[Azeroth (world)|your world]] [[Hour of Twilight|are doomed]]!}} |
||
| + | |||
| + | ==Loot== |
||
| + | |||
| + | Like many final bosses of raid instances, the item levels of the gear from Deathwing are higher than gear from the rest of the instance - in this case, six item levels higher. |
||
| + | |||
| + | {| class = darktable |
||
| + | ! Raid Finder (ilvl 390)!! Normal (ilvl 403) !! Heroic (ilvl 416) !! Description |
||
| + | |- |
||
| + | | [[Backbreaker Spaulders (Raid Finder)]] || [[Backbreaker Spaulders]] || [[Backbreaker Spaulders (heroic)]] || |
||
| + | |- |
||
| + | | [[Gauntlets of the Golden Thorn (Raid Finder)]] || [[Gauntlets of the Golden Thorn]] || [[Gauntlets of the Golden Thorn (heroic)]] || |
||
| + | |- |
||
| + | | [[Gloves of Liquid Smoke (Raid Finder)]] || [[Gloves of Liquid Smoke]] || [[Gloves of Liquid Smoke (heroic)]] || |
||
| + | |- |
||
| + | | [[Belt of Shattered Elementium (Raid Finder)]] || [[Belt of Shattered Elementium]] || [[Belt of Shattered Elementium (heroic)]] || |
||
| + | |- |
||
| + | | [[Molten Blood Footpads (Raid Finder)]] || [[Molten Blood Footpads]] || [[Molten Blood Footpads (heroic)]] || |
||
| + | |- |
||
| + | | [[Eye of Unmaking (Raid Finder)]] || [[Eye of Unmaking]] || [[Eye of Unmaking (heroic)]] || |
||
| + | |- |
||
| + | | [[Heart of Unliving (Raid Finder)]] || [[Heart of Unliving]] || [[Heart of Unliving (heroic)]] || |
||
| + | |- |
||
| + | | [[Resolve of Undying (Raid Finder)]] || [[Resolve of Undying]] || [[Resolve of Undying (heroic)]] || |
||
| + | |- |
||
| + | | [[Will of Unbinding (Raid Finder)]] || [[Will of Unbinding]] || [[Will of Unbinding (heroic)]] || |
||
| + | |- |
||
| + | | [[Wrath of Unchaining (Raid Finder)]] || [[Wrath of Unchaining]] || [[Wrath of Unchaining (heroic)]] || |
||
| + | |- |
||
| + | | || [[Essence of Destruction]] || [[Essence of Destruction]] || |
||
| + | |} |
||
| + | |||
| + | ==Videos== |
||
| + | |||
| + | ===10-man Normal PTR=== |
||
| + | {{Youtubelink|W5uJwZDjANE|desc=[http://www.vagrantcorps.com/ Vagrant Corps] - 1080p}} |
||
| + | {{Youtubelink|yLu5pWvDpD8|desc=N1kftw}} |
||
| + | |||
| + | ==Patches and hotfixes== |
||
| + | *{{Hotfix|date=2011-12-02|link=http://us.battle.net/wow/en/blog/4023884|bluenote=Players should no longer get disconnected once they release their spirit after jumping or falling off Deathwing.}} |
||
| + | *{{Patch 4.3.0|note=Added.}} |
||
| + | |||
| + | ==References== |
||
| + | {{Reflist}} |
||
==External links== |
==External links== |
||
| Line 26: | Line 117: | ||
Repeat violations may result in a BAN. |
Repeat violations may result in a BAN. |
||
Have a nice day. :) --> |
Have a nice day. :) --> |
||
| − | {{elinks- |
+ | {{elinks-NPC|53879|armory=1}} |
| + | ;Guides |
||
| − | [[Category:World of Warcraft off-hand items]] |
||
| + | {{elink|icon=icyveinscom|site=Icy Veins|link=http://www.icy-veins.com/spine-of-deathwing-detailed-strategy|desc=Comprehensive Spine of Deathwing strategy guide (includes perspective guides for tanks, healers, and DPS)}} |
||
| − | [[Category:World of Warcraft rare items]] |
||
| + | |||
| ⚫ | |||
| + | [[Category:Bosses]] |
||
| ⚫ | |||
| + | [[Category:The Dragon Soul mobs| ]] |
||
Revision as of 01:02, 12 December 2011
- For character biography, see Deathwing.
 | |||
| Race | Black wyrm (Dragonkin) | ||
| Level | ?? Boss | ||
| Location | The Dragon Soul | ||
| Status | Killable | ||
| |||
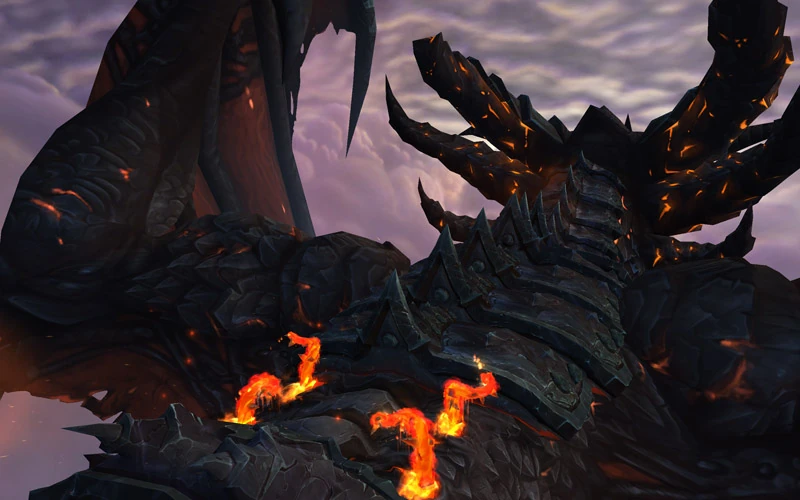
The Spine of Deathwing is the first of two confrontations with Deathwing in the Dragon Soul raid. The battle begins in The Skyfire as players leap onto the Destroyer's back, attempting to weaken his armor enough for their allies to attack, and ends when he is defeated and crashes into the Maelstrom.
Description

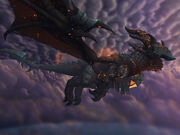
Deathwing heading toward the Maelstrom.
The first stage occurs as players are flying on the airship Skyfire, chasing down Deathwing while his Twilight's Hammer drake riders are swooping in to harry the pursuit. In the second stage, players paratroop commando-style onto Deathwing’s back and start ripping up his armor, trying to pry a hole big enough to give Thrall a clean shot with the Dragon Soul. During this phase, players are actually riding on Deathwing as he’s swooping around and trying to knock the players off with barrel rolls and such. Players will have to hang on at key points in the fight to avoid falling while also tangling with all kinds of monstrosities that are rising out of Deathwing’s corrupted magma blood. Once the players get enough of Deathwing’s armor off, Thrall blasts Deathwing with the Dragon Soul and sends him crash-landing into the Maelstrom.[1][2]
Abilities
 Barrel Roll — Throughout the encounter, Deathwing tries to throw players from his back when he senses that they are all standing on the same side of his spine. During a barrel roll, all players and other creatures not attached to his back are thrown off.
- Elementium Reinforced Plates — The glancing strike from the Dragon Soul has destroyed one of the large armor plates on Deathwing's back and loosened another three. Players must remove all of these plates to give Thrall a chance to get a clear shot.
- Burning Tendons — Players expose Burning Tendons when they pry up one of Deathwing's armor plates. Destroying these fibrous strands is the key to removing an armor plate.
- Seal Armor Breach — After the players pry up an armor plate, the Burning Tendons rapidly pull the plate closed, protecting the tendons from further damage and preventing the plate from flying off.
- Burning Tendons
- Deathwing's Immune System — The creatures that comprise Deathwing's Immune System emerge from the holes in his back left by torn off armor plates. Deathwing defends himself with increasing intensity as more plates are torn off.
- Grasping Tendrils — These tendrils sprout from holes in Deathwing's back that aren't currently occupied by Corruption tentacles. The Tendrils grasp any player that wander too close, reducing their movement speed by 50% and inflicting 6000[note 1] Fire damage every 5.20 sec. until they move away. This effect prevents players from being thrown off Deathwing's back.
- Corruption — These tentacles are dramatic physical manifestations of the Old God Corruption that runs rampant through Deathwing's body. They emerge first from the holes in his back left by armor plates, and they seal the wound completely, preventing any other creatures from emerging from it.
- Searing Plasma — The Corruption coats the victim in the searing blood of Deathwing. The thick blood will absorb up to 200000[note 2] healing done to the target and causes the victim to cough up blood. The violent coughing periodically inflicts 10000[note 3] Physical damage ever 10 sec. This ability is not used on Raid Finder difficulty.
- Fiery Grip — The Corruption grips victims with a whip-like cord of plasma, stunning them for up to 30 sec and inflicting 60000[note 4] Fire damage every 3.50 sec. The corruption must channel to maintain this effect, and players may break by inflicting significant damage to the tentacle. This effect prevents players from being thrown off Deathwing's back. This ability is not used on Raid Finder difficulty.
- Hideous Amalgamation — These unstable creatures are a patchwork of Elementium Armor fragments and pieces of the former Dragon's body held together by his molten blood.
- Absorb Blood — The Amalgamation absorbs nearby Corrupted Blood residue. The Amalgamation grows more unstable with each Residue absorbed, increasing its damage by 10% and attack speed by 10%. At 9 stacks it becomes superheated.
- Superheated Nucleus — The core of the Amalgamation becomes critically unstable, causing it to inflict 15000[note 5] Fire damage to all enemies every 3 sec. If players destroy the Amalgamation in this state, then it will trigger a Nuclear Blast.
- Nuclear Blast — The superheated nucleus of the Amalgamation triggers a massive explosion, inflicting 375000[note 6] Fire damage to targets within 10 yds. This powerful blast pries up one of Deathwing's Elementium plates if it is within range.
- Degradation — Destroyed Amalgamations degrade the maximum health of all enemy targets by 6%. This effect occurs regardless of the state of the nucleus and stacks up to 15 times.
- Blood Corruption: Death — Deathwing's corruption courses through your veins. This corruption takes hold if it is not removed quickly, infecting the player with the Blood of Deathwing. When dispelled this effect jumps to a new target and can mutate into Blood Corruption: Earth.
- Blood of Deathwing — The blood of Deathwing explodes violently from your veins, inflicting 875000 Fire damage to you and several other players.
- Blood Corruption: Earth — A shadow of Neltharion courses through your veins. This corruption takes hold if it is not removed quickly, infecting the player with the Blood of Neltharion. When dispelled this effect jumps to a new target and can mutate into Blood Corruption: Death.
- Blood of Neltharion — The barest hint of a shadow of the former Earth-Warder suffuses your blood. Damage taken from all sources is reduced by 10%. This effect can stack up to 3 times.
- Corrupted Blood — These living globs of Deathwing's blood appear fragile, but leave behind an indestructible residue when killed.
- Burst — Corrupted Blood explodes when destroyed, inflicting 10000[note 7] Physical damage to nearby enemies within 200 yards.
- Residue — Destroying a Corrupted Blood leaves behind an indestructible residue. It slowly creeps toward the nearest hole in Deathwing's Back where it reconstitutes into a new Corrupted Blood.
- Notes
- ^ Raid Finder: 6499, 10-man heroic: 12000, 25-man: 6499, 25-man heroic: 13000
- ^ 10-man heroic: 280000, 25-man: 300000, 25-man heroic: 420000
- ^ 10/25-man heroic: 12000
- ^ 10/25-man heroic: 90000
- ^ Raid Finder: 11375, 10-man heroic: 30000, 25-man: 17500, 25-man heroic: 35000
- ^ Raid Finder: 243750
- ^ Raid Finder: 13000, 10-man heroic: 14000, 25-man: 20000, 25-man heroic: 28000
Strategy
- Spine of Deathwing is the First of the two encounters dealing with Neltharion or Deathwing the Destroyer, in which the raid must remove three of Deathwing's Armored plates, through a process of dealing with different adds through out the encounter.
When you start the encounter you will go through a small cut scene, which you should get out of right away as it will give you more time to get your bearings right before you land of Deathwing's Back, Once the raid lands on his back, you will encounter four Grasping Tendrils, Killing the Tendrils will result in spawning a Hideous Amalgamation for every Tendril killed, as well as Corrupted Blood from the holes that the Tendrils were killed, These two Adds are the key to destroying his armored plates and need to be managed correctly.
To manage these adds correctly it is best to kill three Tendrils (Nominate which one you do not wish to kill) and then trigger a Barrel Roll, by having the entire raid move to either the left or right side of the boss to knock all the adds off the bosses back, however so that the raid does not fly off as well, you should stack on top of where a Tendril use to be, as this will root you in place, after the barrel roll is complete, simply return into the middle of Deathwing's back, unless triggering a barrel roll, Your raid should always be in the middle. After the barrel roll has occurred, kill the last Tendril (Which will spawn another Tendril because there are none alive, ignore this unless it channels Fiery Grip, in which the range should do some instant casts till it stops channeling) and spawn the Hideous Amalgamation, The tank should move this add all the way to the armored plate near Deathwing's Head, DPS Should damage it down to roughly 25-20% health and full DPS stop on the Amalgamation, instead, they should start killing the Corrupted Bloods which will little fires on the ground, the tank needs to move the Amalgamation over the fires so that it will stack Absorb Blood, once the Amalgamation gains 9 stacks, Proceed to killing it immediately as it will pulse an AoE over the raid. Once the Amalgamation dies, It will cast Nuclear Blast, in which all DPS and Range should Run towards the back of Deathwing's Spine, after the Nuclear Blast is cast, it will blow open a piece of his armour plate, and his Burning Tendon will become exposed, killing this will cause his armor plate to fall off. The rest is simply rinse and repeat, Kill a Tendril, Stand in it, Barrel Roll, Kill another Tendril, and Start the whole process over. Ideally you will want to kill the Burning Tendon in one strike, as such, it is best to blow all damage cool downs on the first Plate, Potions on the second plate, and Lust on the third plate.
On a side note, healers will have to deal with a debuff called Searing Plasma, In which simply needs to be healed and removed as soon as possible. As stated before, any time the Tendril's do Fiery Grip, Simply hit then enough that they stop channeling it, killing should be avoided but should not be too much of a problem should one die, as the Off tank can simply hold onto the second Amalgamation that will either fall to its death or become a second blast should the raid not kill the Tendon in one attempt. Controlling the adds is key to defeating this boss, and is not hard at all to do.
Quotes
- Intro
- Your tenacity is admirable, but pointless! You ride into the jaws of the apocalypse!
- About to spin
- Deathwing howls loudly
- Deathwing lets loose a gargantuan scream
- Player is Thrown Off
- You are less than dust, fit only to be brushed from my back.
- Huah! I didn't realize you fools were still there.
- Your efforts are insignificant! I carry you to your deaths!
- Cling while you can, heroes! You and your world are doomed!
Loot
Like many final bosses of raid instances, the item levels of the gear from Deathwing are higher than gear from the rest of the instance - in this case, six item levels higher.
| Raid Finder (ilvl 390) | Normal (ilvl 403) | Heroic (ilvl 416) | Description |
|---|---|---|---|
| Backbreaker Spaulders (Raid Finder) | Backbreaker Spaulders (heroic) | ||
| Gauntlets of the Golden Thorn (Raid Finder) | Gauntlets of the Golden Thorn (heroic) | ||
| Gloves of Liquid Smoke (Raid Finder) | Gloves of Liquid Smoke (heroic) | ||
| Belt of Shattered Elementium (Raid Finder) | Belt of Shattered Elementium (heroic) | ||
| Molten Blood Footpads (Raid Finder) | Molten Blood Footpads (heroic) | ||
| Eye of Unmaking (Raid Finder) | Eye of Unmaking (heroic) | ||
| Heart of Unliving (Raid Finder) | Heart of Unliving (heroic) | ||
| Resolve of Undying (Raid Finder) | Resolve of Undying (heroic) | ||
| Will of Unbinding (Raid Finder) | Will of Unbinding (heroic) | ||
| Wrath of Unchaining (Raid Finder) | Wrath of Unchaining (heroic) | ||
Videos
10-man Normal PTR
Template:Youtubelink Template:Youtubelink
Patches and hotfixes
- Hotfix (2011-12-02): Players should no longer get disconnected once they release their spirit after jumping or falling off Deathwing.
- Patch 4.3.0 (2011-11-29): Added.
References
External links
- Guides