@DeletedUser40286997 (talk | contribs) (Bot; correcting Category:Quest Rewards) |
No edit summary |
||
| Line 1: | Line 1: | ||
| + | {{ood}}{{infobox instance |
||
| − | <onlyinclude>{{tooltip |
||
| + | |name=Ragefire Chasm |
||
| − | |mode={{{mode|}}} |
||
| + | |aka=RFC |
||
| − | |arg={{{arg|}}} |
||
| + | |ss=Ragefire Chasm loading screen.jpg |
||
| − | |sell={{cost|c=30}} |
||
| + | |caption=Ragefire Chasm loading graphic |
||
| − | |icon=INV_Drink_Milk_05 |
||
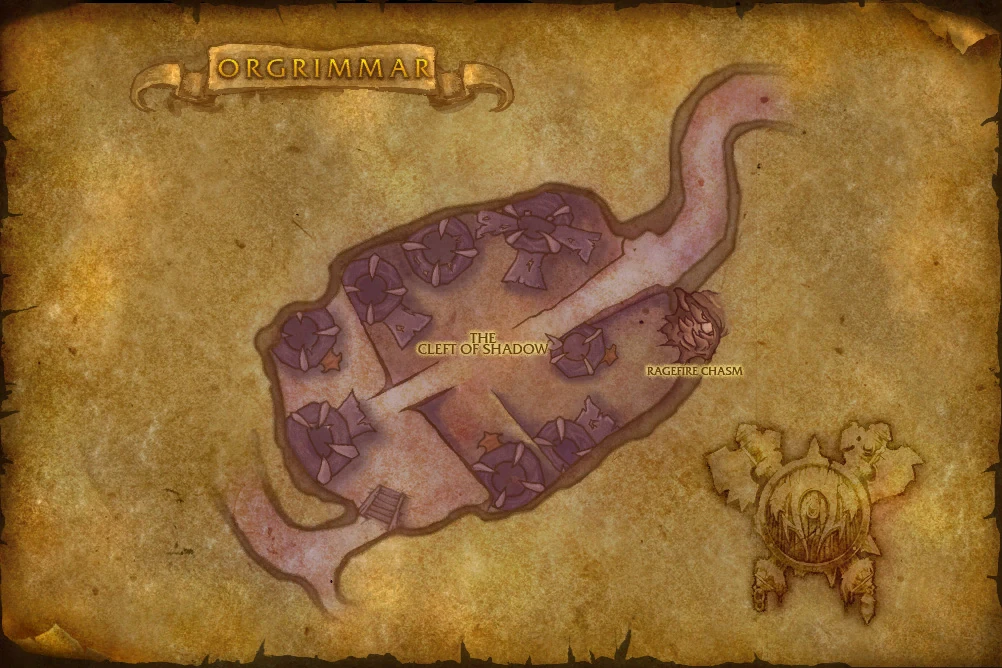
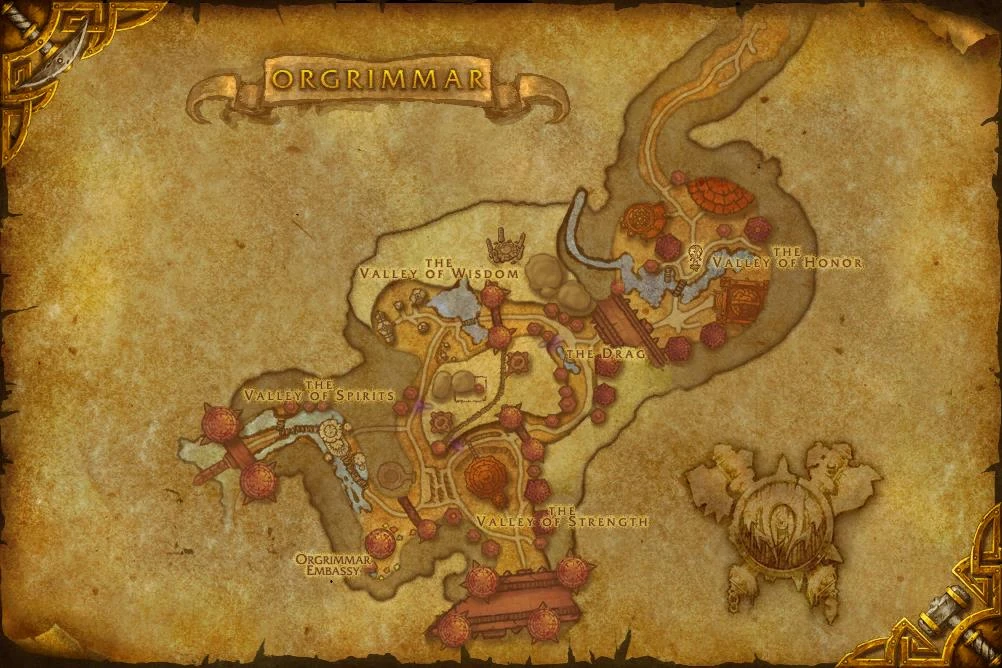
| + | |loc=[[Cleft of Shadow]], [[Orgrimmar]] |
||
| − | |quality=Common |
||
| + | |race={{Race|Orc }}<br />{{Race|Trogg }}<br />{{RaceIconExt|Lava}} [[Lava elemental]]<br />{{Race|Satyr }}<br />{{Race|felguard }} |
||
| − | |itemid=7676 |
||
| + | |boss=[[Bazzalan]] |
||
| − | |charges=1 |
||
| − | | |
+ | |type= |
| ⚫ | |||
| − | |name=Thistle Tea |
||
| + | |minlevel=10 |
||
| ⚫ | |||
| + | |players=5 (10) |
||
| − | |classes=Rogue |
||
| + | |key= |
||
| − | |effect=Use: Instantly restores 40 energy.}}</onlyinclude> |
||
| + | |bosses={{Ragefire Chasm}} |
||
| + | }} |
||
| + | '''Ragefire Chasm''' is an instance dungeon located in [[Orgrimmar]]. The entry portal is in the [[Cleft of Shadow]], next to [[Neeru Fireblade]]'s tent. The lava-filled chasm is home to many hostile [[troggs]], and followers of the [[Burning Blade]] have also recently begun poking around the area. |
||
| − | ==Source== |
||
| + | |||
| − | This item can be crafted using [[Cooking]] (60); taught by {{loot|Uncommon|Recipe: Thistle Tea}}. |
||
| + | This is one of the shortest instances in the game, and of the easiest difficulty. For many players, this will be their first instance. See the [[Instance Grouping Guide]] for some helpful hints. |
||
| − | {{reagentbox|caption=Materials required |
||
| + | |||
| − | |item1=1x {{loot|Common|Swiftthistle}}|icon1=INV_Misc_Herb_04 |
||
| + | == History == |
||
| − | |item2=1x {{loot|Common|Refreshing Spring Water}}|icon2=INV_Drink_07}} |
||
| + | Ragefire Chasm was first discovered by Chief Goblin Engineer [[Gazlowe]], during [[Rexxar]]'s visit to [[Orgrimmar]]. Beneath the city of [[Orgrimmar]] lies this fiery chasm. Recently, a clan of [[troggs]] known as [[Ragefire Troggs]] have begun to appear in the chasm, from deep below the lava-filled tunnels. [[Magatha Grimtotem|Magatha the Seer]], of the [[tauren]] people, attempted to make peace with these creatures, but was met only with hostility. It was clear that these [[trogg]]s were not interested in diplomacy, and could potentially overwhelm the entire [[Horde]] if left unchecked. |
||
| − | This item is a quest reward from the following quests: |
||
| + | |||
| − | * {{questlong|horde|18|Plundering the Plunderers|id=2381}} |
||
| + | A sect of the mysterious [[Shadow Council]] has also taken refuge in this chasm. This sect is known as the [[Searing Blade Clan|Searing Blade]], and is led by [[Taragaman]] the Hungerer, a [[felguard]]; [[Jergosh]] the Invoker, a powerful [[warlock]]; and [[Bazzalan]], a [[satyr]]. From their dark hiding place, they plot to overthrow and destroy all that the [[Horde]] has built for themselves in these lands. |
||
| + | |||
| + | {{wow-dungeons}} |
||
| + | :''Ragefire Chasm consists of a network of volcanic caverns that lie below the orcs' new capital city of [[Orgrimmar]]. Recently, rumors have spread that a cult loyal to the demonic [[Shadow Council]] has taken up residence within the Chasm's fiery depths. This cult, known as the [[Burning Blade]], threatens the very sovereignty of [[Durotar]]. Many believe that the orc Warchief, [[Thrall]], is aware of the Blade's existence and has chosen not to destroy it in the hopes that its members might lead him straight to the Shadow Council. Either way, the dark powers emanating from Ragefire Chasm could undo all that the orcs have fought to attain.'' |
||
| + | |||
| + | :''The Warchief of the Horde, [[Garrosh Hellscream]], believes that a swift and brutal strike at the cult's lieutenants might serve as Orgrimmar's best defense. If they're not silenced, the dark powers emanating from Ragefire Chasm could undo all that the orcs have fought to attain.'' |
||
| + | |||
| + | == Maps == |
||
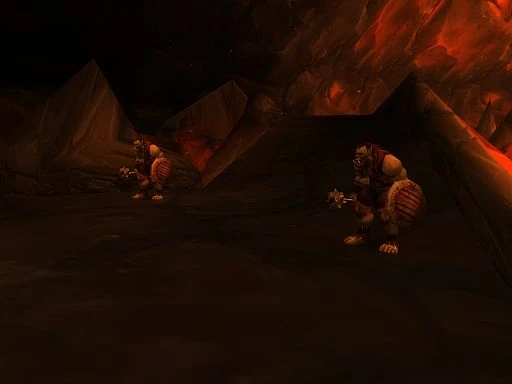
| + | [[File:Ragefire Trogg1.jpg|thumb|The Ragefire Troggs]] |
||
| + | [[File:WorldMap-Ragefire1.jpg|thumb|left|300px]] |
||
| + | {{clr}} |
||
| + | |||
| + | == Walkthroughs == |
||
| + | [[File:RFCbosses.jpg|thumb|Ragefire Chasm bosses]] |
||
| + | Along with [[The Deadmines]], Ragefire Chasm is the lowest level instance in the game (recommended for players no higher than level 21). This instance is pretty much an easy experience and a good introduction to the [[instance]] system for those who are unfamiliar with it. |
||
| + | |||
| + | === Group Selection === |
||
| + | The group that you bring with you into the Chasm shouldn't affect your ability to complete the instance. As long as you have a good leveled batch of players, there is little to stop you in this instance. Definitely bring a healer along though, as you will need to make sure characters don't die. It's a long walk from the graveyard outside [[Orgrimmar]] back to [[the Cleft of Shadow]]. Keep in mind that all the [[mob]]s in the Ragefire Chasm are [[Elite creature|elite]] and much more powerful then your average mob. It will take teamwork to defeat these enemies, which is key to any instance. |
||
| + | |||
| + | === The Chasm === |
||
| + | After some initial elemental mobs, you will be forced to fight the [[trogg]]s of the instance. These mobs should give you little difficulty and are quite farmable for the relevant quest ({{quest|Testing an Enemy's Strength}}). Just be sure not to pull too many at the same time, or things could get hairy. Once you fight your way up to the top of the western ledge of troggs you will find the body of [[Maur Grimtotem]] who will allow you to complete another quest. |
||
| + | |||
| + | Upon dealing with the troggs you can continue through the instance to another batch of elemental mobs. These enemies are fairly easy if pulled in small groups of 1 to 2. Once dealt with you can begin work on fighting the Searing Blade Cultists. Be sure to kill as many of the cultists as possible if you are doing the quest {{quest|The Power to Destroy...}}, as these mobs will drop the books required. These groups of mobs usually come in pulls of 2 to 3 mobs, and will require coordination to effectively deal with. |
||
| + | |||
| + | Once you’ve cleared your way to the massive demon standing in the middle of the lake of lava, you can engage one of the powerful bosses of this instance; [[Taragaman the Hungerer]]. This [[Boss]] is fairly easy to deal with, and once you have effectively engaged with a melee [[tank]], [[DPS]] will bring him down quickly. He hits harder than anything else in the instance, though, and has an uppercut that can hit you into other mobs or the lava, as well as a Blast Wave attack that has an annoying tendency of killing Imp pets that get too close. Once killed, be sure to loot his heart to complete the quest. |
||
| + | |||
| + | Once you are finished battling against the demon, the next two targets will be the leaders of the Searing Blade: [[Bazzalan]] and [[Jergosh the Invoker]]. Jergosh is located just ahead of where Taragaman was, while Bazzalan is located up the adjacent walkway, right above Jergosh. |
||
| + | |||
| + | Both of these mobs are straightforward fights as long as you do not drag any additional enemies into the fray. Once they are slain, the instance is effectively over and you can return to the entrance. As long as you didn't run the instance in a marginal group it shouldn't have taken you more than an hour. Not bad for an instance with five quests and a large number of blue drops. |
||
| + | |||
| + | == Quest Guide == |
||
| + | #[[Quest:Enemies Below (Orgrimmar)]] / [[Quest:Enemies Below (Thunder Bluff)]] / [[Quest:Enemies Below (Undercity)]] |
||
| + | #*[[Quest:Taragaman the Hungerer]] |
||
| + | #*[[Quest:Elemental Tampering]] |
||
| + | #*[[Quest:Repel the Invasion]] |
||
| + | |||
| + | ==Dungeon Denizens== |
||
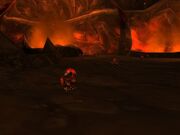
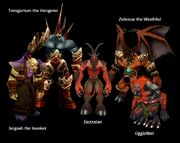
| + | [[File:Searing Blade1.jpg|thumb|Grunts of the Searing Blade Clan]] |
||
| + | * {{RaceIconExt|Doomguard|Small}} [[Doomguard]]s (one, [[Zelemar the Wrathful]]) |
||
| + | * {{RaceIconExt|Felguard|Small}} [[Felguard]]s (one, [[Taragaman the Hungerer]]) |
||
| + | * {{RaceIconExt|Lava|Small}} [[Lava elemental]]s |
||
| + | * {{RaceIcon|Orc|Male|Small}}{{RaceIcon|Orc|Female|Small}} [[Orc]]s |
||
| + | * {{RaceIconExt|Satyr|Small}} [[Satyr]] (one, [[Bazzalan]]) |
||
| + | * {{RaceIcon|Tauren|Male|Small}} [[Tauren]] (one, [[Maur Grimtotem]], dead) |
||
| + | * {{RaceIconExt|Trogg|Small}} [[Trogg]]s |
||
| + | * {{RaceIconExt|Voidwalker|Small}} [[Voidwalker]]s |
||
| + | * {{RaceIconExt|Worm|Small}} [[Worm]]s |
||
| + | |||
| + | |||
| + | ===Encounters=== |
||
| + | {| class="darktable" |
||
| + | |- |
||
| + | ! Bosses || Monsters |
||
| + | |- valign=top |
||
| + | | |
||
| + | * '''Ragefire Chasm |
||
| + | **{{RaceIconExt|Satyr|Small}} {{NPC||Bazzalan}} |
||
| + | **{{RaceIconExt|Orc_Male|Small}} {{NPC||Jergosh the Invoker}} |
||
| + | **{{RaceIconExt|Trogg|Small}} {{NPC||Oggleflint}} |
||
| + | **{{RaceIconExt|Felguard|Small}} {{NPC||Taragaman the Hungerer}} |
||
| + | **{{RaceIconExt|Doomguard|Small}} {{NPC||Zelemar the Wrathful}} (summoned) |
||
| + | | |
||
| + | * {{NPC||Earthborer}} |
||
| + | * {{NPC||Molten Elemental}} |
||
| + | * {{NPC||Ragefire Shaman}} |
||
| + | * {{NPC||Ragefire Trogg}} |
||
| + | * {{NPC||Searing Blade Cultist}} |
||
| + | * {{NPC||Searing Blade Enforcer}} |
||
| + | * {{NPC||Searing Blade Warlock}} |
||
| + | ** {{NPC||Voidwalker Minion}} |
||
| + | |} |
||
| + | |||
| + | == Loot == |
||
| + | {{main|Ragefire Chasm loot}} |
||
| + | |||
| + | ==Notes== |
||
| + | *The Ragefire Chasm was mostly a Horde-only instance before the introduction of the [[Dungeon Finder]]; its location within a Horde capital city made entrance all but impossible for level-appropriate Alliance characters. Alliance players could remove all gear to keep from having to repair and try to ghost towards the instance. Later another way to access RFC in safety was while doing the [[Battle for the Undercity]] quest chain. After completing the quest {{questlong|Alliance|74|Fate, Up Against Your Will}} the player was in an instanced version of Orgrimar that allowed complete exploration with no fear of harassment by either NPCs or player characters. A later patch not only patched this work-around, but also prevented Fishing while in this instanced version of Orgrimmar. With the release of [[Patch 4.0.3a]], the [[Battle for the Undercity]] has been removed entirely. |
||
| + | |||
| + | ==Patch changes== |
||
| + | *{{Patch 4.0.1|note=raised to a level 15-21 zone in Cataclysm to match the level range of the [[Deadmines]]}} |
||
| + | *{{Patch 1.3.0|note= |
||
| + | **Capped at ten players. |
||
| + | **Lengthened the respawn time of many of the creatures in Ragefire Chasm. |
||
| + | **Characters dying in the instanced portions of Ragefire Chasm will now correctly receive a corpse marker in the minimap and see the message letting them know that they need to enter the instance before they will be able to resurrect.}} |
||
| + | |||
| + | ==Videos== |
||
| + | |||
| + | <youtube>4UStXY9-Rog</youtube> |
||
| + | [http://www.wowhead.com/?forums&topic=72686 Project Lore: Ragefire Chasm] |
||
==External links== |
==External links== |
||
| + | <!-- Read http://www.wowpedia.org/Wowpedia:External_links before posting your links here. |
||
| ⚫ | |||
| + | Links that do not conform to the rules will be DELETED. |
||
| ⚫ | |||
| + | Repeat violations may result in a BAN. |
||
| + | Have a nice day. :) --> |
||
| ⚫ | |||
| + | {{Dungeons|World of Warcraft}} |
||
| + | {{Orgrimmar}} |
||
| + | [[fr:Gouffre de Ragefeu]] |
||
| − | [[Category:World of Warcraft common items]] |
||
| + | [[nl:Ragefire Chasm]] |
||
| + | [[Category:Instances]] |
||
| + | [[Category:Ragefire Chasm| ]] |
||
| + | [[Category:Walkthroughs]] |
||
| + | [[Category:Caves]] |
||
| ⚫ | |||
Revision as of 18:42, 19 November 2011
| Ragefire Chasm | ||||||||||
|---|---|---|---|---|---|---|---|---|---|---|
| RFC | ||||||||||
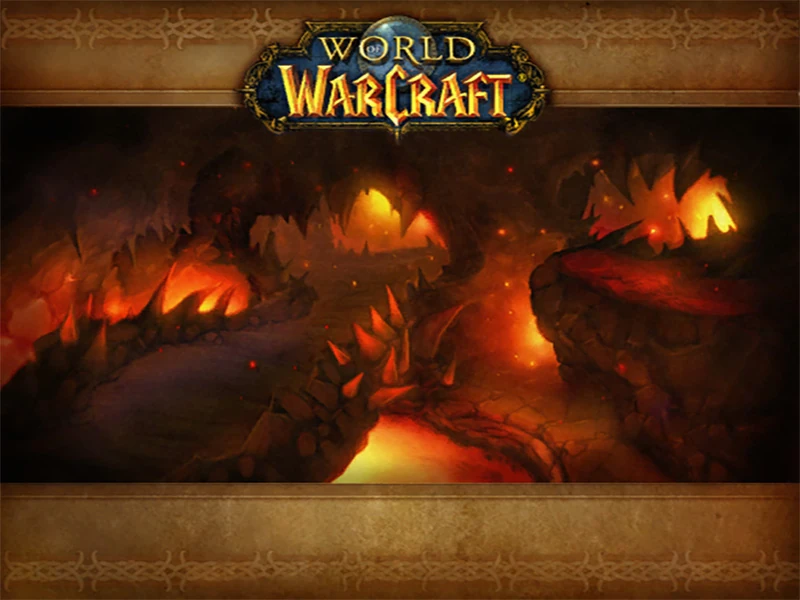 Ragefire Chasm loading graphic | ||||||||||
| Location | Cleft of Shadow, Orgrimmar | |||||||||
| Race(s) |
| |||||||||
| End boss | Bazzalan | |||||||||
| Advised level | 15-21 | |||||||||
| Minimum level | 10 | |||||||||
| Player limit | 5 (10) | |||||||||
| ||||||||||
Ragefire Chasm is an instance dungeon located in Orgrimmar. The entry portal is in the Cleft of Shadow, next to Neeru Fireblade's tent. The lava-filled chasm is home to many hostile troggs, and followers of the Burning Blade have also recently begun poking around the area.
This is one of the shortest instances in the game, and of the easiest difficulty. For many players, this will be their first instance. See the Instance Grouping Guide for some helpful hints.
History
Ragefire Chasm was first discovered by Chief Goblin Engineer Gazlowe, during Rexxar's visit to Orgrimmar. Beneath the city of Orgrimmar lies this fiery chasm. Recently, a clan of troggs known as Ragefire Troggs have begun to appear in the chasm, from deep below the lava-filled tunnels. Magatha the Seer, of the tauren people, attempted to make peace with these creatures, but was met only with hostility. It was clear that these troggs were not interested in diplomacy, and could potentially overwhelm the entire Horde if left unchecked.
A sect of the mysterious Shadow Council has also taken refuge in this chasm. This sect is known as the Searing Blade, and is led by Taragaman the Hungerer, a felguard; Jergosh the Invoker, a powerful warlock; and Bazzalan, a satyr. From their dark hiding place, they plot to overthrow and destroy all that the Horde has built for themselves in these lands.
From the World Dungeons page on the official World of Warcraft Community Site:
- Ragefire Chasm consists of a network of volcanic caverns that lie below the orcs' new capital city of Orgrimmar. Recently, rumors have spread that a cult loyal to the demonic Shadow Council has taken up residence within the Chasm's fiery depths. This cult, known as the Burning Blade, threatens the very sovereignty of Durotar. Many believe that the orc Warchief, Thrall, is aware of the Blade's existence and has chosen not to destroy it in the hopes that its members might lead him straight to the Shadow Council. Either way, the dark powers emanating from Ragefire Chasm could undo all that the orcs have fought to attain.
- The Warchief of the Horde, Garrosh Hellscream, believes that a swift and brutal strike at the cult's lieutenants might serve as Orgrimmar's best defense. If they're not silenced, the dark powers emanating from Ragefire Chasm could undo all that the orcs have fought to attain.
Maps
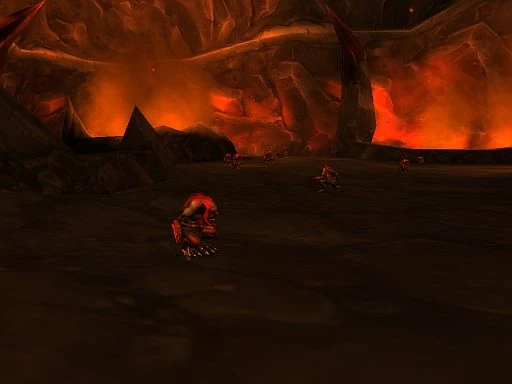
The Ragefire Troggs
Walkthroughs
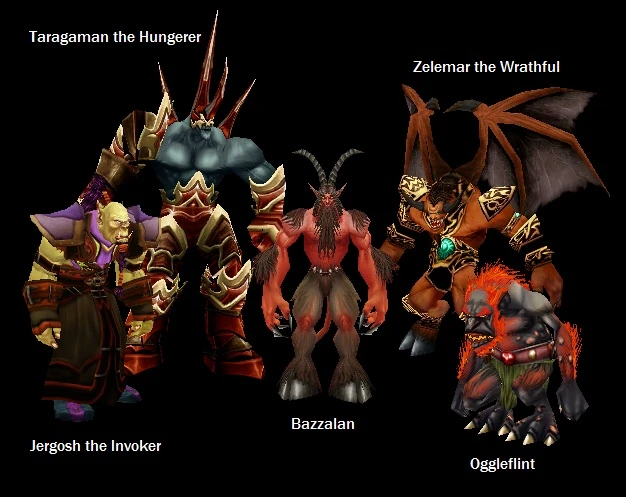
Ragefire Chasm bosses
Along with The Deadmines, Ragefire Chasm is the lowest level instance in the game (recommended for players no higher than level 21). This instance is pretty much an easy experience and a good introduction to the instance system for those who are unfamiliar with it.
Group Selection
The group that you bring with you into the Chasm shouldn't affect your ability to complete the instance. As long as you have a good leveled batch of players, there is little to stop you in this instance. Definitely bring a healer along though, as you will need to make sure characters don't die. It's a long walk from the graveyard outside Orgrimmar back to the Cleft of Shadow. Keep in mind that all the mobs in the Ragefire Chasm are elite and much more powerful then your average mob. It will take teamwork to defeat these enemies, which is key to any instance.
The Chasm
After some initial elemental mobs, you will be forced to fight the troggs of the instance. These mobs should give you little difficulty and are quite farmable for the relevant quest (Testing an Enemy's Strength). Just be sure not to pull too many at the same time, or things could get hairy. Once you fight your way up to the top of the western ledge of troggs you will find the body of Maur Grimtotem who will allow you to complete another quest.
Upon dealing with the troggs you can continue through the instance to another batch of elemental mobs. These enemies are fairly easy if pulled in small groups of 1 to 2. Once dealt with you can begin work on fighting the Searing Blade Cultists. Be sure to kill as many of the cultists as possible if you are doing the quest The Power to Destroy..., as these mobs will drop the books required. These groups of mobs usually come in pulls of 2 to 3 mobs, and will require coordination to effectively deal with.
Once you’ve cleared your way to the massive demon standing in the middle of the lake of lava, you can engage one of the powerful bosses of this instance; Taragaman the Hungerer. This Boss is fairly easy to deal with, and once you have effectively engaged with a melee tank, DPS will bring him down quickly. He hits harder than anything else in the instance, though, and has an uppercut that can hit you into other mobs or the lava, as well as a Blast Wave attack that has an annoying tendency of killing Imp pets that get too close. Once killed, be sure to loot his heart to complete the quest.
Once you are finished battling against the demon, the next two targets will be the leaders of the Searing Blade: Bazzalan and Jergosh the Invoker. Jergosh is located just ahead of where Taragaman was, while Bazzalan is located up the adjacent walkway, right above Jergosh.
Both of these mobs are straightforward fights as long as you do not drag any additional enemies into the fray. Once they are slain, the instance is effectively over and you can return to the entrance. As long as you didn't run the instance in a marginal group it shouldn't have taken you more than an hour. Not bad for an instance with five quests and a large number of blue drops.
Quest Guide
- Quest:Enemies Below (Orgrimmar) / Quest:Enemies Below (Thunder Bluff) / Quest:Enemies Below (Undercity)
Dungeon Denizens

Grunts of the Searing Blade Clan
- File:IconSmall Doomguard Small.gif Doomguards (one, Zelemar the Wrathful)
- File:IconSmall Felguard Small.gif Felguards (one, Taragaman the Hungerer)
- File:IconSmall Lava Small.gif Lava elementals
 Orcs
Orcs- File:IconSmall Satyr Small.gif Satyr (one, Bazzalan)
- Tauren (one, Maur Grimtotem, dead)
- File:IconSmall Trogg Small.gif Troggs
- File:IconSmall Voidwalker Small.gif Voidwalkers
- File:IconSmall Worm Small.gif Worms
Encounters
| Bosses | Monsters |
|---|---|
Loot
- Main article: Ragefire Chasm loot
Notes
- The Ragefire Chasm was mostly a Horde-only instance before the introduction of the Dungeon Finder; its location within a Horde capital city made entrance all but impossible for level-appropriate Alliance characters. Alliance players could remove all gear to keep from having to repair and try to ghost towards the instance. Later another way to access RFC in safety was while doing the Battle for the Undercity quest chain. After completing the quest [74] Fate, Up Against Your Will the player was in an instanced version of Orgrimar that allowed complete exploration with no fear of harassment by either NPCs or player characters. A later patch not only patched this work-around, but also prevented Fishing while in this instanced version of Orgrimmar. With the release of Patch 4.0.3a, the Battle for the Undercity has been removed entirely.
Patch changes
- Patch 4.0.1 (2010-10-12): raised to a level 15-21 zone in Cataclysm to match the level range of the Deadmines
- Patch 1.3.0 (2005-03-07):
- Capped at ten players.
- Lengthened the respawn time of many of the creatures in Ragefire Chasm.
- Characters dying in the instanced portions of Ragefire Chasm will now correctly receive a corpse marker in the minimap and see the message letting them know that they need to enter the instance before they will be able to resurrect.
Videos
External links
| ||||||||
nl:Ragefire Chasm