Nebaru40667@legacy41560560 (talk | contribs) |
m (Undo revision 2765632 by Darksora110 (talk)) |
||
| Line 1: | Line 1: | ||
| + | {{Removed|patch=4.1.0}} |
||
| − | {{stub/Other}} |
||
| + | {{Npcbox |
||
| − | {{Server_EU|PvE|English|Wildhammer Europe}} |
||
| + | |name = Halazzi |
||
| − | {{Infobox BattlegroupN|EU|Misery}} |
||
| + | |image = Halazzi.jpg |
||
| + | |faction=Combat |
||
| + | |title = Lynx Avatar |
||
| + | |races = [[Troll]] / [[Lynx]] |
||
| + | |creature = Humanoid |
||
| + | |level = ?? |
||
| + | |type= Boss |
||
| + | |status = Killable |
||
| + | |location = [[Zul'Aman]] |
||
| + | |health = 431,000 |
||
| + | |instance = Zul'Aman (original) |
||
| + | }} |
||
| + | {{about||the new 5-man version of this encounter|Halazzi}} |
||
| − | == Wildhammer (PvE, EU) == |
||
| − | Wildhammer is a European PvE server. The playerbase on Wildhammer mostly consisting of people that have migrated to Wildhammer from Terenas, Turalyon, Thunderhorn and several other servers. Wildhammer was opened originally as an overflow server for Arathor. It commenced service in mid-Summer 2006. |
||
| + | '''Halazzi''' is the [[Amani Empire|Amani]] lord of [[lynx]]es. He is one of the four animal bosses in the [[Zul'Aman]] [[instance]]. He guards the cage containing the gnome female [[Ashli]] who is part of the [[Zul'Aman Timed Event]]. |
||
| − | === Wildhammer Forum === |
||
| − | While there have been discussions concerning the possibility to create a forum away from Blizzards less than reliable servers, the [http://forums.wow-europe.com/board.html?forumId=1163&sid=1 realm forums] remain at the official World of Warcraft forums. |
||
| − | + | == Abilities == |
|
| + | The fight consists of 3 phases. Halazzi is a single NPC until taken to 75%, 50% and 25%, at which point he splits into his [[Troll Spirit]] and a '''Spirit of the Lynx'''. Take either spirit to 20% to reunite them into the single NPC. |
||
| − | Raid progress information for wildhammer is currently kept at [http://forums.wow-europe.com/thread.html?topicId=273218395&sid=1 this forum thread] |
||
| + | * Halazzi cannot perform crushing blows |
||
| ⚫ | |||
| + | * He will enrage after 10 minutes |
||
| − | Guild list taken from thread on realm forum - [http://forums.wow-europe.com/thread.html?topicId=49495411&sid=1 Guilds on Wildhammer] |
||
| + | * Halazzi has ~600k health in non-split form. When split, Halazzi's max and current health changes to ~240k health, while the Spirit of the Lynx spawns with ~230k health. |
||
| + | '''Phase 1 - Single NPC, no totems''' |
||
| − | ===== {{Horde Icon Small}} [[Horde]] ===== |
||
| − | * Awakening [http://www.awakening-wildhammer.eu website] |
||
| − | * Axe of Hellscream (''Italian guild'') [http://AxeOfHellscream.interfree.it website] |
||
| − | * Caern Morghen [http://cmg.1hand.pl website] |
||
| − | * Delirium [http://www.deliriumguild.eu website] |
||
| − | * Chaos Resurrected [http://www.dreadlords.eu website] |
||
| − | * Frostwolf Tribe |
||
| − | * Fury [http://www.fury-guild.co.uk website] |
||
| − | * Holy Moly |
||
| − | * Illidans Revenge (''Dutch guild'') |
||
| − | * Life Before Death |
||
| − | * New Bambocha (''CZ/SVK guild'') [http://www.bambocha.sk website] |
||
| − | * Prophecy [http://www.prophecy-horde.com website] |
||
| − | * PWND |
||
| − | * Raiders of the Lost Orc |
||
| − | * Refuge [http://refugeguild.net website] |
||
| − | * Tabula Rasa [http://tabularasaguild.eu website] |
||
| − | * Uniti Resisitiamo (''Italian guild'') |
||
| − | * Unleashed [http://www.unleashedguild.co.uk website] |
||
| − | * War Nation [http://war-nation.com website] |
||
| − | * Wipe [http://www.wipe-guild.com website] |
||
| + | * [[Frenzy (Power)|Frenzy]] — Increases Attack Speed. Can be [[Tranquilizing Shot|tranquilized]]. |
||
| − | ===== {{Alliance Icon Small}} [[Alliance]] ===== |
||
| + | * ''Saber Lash'' — Deals 47500 to 52500 damage to the tank (shared with up to one additional target in his front melee zone), mitigated by armor. <!-- Confirmed max 2 targets by Mikk 20080829. 5 people standing on top of the tank. Only 2 targets were ever mentioned at a time in the combat log. No, the clothies didn't live. --> |
||
| − | * Affinity |
||
| + | |||
| − | * Blood Wolves of the Moon [http://www.bloodwolvesofthemoon.eu/ website] |
||
| + | '''Phase 2 - Two Spirits, totems''' (75%, 50%, and 25% health) |
||
| − | * Brave New World [http://www.bnworldofwow.co.uk website] |
||
| + | |||
| − | * Chariot of The Gods [http://http://www.gods.devious-interactive.com website] |
||
| + | * Transfigure - ~4K damage on the entire raid group when transitioning from Phase 1 to Phase 2. |
||
| − | * Czech Alliance (CZ/SVK Guild) [http://cza.voy.cz website] |
||
| + | * Phase 2 ends when either spirit reaches 20% health. '''Spirit of the Lynx''' then despawns. |
||
| − | * Devils Nightmare [http://www.Devils-Nightmare.com website] |
||
| + | * '''Corrupted Lightning Totem''' — 5000 Nature damage, chains to nearby targets. Is cast frequently. |
||
| − | * Divine Guardians |
||
| + | * [[Flame Shock]] — 5000 Fire base with a 4K tick. Dispellable. |
||
| − | * Freedom [http://www.phpbbplanet.com/konoob website] |
||
| + | * [[Earth Shock]] — 4000 to 5000 Nature damage, interrupts any school being cast for 3 seconds. |
||
| − | * Genova [http://genova.7.forumer.com/ website] |
||
| + | |||
| − | * Good Deeds [http://guild-gd.info website] |
||
| + | '''Phase 3 - Single NPC, totems''' (<25% health) |
||
| − | * Heroes for Hire [http://s7.invisionfree.com/HeroesforHire/ website] |
||
| + | * Enrage — Increased melee damage. |
||
| − | * Icon [http://www.icon-guild.com website] |
||
| + | * Totems, as in Phase 2. |
||
| − | * Immortals [http://immortals.executus.net website] |
||
| + | |||
| − | * Istanbul [http://www.wow-turkiye.gen.tr website] |
||
| + | == Strategy == |
||
| − | * Knight of Dark Renown [http://www.guildportal.com/Guild.aspx?GuildID=131032&TabID=1115603 website] |
||
| + | This is a heavy healing encounter, so bring consumables or a Shadow Priest. Your tanks should have at least 18k health each fully buffed, and must be kept fully healed at all times. Bring three healers, assigning one healer to each tank, and having the third healer split between two. Having a Resto Druid as your third healer is helpful, because he can keep full stacks of Lifebloom on both tanks and innervate one of the healers. Use mana potions as soon as needed, you will need another one |
||
| − | * Metal Warriors |
||
| + | before the encounter ends, so starting potion cooldown early is advisable. |
||
| − | * New Order |
||
| + | |||
| − | * [[Nase Guilda]] (''CZ/SVK Guild'') [http://www.naseguilda.cz website] |
||
| ⚫ | |||
| − | * Pestilence [http://ww.pestilence.nl website] |
||
| + | During this phase all damage will be focused on the two tanks. The main tank should begin the pull by running forward and engaging Halazzi. The off-tank should run with the main tank. Do not spend time attempting to turn the boss, the off-tank must be in position as quickly as possible. |
||
| − | * Silent Kill [http://www.wowsilentkill.tk website] |
||
| + | |||
| − | * Silverwing Angels [http://www.silverwingangels.com website] |
||
| + | * The off-tank must stack up with the main-tank at all times. |
||
| − | * Sorrow [http://sorrow-guild.com/ website] |
||
| + | * All melee must stay behind Halazzi to prevent eating a Saber Lash. |
||
| − | * The Demon Crusade [http://www.demoncrusade.net website] |
||
| + | * Hunters should use Tranquilizing Shot when Halazzi gains Frenzy (jump and fire Tranquilizing Shot to interrupt any current shot rotation). |
||
| − | * The Fallen Angels [http://www.tfa-wow.net website] |
||
| + | * If no Hunters are in the raid, tanks should use trinkets to help mitigate Frenzy. |
||
| − | * [[The Swedish Legion]] (''Swedish speaking Guild'') [http://www.swedishlegion.se/ website] |
||
| + | * Assign a healer to the off-tank. |
||
| − | * The Twisted Ones |
||
| + | |||
| − | * The Old Garrison [http://www.theoldgarrison.com website] |
||
| + | '''Saber Lash''' is a frontal cleave that can hit up to two targets, splitting the total damage evenly between them. Two tanks must both be in front of the boss in order to properly split the damage. This ability occurs randomly about every 5 to 15 seconds, but often occurs very frequently. This is similar to an ability possessed by [[Mother Shahraz]]. |
||
| − | * Veneratio [http://www.veneratioguild.co.uk website] |
||
| + | |||
| − | * Vikings of Midgård [http://wow.vikingsofmidgard.com/ website] |
||
| + | In the event that one of the tanks parries, dodges, or blocks, the other tank still only takes half the Saber Lash if positioning is correct. The tank that parried or dodged completely avoids the damage that they would have taken otherwise. High dodge/parry on the OT is an advantage. |
||
| − | * Void Watch |
||
| + | |||
| − | * Wardens |
||
| + | === Phase 2 === |
||
| + | This phase begins when the merged avatar form of Halazzi is brought to 75%, 50%, and 25% health. At the beginning of this phase he will split into his troll and spirit lynx forms, dealing 4k AoE damage to everyone in the raid. |
||
| + | |||
| + | This phase ends when either Halazzi or the Spirit Lynx reaches 20% health. The Spirit Lynx has 10% less health than Halazzi's troll form, but totems spawn near Halazzi so groups with melee damage may prefer to focus on Halazzi instead of the Lynx. Establish your phase 2 DPS target before beginning the fight. |
||
| + | |||
| + | Halazzi does not perform Saber Lash during this phase. |
||
| + | |||
| + | His DPS drops significantly and the lynx does not hit hard. It is possible for one paladin to heal both tanks, so the other 2 healers can be assigned to each raid |
||
| + | group for spot healing and decursing. This significantly helps if your healers run into mana issues, because they wont overheal and decurse the same person. |
||
| + | |||
| + | * The main-tank continues to tank the troll form of Halazzi. |
||
| + | * The off-tank's priority is to pick up and tank the Spirit Lynx. |
||
| + | * Main tank should have cast bars enabled and announce when totems are spawned. |
||
| + | * ALL DPS must switch immediately to Corrupted Lightning totems immediately. They have 8900 health |
||
| + | * Raid members must be kept healed up to prevent Flame Shock's initial damage from resulting in death. |
||
| + | * Flame Shock debuff must be removed immediately (similar to Maiden of Virtue's Holy Fire). |
||
| + | * Assign 2 offhealers a group to spot heal, main healer can keep both tanks up |
||
| + | * If you have a warlock cast Curse of Weakness on the lynx. |
||
| + | |||
| + | The major priorities in this phase are to destroy the totems as quickly as possible and to dispel the Flame Shock debuff from raid members. The most efficient method to handle totems is for the main tank to enable cast bars as there is a one second cast period when Halazzi drops a totem. |
||
| + | |||
| + | Totems can be targeted using a macro such as: |
||
| + | <pre>/target Corrupted Lightning Totem</pre> |
||
| + | |||
| + | Please see the [[Talk:Halazzi#Extended_Macro_Discussion|discussion page]] for further information about possible targeting macros. |
||
| + | |||
| + | The off-tank might find the following macro useful (replace Taunt with Growl for druids): |
||
| + | <pre>/cleartarget |
||
| + | /targetexact Spirit of the Lynx |
||
| + | /cast [exists] Taunt |
||
| + | /target [noexists] Halazzi</pre> |
||
| + | |||
| + | This will target the Spirit if it is up, and taunt it, otherwise it will keep targeting Halazzi. One can start spamming it when the spirit is about to spawn. Due to the exists condition, it won't waste a taunt on Halazzi. |
||
| + | |||
| + | When either the Spirit Lynx or Halazzi's troll form are brought to 20%, they will join back together into the merged avatar form, assume the health he had before splitting, and resume performing Saber Lash. Generally as the Phase 2 DPS target reaches 20%, the tanks should begin to stack up again. |
||
| + | |||
| + | === Phase 3 === |
||
| + | When Halazzi joins back together again following the third split phase (from 25% to 0% health), Halazzi will combine Phase 1 and Phase 2 abilities. |
||
| + | |||
| + | * Halazzi enrages, dealing more damage to the main-tank. |
||
| + | * Halazzi will continue to Saber Lash so tanks must remain stacked during this phase. |
||
| + | * Totems will continue dropping during this phase and must be DPS priority. |
||
| + | * Halazzi also continues casting Flame Shock on raid members, requiring extensive raid healing. |
||
| + | |||
| + | This phase requires even more healing as the melee attacks from the boss are increased from previous phases. |
||
| + | |||
| + | === Additional tips === |
||
| + | * Druids in Bear form can tank Halazzi in Phase 1 very efficiently because he cannot perform crushing blows. |
||
| + | |||
| + | * Halazzi is tauntable, as is the Spirit Lynx. Be careful not to have taunt on cooldown when the spirit is about to appear. |
||
| + | |||
| + | * Hunter's Tranquilizing Shot can dispel Halazzi's Frenzy, greatly reducing incoming damage. |
||
| + | |||
| + | * The Spirit Lynx will aggro on a healer quickly at the beginning of Phase 2; pick it up quickly. |
||
| + | |||
| + | * DPS should create a macro to "/target corrupted" to take down the totems as quickly as possible. |
||
| + | |||
| + | * Tauren have a slightly larger hitbox than other characters; if your main-tank is a Tauren and the off-tank is not, the off-tank should move closer to Halazzi to ensure the Saber Lash is shared. |
||
| + | |||
| + | * Because the secondary Saber Lash target is positionally determined, not threat-based, Paladins can use Blessing of Protection on the OT (or if the OT is a paladin he/she can Divine Shield) to eliminate Saber Lash damage. |
||
| + | |||
| + | * The following macro can be helpful for the DPS classes to take down the Corrupted Lightning Totems. It is a "remake" of the Illhoof macro, so just spam it over and over and it will automatically target the correct target. |
||
| + | <pre>/cleartarget |
||
| + | /target Corrupted Lightning Totem |
||
| + | /stopmacro [nodead, harm] |
||
| + | /target Halazzi</pre> |
||
| + | |||
| + | == Quotes == |
||
| + | Timer progression: |
||
| + | *{{text|yell|I be waitin, strangers. Your deaths gonna make me stronger!}} |
||
| + | *{{text|yell|Come, fools. Fill ma empty cages...}} |
||
| + | |||
| + | Aggro: |
||
| + | *{{text|yell|Get on your knees and bow to da fang and claw!}} |
||
| + | |||
| + | Sabre Lash: |
||
| + | *{{text|yell|You gonna leave in pieces!}} |
||
| + | *{{text|yell|Me gonna carve ya now!}} |
||
| + | |||
| + | Splits into Halazzi and Lynx: |
||
| + | *{{text|yell|I fight wit' untamed spirit...}} |
||
| + | |||
| + | Returns to Halazzi-only: |
||
| + | *{{text|yell|Spirit, come back to me!}} |
||
| + | |||
| + | Death: |
||
| + | *{{text|yell|Chaga... choka'jinn.}} |
||
| + | |||
| + | == Loot == |
||
| + | For the timed event loot, see the [[Zul%27Aman_timed_event#Loot|Zul'Aman timed event]] article. |
||
| + | |||
| + | {{Lootbox|Halazzi loot |
||
| + | |Avalanche Leggings |
||
| + | |Robe of Departed Spirits |
||
| + | |Shimmer-Pelt Vest |
||
| + | |Shoulderpads of Dancing Blades |
||
| + | |Skullshatter Warboots |
||
| + | |Spaulders of the Advocate |
||
| + | |The Savage's Choker |
||
| + | |Badge of Justice}} |
||
| + | |||
| + | ==Patches and hotfixes== |
||
| + | {{Patch 4.1.0|note=Removed}} |
||
| + | {{Patch 2.3.0|note=Added}} |
||
| + | |||
| + | ==External links== |
||
| + | <!-- Read http://www.wowpedia.org/Wowpedia:External_links before posting your links here. |
||
| + | Links that do not conform to the rules will be DELETED. |
||
| + | Repeat violations may result in a BAN. |
||
| + | Have a nice day. :) --> |
||
| + | {{elinks-NPC|23577|armory=1}} |
||
| + | {{elink|link=http://www.wowinn.net/2008/03/25/halazzi/|site=WoW Inn|desc=How to: Halazzi, quick strategy, loots, tips for each class, etc}} |
||
| + | {{elink|type=video|site=Halazzi|desc=How-To Video|link=http://www.youtube.com/watch?v=NkjpgoGRLfM}} |
||
| + | {{elink|type=video|site=Trial by Fire (Eonar US)|desc=Druid OT PoV|link=http://www.stage6.com/user/Evilsithgirl/video/2089915/Trial-by-Fire-vs--Halazzi}} |
||
Revision as of 02:56, 26 July 2011
The subject of this article was removed from World of Warcraft in patch 4.1.0.
|
 | |||
| Title | <Lynx Avatar> | ||
| Race(s) | Troll / Lynx (Humanoid) | ||
| Level | ?? Boss | ||
| Location | Zul'Aman | ||
| Status | Killable | ||
| |||
- For the new 5-man version of this encounter, see Halazzi.
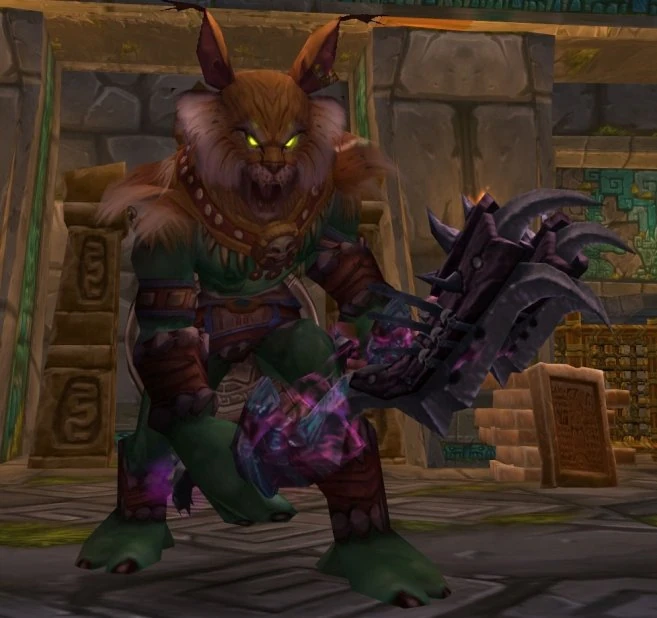
Halazzi is the Amani lord of lynxes. He is one of the four animal bosses in the Zul'Aman instance. He guards the cage containing the gnome female Ashli who is part of the Zul'Aman Timed Event.
Abilities
The fight consists of 3 phases. Halazzi is a single NPC until taken to 75%, 50% and 25%, at which point he splits into his Troll Spirit and a Spirit of the Lynx. Take either spirit to 20% to reunite them into the single NPC.
- Halazzi cannot perform crushing blows
- He will enrage after 10 minutes
- Halazzi has ~600k health in non-split form. When split, Halazzi's max and current health changes to ~240k health, while the Spirit of the Lynx spawns with ~230k health.
Phase 1 - Single NPC, no totems
- Frenzy — Increases Attack Speed. Can be tranquilized.
- Saber Lash — Deals 47500 to 52500 damage to the tank (shared with up to one additional target in his front melee zone), mitigated by armor.
Phase 2 - Two Spirits, totems (75%, 50%, and 25% health)
- Transfigure - ~4K damage on the entire raid group when transitioning from Phase 1 to Phase 2.
- Phase 2 ends when either spirit reaches 20% health. Spirit of the Lynx then despawns.
- Corrupted Lightning Totem — 5000 Nature damage, chains to nearby targets. Is cast frequently.
 [Flame Shock] — 5000 Fire base with a 4K tick. Dispellable.
 [Earth Shock] — 4000 to 5000 Nature damage, interrupts any school being cast for 3 seconds.
Phase 3 - Single NPC, totems (<25% health)
- Enrage — Increased melee damage.
- Totems, as in Phase 2.
Strategy
This is a heavy healing encounter, so bring consumables or a Shadow Priest. Your tanks should have at least 18k health each fully buffed, and must be kept fully healed at all times. Bring three healers, assigning one healer to each tank, and having the third healer split between two. Having a Resto Druid as your third healer is helpful, because he can keep full stacks of Lifebloom on both tanks and innervate one of the healers. Use mana potions as soon as needed, you will need another one before the encounter ends, so starting potion cooldown early is advisable.
Phase 1
During this phase all damage will be focused on the two tanks. The main tank should begin the pull by running forward and engaging Halazzi. The off-tank should run with the main tank. Do not spend time attempting to turn the boss, the off-tank must be in position as quickly as possible.
- The off-tank must stack up with the main-tank at all times.
- All melee must stay behind Halazzi to prevent eating a Saber Lash.
- Hunters should use Tranquilizing Shot when Halazzi gains Frenzy (jump and fire Tranquilizing Shot to interrupt any current shot rotation).
- If no Hunters are in the raid, tanks should use trinkets to help mitigate Frenzy.
- Assign a healer to the off-tank.
Saber Lash is a frontal cleave that can hit up to two targets, splitting the total damage evenly between them. Two tanks must both be in front of the boss in order to properly split the damage. This ability occurs randomly about every 5 to 15 seconds, but often occurs very frequently. This is similar to an ability possessed by Mother Shahraz.
In the event that one of the tanks parries, dodges, or blocks, the other tank still only takes half the Saber Lash if positioning is correct. The tank that parried or dodged completely avoids the damage that they would have taken otherwise. High dodge/parry on the OT is an advantage.
Phase 2
This phase begins when the merged avatar form of Halazzi is brought to 75%, 50%, and 25% health. At the beginning of this phase he will split into his troll and spirit lynx forms, dealing 4k AoE damage to everyone in the raid.
This phase ends when either Halazzi or the Spirit Lynx reaches 20% health. The Spirit Lynx has 10% less health than Halazzi's troll form, but totems spawn near Halazzi so groups with melee damage may prefer to focus on Halazzi instead of the Lynx. Establish your phase 2 DPS target before beginning the fight.
Halazzi does not perform Saber Lash during this phase.
His DPS drops significantly and the lynx does not hit hard. It is possible for one paladin to heal both tanks, so the other 2 healers can be assigned to each raid group for spot healing and decursing. This significantly helps if your healers run into mana issues, because they wont overheal and decurse the same person.
- The main-tank continues to tank the troll form of Halazzi.
- The off-tank's priority is to pick up and tank the Spirit Lynx.
- Main tank should have cast bars enabled and announce when totems are spawned.
- ALL DPS must switch immediately to Corrupted Lightning totems immediately. They have 8900 health
- Raid members must be kept healed up to prevent Flame Shock's initial damage from resulting in death.
- Flame Shock debuff must be removed immediately (similar to Maiden of Virtue's Holy Fire).
- Assign 2 offhealers a group to spot heal, main healer can keep both tanks up
- If you have a warlock cast Curse of Weakness on the lynx.
The major priorities in this phase are to destroy the totems as quickly as possible and to dispel the Flame Shock debuff from raid members. The most efficient method to handle totems is for the main tank to enable cast bars as there is a one second cast period when Halazzi drops a totem.
Totems can be targeted using a macro such as:
/target Corrupted Lightning Totem
Please see the discussion page for further information about possible targeting macros.
The off-tank might find the following macro useful (replace Taunt with Growl for druids):
/cleartarget
/targetexact Spirit of the Lynx
/cast [exists] Taunt
/target [noexists] Halazzi
This will target the Spirit if it is up, and taunt it, otherwise it will keep targeting Halazzi. One can start spamming it when the spirit is about to spawn. Due to the exists condition, it won't waste a taunt on Halazzi.
When either the Spirit Lynx or Halazzi's troll form are brought to 20%, they will join back together into the merged avatar form, assume the health he had before splitting, and resume performing Saber Lash. Generally as the Phase 2 DPS target reaches 20%, the tanks should begin to stack up again.
Phase 3
When Halazzi joins back together again following the third split phase (from 25% to 0% health), Halazzi will combine Phase 1 and Phase 2 abilities.
- Halazzi enrages, dealing more damage to the main-tank.
- Halazzi will continue to Saber Lash so tanks must remain stacked during this phase.
- Totems will continue dropping during this phase and must be DPS priority.
- Halazzi also continues casting Flame Shock on raid members, requiring extensive raid healing.
This phase requires even more healing as the melee attacks from the boss are increased from previous phases.
Additional tips
- Druids in Bear form can tank Halazzi in Phase 1 very efficiently because he cannot perform crushing blows.
- Halazzi is tauntable, as is the Spirit Lynx. Be careful not to have taunt on cooldown when the spirit is about to appear.
- Hunter's Tranquilizing Shot can dispel Halazzi's Frenzy, greatly reducing incoming damage.
- The Spirit Lynx will aggro on a healer quickly at the beginning of Phase 2; pick it up quickly.
- DPS should create a macro to "/target corrupted" to take down the totems as quickly as possible.
- Tauren have a slightly larger hitbox than other characters; if your main-tank is a Tauren and the off-tank is not, the off-tank should move closer to Halazzi to ensure the Saber Lash is shared.
- Because the secondary Saber Lash target is positionally determined, not threat-based, Paladins can use Blessing of Protection on the OT (or if the OT is a paladin he/she can Divine Shield) to eliminate Saber Lash damage.
- The following macro can be helpful for the DPS classes to take down the Corrupted Lightning Totems. It is a "remake" of the Illhoof macro, so just spam it over and over and it will automatically target the correct target.
/cleartarget
/target Corrupted Lightning Totem
/stopmacro [nodead, harm]
/target Halazzi
Quotes
Timer progression:
- I be waitin, strangers. Your deaths gonna make me stronger!
- Come, fools. Fill ma empty cages...
Aggro:
- Get on your knees and bow to da fang and claw!
Sabre Lash:
- You gonna leave in pieces!
- Me gonna carve ya now!
Splits into Halazzi and Lynx:
- I fight wit' untamed spirit...
Returns to Halazzi-only:
- Spirit, come back to me!
Death:
- Chaga... choka'jinn.
Loot
For the timed event loot, see the Zul'Aman timed event article.
Patches and hotfixes
![]() Patch 4.1.0 (2011-04-26): Removed
Patch 4.1.0 (2011-04-26): Removed
![]() Patch 2.3.0 (2007-11-13): Added
Patch 2.3.0 (2007-11-13): Added