Liryncka33976@legacy41554122 (talk | contribs) No edit summary |
m (→External links) |
||
| Line 1: | Line 1: | ||
| + | {{infobox instance |
||
| − | <div style="max-width:70em; margin-left:auto; margin-right:auto;"> |
||
| + | |name=Tempest Keep |
||
| − | |||
| + | |aka=The Eye, TE, TK Raid |
||
| − | <onlyinclude>{| width="100%" cellpadding="0" cellspacing="0" align="center" style="color:white;" |
||
| + | |ss=Tempest Keep loading screen.jpg |
||
| − | |----- style="background-color:#232325;" |
||
| + | |caption=The Eye loading graphic |
||
| − | | valign="top" rowspan="2" | |
||
| + | |loc=[[Tempest Keep]], [[Netherstorm]] |
||
| − | {| height="100%" width="100%" cellpadding="12px" cellspacing="0" align="center" style="color:white;" |
||
| + | |race={{Race|Blood Elf }}<br/>{{RaceIconExt|ArcaneGuardian|Small}} [[Arcane guardian]]<br/>{{RaceIconExt|Dragonhawk|Small}} [[Dragonhawk]]<br/>{{RaceIconExt|FelReaver|Small}} [[Void Reaver]]<br/>{{RaceIconExt|Mo'arg|Small}} [[Mo'arg]]<br/>{{RaceIconExt|Phoenix|Small}} [[Phoenix]]<br/> |
||
| − | |----- style="background-color:#202020;" |
||
| + | |boss={{npc||Kael'thas Sunstrider (tactics)||Kael'thas Sunstrider}} |
||
| − | | style="border-top: solid 1px #257575; border-bottom: solid 2px #102D32; padding-bottom: 8px;" colspan="3" valign="top" | |
||
| + | |affiliation=[[Kael'thas' forces]] |
||
| − | <font style="font-size:x-large;">[[Image:realms.gif]] Garrosh US ([[PvE]])</font> |
||
| + | |type=Raid |
||
| − | |----- |
||
| + | |level=70+ |
||
| − | | valign="top" style="background-color:#232325;" | |
||
| + | |players=25 |
||
| + | |key=[[The Tempest Key]] (removed 6/19/07) |
||
| + | |bosses={{The Eye}} |
||
| + | }} |
||
| + | {{Tempest Keep wings}} |
||
| + | {{For|other uses|Eye}} |
||
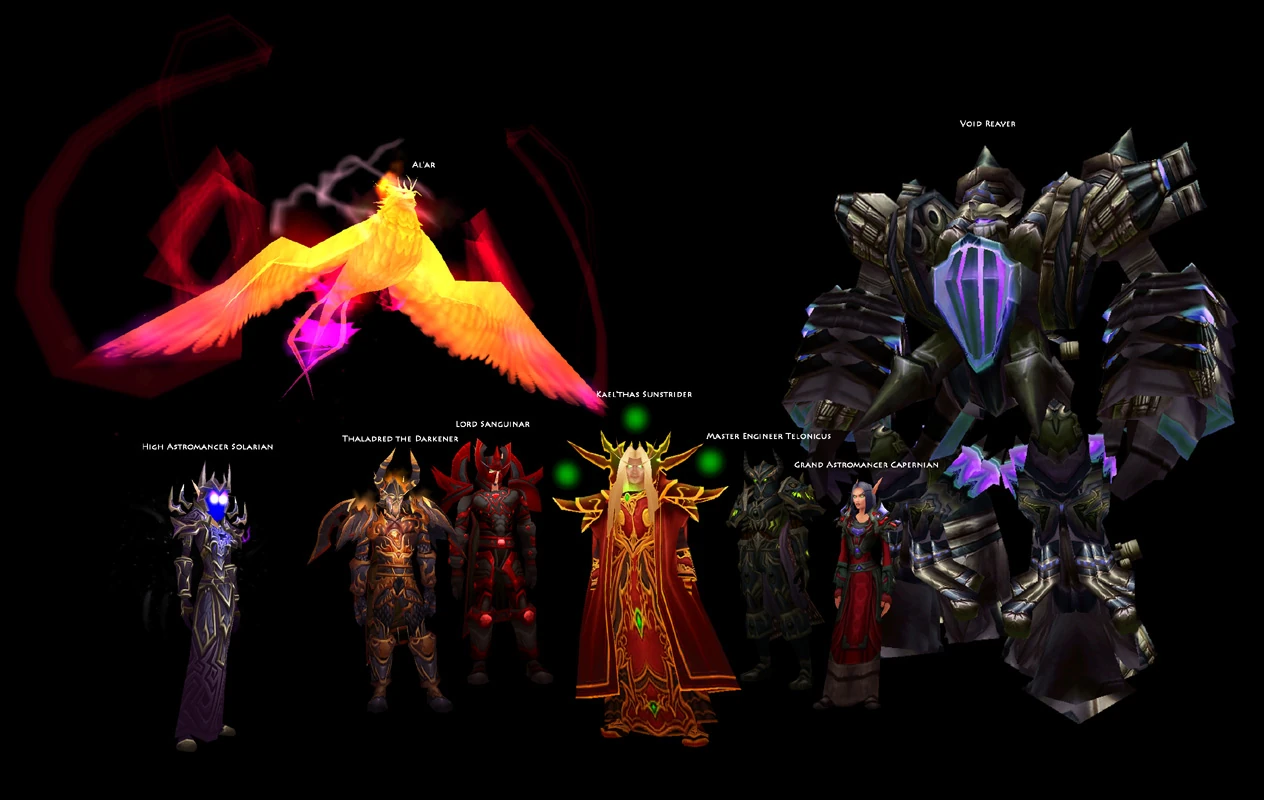
| + | [[File:The Eye bosses.jpg|thumb|250px|The Eye bosses]] |
||
| + | '''The Eye''' is the inner palace of [[Tempest Keep]] in [[Netherstorm]] and stronghold of the "Sun King", [[Kael'thas Sunstrider]]. In-game, it is known simply as "Tempest Keep". The tokens for [[tier 5]] shoulder and chest pieces drop in the Eye. There is no longer any attunement required to enter this instance. |
||
| + | ==Attunement== |
||
| + | Though the attunement is no longer required, the quests still remain in-game and can still be completed if desired. The player title of "[[Champion of the Naaru]]" was achieved by those that completed the attunement quest chain. The title is no longer available. |
||
| + | The quests to complete the attunement for The Eye are given by [[A'dal]] in [[Shattrath City]] after successful completion of {{questlong|Neutral|70g5|The Cipher of Damnation}} questlines in [[Shadowmoon Valley]]. It begins with {{questlong|Neutral|70|The Hand of Gul'dan}}. |
||
| − | | valign="top" style="background-color:#232325;" | |
||
| + | == Dungeon Denizens == |
||
| + | * {{RaceIconExt|ArcaneGuardian|Small}} [[Arcane guardian]]s |
||
| + | * {{RaceIcon|BloodElf|Male|Small}}{{RaceIcon|BloodElf|Female|Small}} [[Blood elves]] |
||
| + | ** {{RaceIconExt|Kael'thas|Small}} [[Kael'thas]] |
||
| + | * {{RaceIconExt|Dragonhawk|Small}} [[Dragonhawk]]s |
||
| + | * {{RaceIconExt|FelReaver|Small}} [[Fel reaver]] (one, [[Void Reaver]]) |
||
| + | * {{RaceIconExt|Mo'arg|Small}} [[Mo'arg]] |
||
| + | * {{RaceIconExt|Phoenix|Small}} [[Phoenix]]es |
||
| + | ===Bosses and mobs=== |
||
| − | '''Garrosh US''' was opened in January 2009 as a new realm and is a member of the [[Battlegroup US Emberstorm|Emberstorm]] battlegroup. Garrosh is located in the [[:Category:Eastern Time Zone servers|Eastern Timezone (EST)]]. The Garrosh server is physically located in the Seattle area. |
||
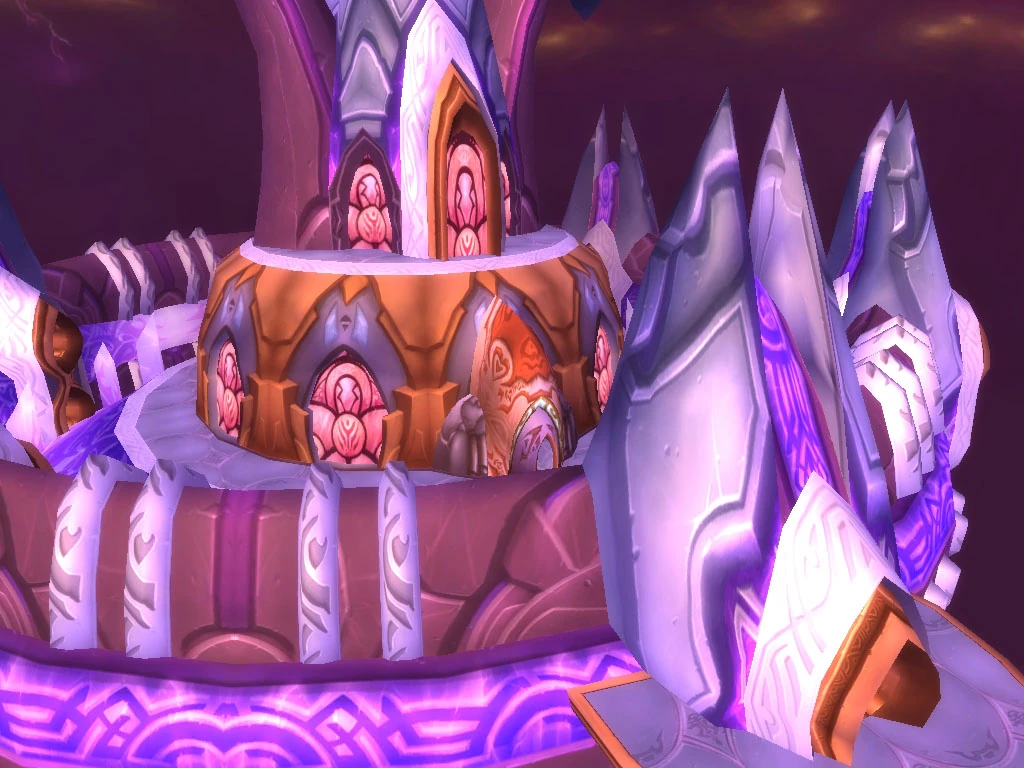
| + | [[File:The Eye.jpg|thumb|View of the entrance]] |
||
| + | As with [[SSC]], the trash respawn timer is 2 hours. |
||
| + | {| class="darktable" |
||
| − | [http://forums.worldofwarcraft.com/board.html?sid=1&forumId=15718395 Official Forum] |
||
| + | ! Bosses || Monsters |
||
| + | |- valign=top |
||
| + | | |
||
| + | ;[[#Phoenix Hall|The Phoenix Hall]] |
||
| + | *{{RaceIconExt|Phoenix}} {{NPC||Al'ar}} |
||
| + | | |
||
| + | *{{mob|Astromancer}} |
||
| + | *{{mob|Bloodwarder Legionnaire}} |
||
| + | *{{mob|Bloodwarder Marshal}} |
||
| + | *{{mob|Bloodwarder Squire}} |
||
| + | *{{mob|Bloodwarder Vindicator}} |
||
| + | *{{mob|Phoenix-Hawk}} |
||
| + | *{{mob|Phoenix-Hawk Hatchling}} |
||
| + | *{{mob|Star Scryer}} |
||
| + | *{{mob|Tempest Falconer}} |
||
| + | |- valign=top class="alt" |
||
| + | | |
||
| + | ;[[#The Crucible|The Crucible]] |
||
| + | *{{RaceIconExt|FelReaver}} {{NPC||Void Reaver}} |
||
| + | | |
||
| + | *{{mob|Crystalcore Devastator}} |
||
| + | *{{mob|Crystalcore Mechanic}} |
||
| + | *{{mob|Crystalcore Sentinel}} |
||
| + | *{{mob|Tempest-Smith}} |
||
| + | |- valign=top |
||
| + | | |
||
| + | ;[[#The Solarium|The Solarium]] |
||
| + | *{{RaceIcon|BloodElf|Female}} {{NPC||High Astromancer Solarian}} |
||
| + | | |
||
| + | *{{mob|Apprentice Star Scryer}} |
||
| + | *{{mob|Astromancer Lord}} |
||
| + | *{{mob|Bloodwarder Legionnaire}} |
||
| + | *{{mob|Bloodwarder Squire}} |
||
| + | *{{mob|Crystalcore Sentinel}} |
||
| + | *{{mob|Nether Scryer}} |
||
| + | *{{mob|Novice Astromancer}} |
||
| + | |- valign=top class="alt" |
||
| + | | |
||
| + | ;[[#Tempest Bridge|The Tempest Bridge]] |
||
| + | *{{RaceIconExt|Kael'thas}} {{NPC||Kael'thas Sunstrider}} <small>[[Kael'thas Sunstrider (tactics)|(tactics)]]</small> |
||
| + | **{{RaceIcon|BloodElf|Male}} {{NPC||Thaladred the Darkener}} |
||
| + | **{{RaceIcon|BloodElf|Male}} {{NPC||Lord Sanguinar}} |
||
| + | **{{RaceIcon|BloodElf|Female}} {{NPC||Grand Astromancer Capernian}} |
||
| + | **{{RaceIcon|BloodElf|Male}} {{NPC||Master Engineer Telonicus}} |
||
| + | | |
||
| + | *{{mob|Bloodwarder Marshal}} |
||
| + | *{{mob|Crimson Hand Blood Knight}} |
||
| + | *{{mob|Crimson Hand Centurion}} |
||
| + | *{{mob|Crimson Hand Inquisitor}} |
||
| + | *{{mob|Crimson Hand Battle Mage}} |
||
| + | |} |
||
| + | === Phoenix Hall === |
||
| − | {{Battlegroup|US|Emberstorm}} |
||
| + | [[Image:TK Phoenix Hall.jpg|thumb]] |
||
| + | ;Packs One, Three, and Four. |
||
| + | The first pack of 6 mobs you'll encounter is a pack of crowd controllable mobs, combined with 1-2 Vindicators. Crowd control the adds, then focus on the vindicators. These may heal, but their heals are weak enough to simply ignore. The vindicators also have a cleanse, so CCers should pay close attention to the mobs they're in charge of. Packs three and four have varying mobs and NPC types. |
||
| + | *{{mob|Apprentice Star Scryer}} (cc) |
||
| − | ==Progression== |
||
| + | *{{mob|Bloodwarder Legionnaire}} (cc) |
||
| − | *[[Server:Garrosh US/Garrosh Guild 25 Man Progression|Garrosh Guild 25 Man Progression]] page. |
||
| + | *{{mob|Astromancer}} (cc) |
||
| − | *[[Server:Garrosh US/Garrosh Guild 10 Man Progression|Garrosh Guild 10 Man Progression]] page. |
||
| + | *{{mob|Star Scryer}} (cc) |
||
| + | *{{mob|Bloodwarder Vindicator}} |
||
| + | A kill order that worked well for us was Vindicator, Apprentice Star Scryer, Legionnaire, Astromancer, Star Scryer. |
||
| − | External Progression Site Links |
||
| − | *[http://www.wowprogress.com/pve/us/garrosh WoWProgress sorted by Kill Progression] |
||
| − | *[http://www.wowprogress.com/pve/us/garrosh WowProgress sorted by Achievement Progression] |
||
| − | *[http://www.guildox.com/go/g.asp?a=3&r=Garrosh-US&w= Guild Ox Garrosh Progression Page] |
||
| − | *[http://wow.guildprogress.com/US/Garrosh GuildProgress Garrosh Page] |
||
| + | ;Pack Two - Patrol |
||
| + | This pack patrols from Al'ar's room to the entrance, and should be the second pack you kill in the instance. Kill the squires first, as these heal. |
||
| + | *1x {{mob|Bloodwarder Marshal}} |
||
| + | *2x {{mob|Bloodwarder Squire}} |
||
| − | ==Realm Firsts== |
||
| − | *{{Achievement|Realm First! Celestial Defender}} - 8/26/2009 {{Alliance Icon Small}} {{Guildlink|locale=US|realm=Garrosh|guild=Contempt|website=http://www.contemptgaming.com/|armory=true}} |
||
| − | *{{Achievement|Realm First! Death's Demise}} - 9/20/2009 {{Alliance Icon Small}}{{Guildlink|locale=US|realm=Garrosh|guild=Contempt|website=http://www.contemptgaming.com/|armory=true}} |
||
| − | *{{Achievement|Realm First! Grand Crusader}} - 12/22/2009 {{Alliance Icon Small}}{{Guildlink|locale=US|realm=Garrosh|guild=Contempt|website=http://www.contemptgaming.com/|armory=true}} |
||
| + | ;Pack Five - Hatchlings |
||
| − | ==PVP Ladders== |
||
| + | Once you reach Al'ar's room you'll find 2 of these packs. Each pack patrols in roughly a half-circle, one on the left, the other on the right. Each pack consists of 2 falconers, and 5-7 hatchlings. Pull 1 pack down the hallway with a hunter using Misdirection to the tank to avoid getting knocked back into the room and pulling the other pack. Crowd control the hatchlings as they pass. There is a glitch with LOS in the hallway so that you can not rely on LOS to get the Falconer to move down the hallway. The person with aggro (the tank that was Misdirected onto) must move far enough down the hall (a few steps into the wider section of the hallway) to get out of range of the Falconers to get them into the hallway. Kill any Hatchlings that are not crowd controlled, then focus fire on the Falconers. As much CC as possible is recommended |
||
| + | *{{mob|Tempest Falconer}} |
||
| − | *[http://www.wowarmory.com/arena-ladder.xml?ts=2&b=Emberstorm&ff=realm&fv=Garrosh| 2v2 Ladder] |
||
| + | *{{mob|Phoenix-Hawk Hatchling}} |
||
| − | *[http://www.wowarmory.com/arena-ladder.xml?ts=3&b=Emberstorm&ff=realm&fv=Garrosh| 3v3 Ladder] |
||
| − | *[http://www.wowarmory.com/arena-ladder.xml?ts=5&b=Emberstorm&ff=realm&fv=Garrosh| 5v5 Ladder] |
||
| + | ;Secondary tactic: Bring a protection paladin. Misdirect the Falconers to the main tank, and let the protection paladin grab all the Hatchlings using Consecration. The protection paladin must quickly position himself with his back to a wall (he'll get knocked back several times), and far from the healers and casters (as the Hatchlings do an AoE Silence). Focus on the Falconers, then AoE the Hatchlings down. Make sure the paladin is using Retribution Aura, as he would not be able to actively generate aggro (because of the AoE Silence), but the passive aggro from Retribution Aura will still work. |
||
| − | ==Guilds on Server== |
||
| + | ;Final Pack - Phoenix-Hawks |
||
| − | {| class="wikitable" |
||
| + | *{{mob|Phoenix-Hawk}}s are solo pullable. Four patrol on the second level of {{NPC||Al'ar}}'s room. The tank can pull them from either the left or the right ramp, but should be careful not to get two, as they sometimes are close together while patrolling. They have a charge ability that will hit the person furthest back from it for around 9000 damage and knock away those near the targeted person, so have an OT stand at medium range to soak the charges while everybody else stays in melee range of the mob. It is best if the raid stands at the bottom of the ramp while the tank pulls, so that you do not provoke a charge onto someone other than the OT while the tank positions the Phoenix-Hawk. They will also use a periodic mana burn on everyone which cannot be avoided, but it can be fully resisted by way of [[Mark of the Wild]], [[Prayer of Shadow Protection]] or [[Shadow Resistance Aura]]. A Warlock can also absorb some of the mana burn using [[Shadow Ward]]. Generally, however, you'll want to kill them before everybody is out of mana. |
||
| − | | style="margin: 1px; width: 50%; vertical-align: top; background-color: #2D2D46; padding:1em; border:1px solid #2D2D96"| |
||
| + | ;Secondary tactic: You pull one into a corner and have everyone stand on that spot. This reduces the chances for knockback drastically. And of course some people won't be able to this correct the first time, but make sure everyone has their back to the wall. |
||
| − | <font style="font-size:x-large;">{{Alliance Icon}} [[:Category:Alliance_guilds|<span style="color:white;">Alliance</span> »]]</font> |
||
| − | ---- |
||
| + | === The Crucible === |
||
| − | *{{Guildlink|locale=US|realm=Garrosh|guild=Apothesis|website=http://apothguild.wowstead.com |armory=true}} - 25 Raiding |
||
| + | ;Pack One |
||
| − | *{{Guildlink|locale=US|realm=Garrosh|guild=Bastion of Chaos|website=http://bastionofchaos.blogspot.com/ |armory=true}} - 10 Man Raiding |
||
| + | First is the solo pull of the Crystalcore Devastator that moves backwards and forwards along the entire length of the hall. |
||
| − | *{{Guildlink|locale=US|realm=Garrosh|guild=Casual Crusaders|website=http://casualcrusaders.wowstead.com |armory=true}} - Casual Leveling/Raiding |
||
| − | *{{Guildlink|locale=US|realm=Garrosh|guild=Chaotic Vengeance|website=http://choticvengeance.wowstead.com|armory=true}} - Leveling/Raiding |
||
| − | *{{Guildlink|locale=US|realm=Garrosh|guild=Contempt|website=http://www.contemptgaming.com/|armory=true}} - 25 Raiding |
||
| − | *{{Guildlink|locale=US|realm=Garrosh|guild=Damage|website=|armory=true}} - Casual leveling |
||
| − | *{{Guildlink|locale=US|realm=Garrosh|guild=The Divine Knights|website=http://www.divineknightsclan.com|armory=true}} - 10 Man Raiding |
||
| − | *{{Guildlink|locale=US|realm=Garrosh|guild=Emanon|website=http://raptureworld.net/ |armory=true}} - 10 Man Raiding, Building 25 man raiding team |
||
| − | *{{Guildlink|locale=US|realm=Garrosh|guild=Eventide|website=http://eventideguild.com|armory=true}} - 25 Raiding |
||
| − | *{{Guildlink|locale=US|realm=Garrosh|guild=Forceful Deflection|website=http://forcefuldeflection.guildlaunch.com |armory=true}} - 10 & 25 Raiding |
||
| − | *{{Guildlink|locale=US|realm=Garrosh|guild=Gambling Red Swords|website=|armory=true}} - 25 Raiding |
||
| − | *{{Guildlink|locale=US|realm=Garrosh|guild=Gothik Bunnies|website=http://gotbunnies.net/ |armory=true}} - Reroll Guild |
||
| − | *{{Guildlink|locale=US|realm=Garrosh|guild=Harbingers of Light|website=http://harbingerslight.guildomatic.com|armory=true}} - Social / Casual 10 Man Raiding |
||
| − | *{{Guildlink|locale=US|realm=Garrosh|guild=Heartless|website=http://heartlessofgarrosh.guildomatic.com|armory=true}} - 25 Raiding |
||
| − | *{{Guildlink|locale=US|realm=Garrosh|guild=Imminent|website=http://z13.invisionfree.com/Imminent/index.php?|armory=true}} - 10 Raiding |
||
| − | *{{Guildlink|locale=US|realm=Garrosh|guild=Instability|website=http://instability-guild.com|armory=true}} - 25 Raiding |
||
| − | *{{Guildlink|locale=US|realm=Garrosh|guild=Ironclad|website=http://ironcladguild.com|armory=true}} - 25 Raiding |
||
| − | *{{Guildlink|locale=US|realm=Garrosh|guild=Is Awesome|website=|armory=true}} - 10 Man Raiding |
||
| − | *{{Guildlink|locale=US|realm=Garrosh|guild=Legion of Accordance|website=http://dkp.loaguild.net/|armory=true}} - 25 Raiding |
||
| − | *{{Guildlink|locale=US|realm=Garrosh|guild=Lions Den|website=http://lionsdengaming.org|armory=true}} - 25 Raiding |
||
| − | *{{Guildlink|locale=US|realm=Garrosh|guild=NinyNinePrbsSkillAintOne|website=http://www.wishyouwere.us|armory=true}} |
||
| − | *{{Guildlink|locale=US|realm=Garrosh|guild=Pantheons Revenge|website=|armory=true}} - Casual / Leveling |
||
| − | *{{Guildlink|locale=US|realm=Garrosh|guild=Reaper of Death|website=|armory=true}} - Casual / Raiding |
||
| − | *{{Guildlink|locale=US|realm=Garrosh|guild=Sovereign|website=http://sovereign-garrosh.com|armory=true}} - 25 Raiding |
||
| − | *{{Guildlink|locale=US|realm=Garrosh|guild=Unforseen|website=http://www.ufguild.com|armory=true}} - 25 Raiding |
||
| − | *{{Guildlink|locale=US|realm=Garrosh|guild=VII|website=http://vii.guildlaunch.com|armory=true}} - AM Raiding |
||
| − | *{{Guildlink|locale=US|realm=Garrosh|guild=Visions|website=http://visions-garrosh.com|armory=true}} - 25 Raiding |
||
| + | *{{mob|Crystalcore Devastator}} |
||
| − | | style="margin: 1px; width: 50%; vertical-align: top; background-color: #462D2D; padding:1em; border:1px solid #962D2D"| |
||
| − | <font style="font-size:x-large;">{{Horde Icon}} [[:Category:Horde_guilds|<span style="color:white;">Horde</span> »]]</font> |
||
| − | ---- |
||
| + | ;Packs Two and Three |
||
| − | *{{Guildlink|locale=US|realm=Garrosh|guild=Archetype|website=http://forums.archetypeguild.com|armory=true}} - Social / 10 Raiding |
||
| + | After this patrol is destroyed, there will be a group of two Crystalcore Sentinels. Farther down the hall are two more. On each pull, the tanks should separate the two mobs so that the AoEs do not overlap, and be careful not to drag the mob into the ranged / healer group. |
||
| − | *{{Guildlink|locale=US|realm=Garrosh|guild=Armageddon|website=http://armageddonnow.guildomatic.com|armory=true}} - 10 Raiding |
||
| − | *{{Guildlink|locale=US|realm=Garrosh|guild=Army of Darkness|website=|armory=true}} - Semi-Hardcore |
||
| − | *{{Guildlink|locale=US|realm=Garrosh|guild=Attica|website=http://cattica.guildlaunch.com|armory=true}} - 25 Raiding |
||
| − | *{{Guildlink|locale=US|realm=Garrosh|guild=Audacity|website=http://audacity-garrosh.wowstead.com|armory=true}} - 10 man Raiding |
||
| − | *{{Guildlink|locale=US|realm=Garrosh|guild=Azazel|website=http://www.azazel-wow.com|armory=true}} - Casual / Raiding |
||
| − | *{{Guildlink|locale=US|realm=Garrosh|guild=B B B|website=|armory=true}} - Disbanded, First Yogg 25 Kill on Server |
||
| − | *{{Guildlink|locale=US|realm=Garrosh|guild=Bitter Ashes|website=http://bitterashes.guildportal.com|armory=true}} - Casual / Raiding |
||
| − | *{{Guildlink|locale=US|realm=Garrosh|guild=Blackblades of Durotar|website=http://bbod.guildlaunch.com|armory=true}} - Hard Mode 10 man Raiding |
||
| − | *{{Guildlink|locale=US|realm=Garrosh|guild=Conspiracy|website=http://www.conspiracyguild.com|armory=true}} - Casual/Heroics/10&25 man Raiding |
||
| − | *{{Guildlink|locale=US|realm=Garrosh|guild=Cadia|website=http://www.gunbad.com |armory=true}} - Casual |
||
| − | *{{Guildlink|locale=US|realm=Garrosh|guild=Darkness|website=http://www.iattackthedarkness.com|armory=true}} - Adult Social/ Very Casual 10-man |
||
| − | *{{Guildlink|locale=US|realm=Garrosh|guild=DORA LOVES YOU|armory=true}} - Casual |
||
| − | *{{Guildlink|locale=US|realm=Garrosh|guild=Infusion|website=|armory=true}} - 25 Raiding |
||
| − | *{{Guildlink|locale=US|realm=Garrosh|guild=Low Friction|website=http://lowfriction.info|armory=true}} - Social / Leveling |
||
| − | *{{Guildlink|locale=US|realm=Garrosh|guild=Luciferi Dominatus|website=http://luciferi-dominatus.guildwebsite.info|armory=true}} - Raiding |
||
| − | *{{Guildlink|locale=US|realm=Garrosh|guild=Mojo|website= |armory=true}} - Casual/Mature 10 man Raiding |
||
| − | *{{Guildlink|locale=US|realm=Garrosh|guild=Moonshadow Clan |website=http://myspace.com/moonshadow_clan.com|armory=true}} - Social |
||
| − | *{{Guildlink|locale=US|realm=Garrosh|guild=Odium |website=http://odiumofgarrosh.guildlaunch.com|armory=true}} - Casual / Raiding |
||
| − | *{{Guildlink|locale=US|realm=Garrosh|guild=OMERTÀ|website=http://omerta.dkpsystem.com |armory=true}} - Casual Raiding |
||
| − | *{{Guildlink|locale=US|realm=Garrosh|guild=One Percenters|website=|armory=true}} - 10 man Focused Raiding |
||
| − | *{{Guildlink|locale=US|realm=Garrosh|guild=Ousted|website=http://ousted.guildlaunch.com|armory=true}} - 10 man Raiding |
||
| − | *{{Guildlink|locale=US|realm=Garrosh|guild=Overthrown|website=http://overthrown-garrosh.wowstead.com |armory=true}}- 25 Raiding |
||
| − | *{{Guildlink|locale=US|realm=Garrosh|guild=Red Matter|website=http://redmatter.wowstead.com|armory=true}} - 25 Raiding |
||
| − | *{{Guildlink|locale=US|realm=Garrosh|guild=Risky Business|website=http://riskybusiness.guildomatic.com|armory=true}} - 10 Raiding/Casual |
||
| − | *{{Guildlink|locale=US|realm=Garrosh|guild=The Rum Runners|website=|armory=true}} - Leveling / Casual Raiding |
||
| − | *{{Guildlink|locale=US|realm=Garrosh|guild=Semper Tyrannis|website=http://sempertyrannis.guildlaunch.com |armory=true}} - Casual Raiding |
||
| − | *{{Guildlink|locale=US|realm=Garrosh|guild=Shadowgear Army|website=http://shadowgeararmy.com|armory=true}} - 25 Raiding |
||
| − | *{{Guildlink|locale=US|realm=Garrosh|guild=Shadowz of Chaos|website=http://shadowzofchaos.guildlaunch.com|armory=true}} - Social / Leveling |
||
| − | *{{Guildlink|locale=US|realm=Garrosh|guild=Tao|website=http://www.morboguild.org|armory=true}} - 25 Raiding |
||
| − | *{{Guildlink|locale=US|realm=Garrosh|guild=The Third Hand|website=http://tthsite.com |armory=true}} - Casual / Raiding |
||
| − | *{{Guildlink|locale=US|realm=Garrosh|guild=The Worst Guild EVER|website= |armory=true}} - Casual |
||
| − | *{{Guildlink|locale=US|realm=Garrosh|guild=Vengeance Inc|website=http://vengeanceinc.wowstead.com |armory=true}} - Casual/Mature 10&25 man Raiding |
||
| − | *{{Guildlink|locale=US|realm=Garrosh|guild=Wreck List|website=http://wrecklist.wowstead.com |armory=true}} - Casual/Mature 10-Man Raiding, DailyKos.com community guild |
||
| − | |} |
||
| + | *{{mob|Crystalcore Sentinel}} |
||
| + | ;Pack Four - Void Reaver's room onward |
||
| − | </onlyinclude> |
||
| + | |||
| + | There are five of these packs, with varying mobs as listed below. The first pack patrols inside {{NPC||Void Reaver}}'s room, near the door. The other four packs are static, and arranged in a semicircle on the near side of the room, one in the center, two to the left and one to the right. The patrolling pack and the center one need to be pulled back into the hall. The remaining packs can be fought inside the room, with the raid standing up against the wall behind the pack for the pull. |
||
| + | |||
| + | The challenge of these pulls is to keep the {{NPC||Crystalcore Mechanic}}s from killing the crowd-controlling Warlocks or Mage on the pull. A tactic that worked well for us was to have a hunter use Misdirection on the tank, and then use <!-- Scatter Shot --> [[Multi-shot]] to get aggro on both Crystalcore Mechanics. On the first two pulls (into the hallway) the crowd-controlling players should stand just inside the door and apply crowd control as the mobs run past. The kill order should be: Crystalcore Devastator or Crystalcore Sentinels first, followed by the Crystalcore Mechanics, followed by the Tempest-Smiths. The raid should spread out as much as possible when fighting the Smiths to limit the number of players that are hit by the bombs these mobs throw. Healers will need to watch the health of the entire raid while fighting the Mechanics and Smiths, as the AoE Sawblades or Bombs can rapidly kill many players if the healing lags behind. Another tweak that may help is to have a rogue sap the [[Tempest Smith]] before the pull to eliminate the stunning bomb they throw. |
||
| + | |||
| + | These groups will fully respawn if not completely killed. |
||
| + | |||
| + | Type 1 |
||
| + | *2 {{mob|Tempest-Smith}}s (cc) |
||
| + | *1 {{mob|Crystalcore Devastator}} |
||
| + | |||
| + | Type 2 |
||
| + | *1 {{mob|Tempest-Smith}} (cc) |
||
| + | *1 {{mob|Crystalcore Devastator}} |
||
| + | *2 {{mob|Crystalcore Mechanic}}s (cc) |
||
| + | |||
| + | Type 3 |
||
| + | *1 {{mob|Tempest-Smith}} (cc) |
||
| + | *2 {{mob|Crystalcore Sentinel}}s |
||
| + | *2 {{mob|Crystalcore Mechanic}}s (cc) |
||
| + | |||
| + | === The Solarium === |
||
| + | ;Pack One |
||
| + | *{{mob|Astromancer Lord}} |
||
| + | *{{mob|Bloodwarder Legionnaire}} (cc) |
||
| + | *{{mob|Novice Astromancer}} |
||
| + | |||
| + | ;Packs Two and Four, Seven to Eighteen |
||
| + | *10 "novice" mobs |
||
| + | *2 {{mob|Bloodwarder Squire}} |
||
| + | AE the novices and tank the squires. |
||
| + | |||
| + | ;Pack Three |
||
| + | *2 {{mob|Crystalcore Sentinel}}s |
||
| + | |||
| + | ;Packs Five and Six |
||
| + | *1 {{mob|Nether Scryer}} |
||
| + | *2 {{mob|Bloodwarder Legionnaire}} (cc) |
||
| + | |||
| + | === Tempest Bridge === |
||
| + | Pulls in order: Pack Type One, Patrol, Pack Type One (x2), Pack Type Two (x2), Patrol, Pack Type Two, Boss Time. |
||
| + | |||
| + | ;Pack Type One |
||
| + | *{{mob|Crimson Hand Centurion}} - Whirlwinds and shoots arcane bolts, CC works (polymorph or fear, and put up Detect Magic or Unstable Affliction so the Blood Knight doesn't dispel the CC), spam CC, even while you're killing it, to limit raid damage. |
||
| + | |||
| + | *{{mob|Crimson Hand Blood Knight}} - Stuns(Hammer of justice, use two tanks), dispels sheeps, immune to CC (needs to die first) |
||
| + | |||
| + | *{{mob|Crimson Hand Battle Mage}} - AoE (Blizzard, Frostbolt Volley, Cone of Cold) and Frost Attack (~2k additional Frost damage on swing), CC works (polymorph or fear, and put up Detect Magic or Unstable Affliction so the Blood Knight doesn't dispel the CC), spam CC, even while you're killing it, to limit raid damage. |
||
| + | |||
| + | ;Pack Type Two |
||
| + | *{{mob|Bloodwarder Marshal}} - Whirlwinds, immune to cc, tank away from the group. |
||
| + | |||
| + | *{{mob|Crimson Hand Inquisitor}} - Casts mindflay, can be disarmed/cc, has Power Infusion (needs to be dispelled/spellstolen) |
||
| + | |||
| + | *{{mob|Crimson Hand Blood Knight}} - See above. |
||
| + | |||
| + | *{{mob|Crimson Hand Centurion}} - See above. |
||
| + | |||
| + | ;Patrols |
||
| + | *{{mob|Crimson Hand Centurion}} (x2) - See above. |
||
| + | *{{mob|Crimson Hand Inquisitor}} - See above. |
||
| + | |||
| + | == Loot == |
||
| + | See [[the Eye loot]]. |
||
| + | |||
| + | == Patches and hotfixes == |
||
| + | {{Patch 2.4.0|note=You may now fight [[Kael'Thas Sunstrider|Prince Kael'thas]] and [[Lady Vashj]] without first killing all the other bosses in their respective dungeons.}} |
||
| + | {{Patched|link=http://forums.worldofwarcraft.com/thread.html?topicId=110637185&sid=1|date=6/19/07|bluenote= After a lot of thought and deliberation, we’ve decided to remove the attunement requirements to enter Serpentshrine Cavern and Tempest Keep: The Eye. While many of our attunements in the Burning Crusade have been good progression checks, a few of the attunements have turned out to cause unnecessary stress on guilds either doing the content or attempting to do the content. With Black Temple and Battle for Mount Hyjal thriving, we want to encourage (rather than prevent) new guilds and raid groups to attempt Serpentshrine and TK. We are going to leave the current attunement quests in the game so that players can still engage in the challenge and the lore of those quests should they choose to. At a later point, we are considering adding a final reward step to those quests as well (that way those who have already completed them would not miss out on a *new* reward).}} |
||
| + | |||
| + | == See also == |
||
| + | * [[Tempest Key Guide]] |
||
| + | |||
| + | ==External links== |
||
| + | <!-- Read http://www.wowpedia.org/Wowpedia:External_links before posting your links here. |
||
| + | Links that do not conform to the rules will be DELETED. |
||
| + | Repeat violations may result in a BAN. |
||
| + | Have a nice day. :) --> |
||
| + | {{elinks-zone|3842|armory=1}} |
||
| + | {{elink|site=RealmHistory|link=http://www.realmhistory.net/guild-ranking/the-eye.html|desc=Guild progression}} |
||
| − | <onlyinclude> |
||
| − | |} |
||
| − | |} </onlyinclude> |
||
| + | {{The Eye Subzones}} |
||
| − | </div> |
||
| + | {{Tempest Keep Subzones}} |
||
| − | {{Realm|US|Garrosh|PvE|Eastern}} |
||
| + | {{Instancefooter|The Burning Crusade}} |
||
| − | __NOTOC__ |
||
| + | [[fr:L'Oeil]] |
||
| − | __NOEDITSECTION__<onlyinclude> |
||
| + | [[Category:Raids]] |
||
| − | </onlyinclude> |
||
| − | [[Category: |
+ | [[Category:Instances]] |
| + | [[Category:The Eye| ]] |
||
| + | [[Category:Netherstorm]] |
||
Revision as of 16:17, 12 November 2010
| Tempest Keep | |||
|---|---|---|---|
| The Eye, TE, TK Raid | |||
 The Eye loading graphic | |||
| Location | Tempest Keep, Netherstorm | ||
| Affiliation | Kael'thas' forces | ||
| Race(s) |
File:IconSmall ArcaneGuardian Small.gif Arcane guardian File:IconSmall Dragonhawk Small.gif Dragonhawk File:IconSmall FelReaver Small.gif Void Reaver File:IconSmall Mo'arg Small.gif Mo'arg File:IconSmall Phoenix Small.gif Phoenix | ||
| End boss | Kael'thas Sunstrider | ||
| Instance info | |||
| Type | Raid | ||
| Advised level | 70+ | ||
| Player limit | 25 | ||
| Key |
| ||
| |||
- For other uses, see Eye.

The Eye bosses
The Eye is the inner palace of Tempest Keep in Netherstorm and stronghold of the "Sun King", Kael'thas Sunstrider. In-game, it is known simply as "Tempest Keep". The tokens for tier 5 shoulder and chest pieces drop in the Eye. There is no longer any attunement required to enter this instance.
Attunement
Though the attunement is no longer required, the quests still remain in-game and can still be completed if desired. The player title of "![]() [Champion of the Naaru]" was achieved by those that completed the attunement quest chain. The title is no longer available.
[Champion of the Naaru]" was achieved by those that completed the attunement quest chain. The title is no longer available.
The quests to complete the attunement for The Eye are given by A'dal in Shattrath City after successful completion of ![]() [70g5] The Cipher of Damnation questlines in Shadowmoon Valley. It begins with
[70g5] The Cipher of Damnation questlines in Shadowmoon Valley. It begins with ![]() [70] The Hand of Gul'dan.
[70] The Hand of Gul'dan.
Dungeon Denizens
- File:IconSmall ArcaneGuardian Small.gif Arcane guardians
 Blood elves
- File:IconSmall Dragonhawk Small.gif Dragonhawks
- File:IconSmall FelReaver Small.gif Fel reaver (one, Void Reaver)
- File:IconSmall Mo'arg Small.gif Mo'arg
- File:IconSmall Phoenix Small.gif Phoenixes
Bosses and mobs
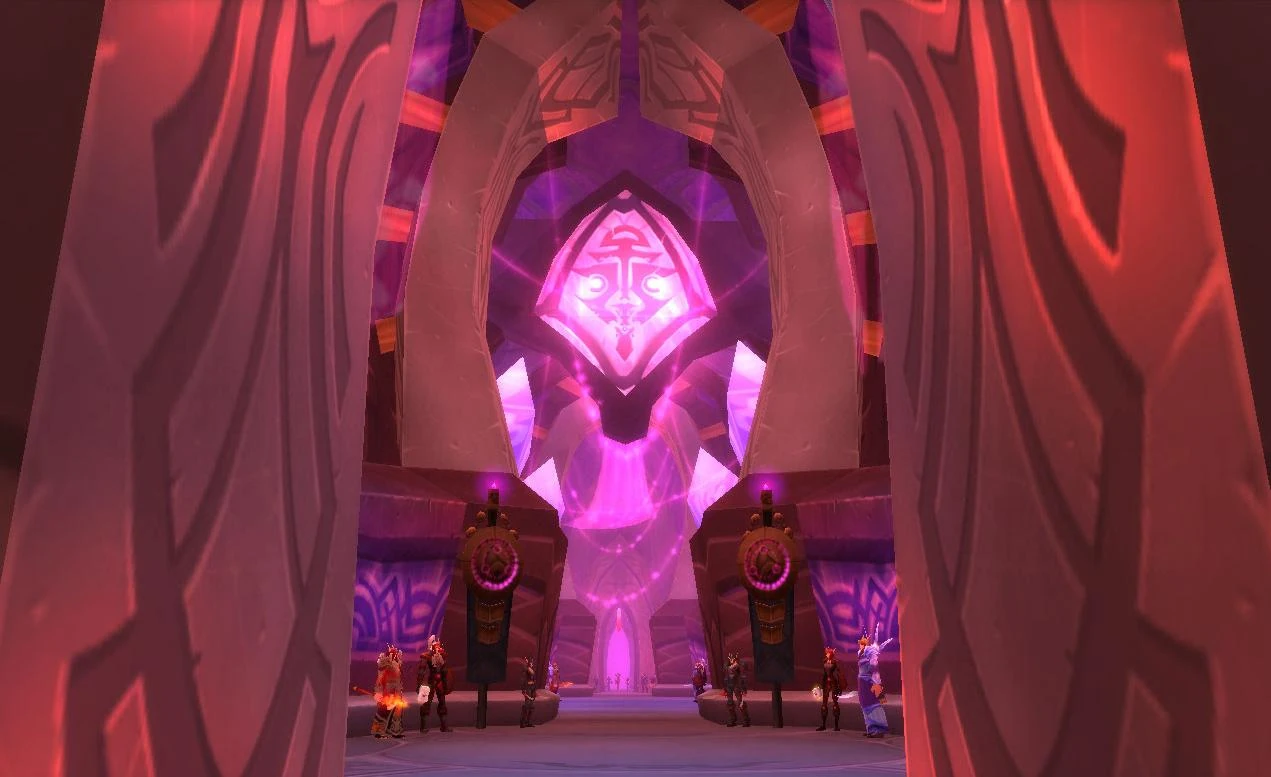
View of the entrance
As with SSC, the trash respawn timer is 2 hours.
| Bosses | Monsters |
|---|---|
Phoenix Hall

- Packs One, Three, and Four.
The first pack of 6 mobs you'll encounter is a pack of crowd controllable mobs, combined with 1-2 Vindicators. Crowd control the adds, then focus on the vindicators. These may heal, but their heals are weak enough to simply ignore. The vindicators also have a cleanse, so CCers should pay close attention to the mobs they're in charge of. Packs three and four have varying mobs and NPC types.
- Apprentice Star Scryer (cc)
- Bloodwarder Legionnaire (cc)
- Astromancer (cc)
- Star Scryer (cc)
- Bloodwarder Vindicator
A kill order that worked well for us was Vindicator, Apprentice Star Scryer, Legionnaire, Astromancer, Star Scryer.
- Pack Two - Patrol
This pack patrols from Al'ar's room to the entrance, and should be the second pack you kill in the instance. Kill the squires first, as these heal.
- Pack Five - Hatchlings
Once you reach Al'ar's room you'll find 2 of these packs. Each pack patrols in roughly a half-circle, one on the left, the other on the right. Each pack consists of 2 falconers, and 5-7 hatchlings. Pull 1 pack down the hallway with a hunter using Misdirection to the tank to avoid getting knocked back into the room and pulling the other pack. Crowd control the hatchlings as they pass. There is a glitch with LOS in the hallway so that you can not rely on LOS to get the Falconer to move down the hallway. The person with aggro (the tank that was Misdirected onto) must move far enough down the hall (a few steps into the wider section of the hallway) to get out of range of the Falconers to get them into the hallway. Kill any Hatchlings that are not crowd controlled, then focus fire on the Falconers. As much CC as possible is recommended
- Secondary tactic
- Bring a protection paladin. Misdirect the Falconers to the main tank, and let the protection paladin grab all the Hatchlings using Consecration. The protection paladin must quickly position himself with his back to a wall (he'll get knocked back several times), and far from the healers and casters (as the Hatchlings do an AoE Silence). Focus on the Falconers, then AoE the Hatchlings down. Make sure the paladin is using Retribution Aura, as he would not be able to actively generate aggro (because of the AoE Silence), but the passive aggro from Retribution Aura will still work.
- Final Pack - Phoenix-Hawks
- Phoenix-Hawks are solo pullable. Four patrol on the second level of Al'ar's room. The tank can pull them from either the left or the right ramp, but should be careful not to get two, as they sometimes are close together while patrolling. They have a charge ability that will hit the person furthest back from it for around 9000 damage and knock away those near the targeted person, so have an OT stand at medium range to soak the charges while everybody else stays in melee range of the mob. It is best if the raid stands at the bottom of the ramp while the tank pulls, so that you do not provoke a charge onto someone other than the OT while the tank positions the Phoenix-Hawk. They will also use a periodic mana burn on everyone which cannot be avoided, but it can be fully resisted by way of
 [Mark of the Wild], [Prayer of Shadow Protection] or [Shadow Resistance Aura]. A Warlock can also absorb some of the mana burn using [Shadow Ward]. Generally, however, you'll want to kill them before everybody is out of mana.
- Secondary tactic
- You pull one into a corner and have everyone stand on that spot. This reduces the chances for knockback drastically. And of course some people won't be able to this correct the first time, but make sure everyone has their back to the wall.
The Crucible
- Pack One
First is the solo pull of the Crystalcore Devastator that moves backwards and forwards along the entire length of the hall.
- Packs Two and Three
After this patrol is destroyed, there will be a group of two Crystalcore Sentinels. Farther down the hall are two more. On each pull, the tanks should separate the two mobs so that the AoEs do not overlap, and be careful not to drag the mob into the ranged / healer group.
- Pack Four - Void Reaver's room onward
There are five of these packs, with varying mobs as listed below. The first pack patrols inside Void Reaver's room, near the door. The other four packs are static, and arranged in a semicircle on the near side of the room, one in the center, two to the left and one to the right. The patrolling pack and the center one need to be pulled back into the hall. The remaining packs can be fought inside the room, with the raid standing up against the wall behind the pack for the pull.
The challenge of these pulls is to keep the Crystalcore Mechanics from killing the crowd-controlling Warlocks or Mage on the pull. A tactic that worked well for us was to have a hunter use Misdirection on the tank, and then use Multi-shot to get aggro on both Crystalcore Mechanics. On the first two pulls (into the hallway) the crowd-controlling players should stand just inside the door and apply crowd control as the mobs run past. The kill order should be: Crystalcore Devastator or Crystalcore Sentinels first, followed by the Crystalcore Mechanics, followed by the Tempest-Smiths. The raid should spread out as much as possible when fighting the Smiths to limit the number of players that are hit by the bombs these mobs throw. Healers will need to watch the health of the entire raid while fighting the Mechanics and Smiths, as the AoE Sawblades or Bombs can rapidly kill many players if the healing lags behind. Another tweak that may help is to have a rogue sap the Tempest Smith before the pull to eliminate the stunning bomb they throw.
These groups will fully respawn if not completely killed.
Type 1
- 2 Tempest-Smiths (cc)
- 1 Crystalcore Devastator
Type 2
- 1 Tempest-Smith (cc)
- 1 Crystalcore Devastator
- 2 Crystalcore Mechanics (cc)
Type 3
- 1 Tempest-Smith (cc)
- 2 Crystalcore Sentinels
- 2 Crystalcore Mechanics (cc)
The Solarium
- Pack One
- Packs Two and Four, Seven to Eighteen
- 10 "novice" mobs
- 2 Bloodwarder Squire
AE the novices and tank the squires.
- Pack Three
- Packs Five and Six
- 1 Nether Scryer
- 2 Bloodwarder Legionnaire (cc)
Tempest Bridge
Pulls in order: Pack Type One, Patrol, Pack Type One (x2), Pack Type Two (x2), Patrol, Pack Type Two, Boss Time.
- Pack Type One
- Crimson Hand Centurion - Whirlwinds and shoots arcane bolts, CC works (polymorph or fear, and put up Detect Magic or Unstable Affliction so the Blood Knight doesn't dispel the CC), spam CC, even while you're killing it, to limit raid damage.
- Crimson Hand Blood Knight - Stuns(Hammer of justice, use two tanks), dispels sheeps, immune to CC (needs to die first)
- Crimson Hand Battle Mage - AoE (Blizzard, Frostbolt Volley, Cone of Cold) and Frost Attack (~2k additional Frost damage on swing), CC works (polymorph or fear, and put up Detect Magic or Unstable Affliction so the Blood Knight doesn't dispel the CC), spam CC, even while you're killing it, to limit raid damage.
- Pack Type Two
- Bloodwarder Marshal - Whirlwinds, immune to cc, tank away from the group.
- Crimson Hand Inquisitor - Casts mindflay, can be disarmed/cc, has Power Infusion (needs to be dispelled/spellstolen)
- Crimson Hand Blood Knight - See above.
- Crimson Hand Centurion - See above.
- Patrols
- Crimson Hand Centurion (x2) - See above.
- Crimson Hand Inquisitor - See above.
Loot
See the Eye loot.
Patches and hotfixes
![]() Patch 2.4.0 (2008-03-25): You may now fight Prince Kael'thas and Lady Vashj without first killing all the other bosses in their respective dungeons.
Patch 2.4.0 (2008-03-25): You may now fight Prince Kael'thas and Lady Vashj without first killing all the other bosses in their respective dungeons.
Template:Patched
See also
External links
Template:The Eye Subzones
| |||||
Template:Instancefooter