 | |||
| Title | <Tower Steward> | ||
| Gender | Male | ||
| Race | Undead | ||
| Level | ?? Boss | ||
| Class | Rogue | ||
| Affiliation(s) | Medivh | ||
| Occupation | Steward of Karazhan, Castellan to Medivh | ||
| Location | Banquet Hall, Karazhan | ||
| Status | Killable | ||
| |||
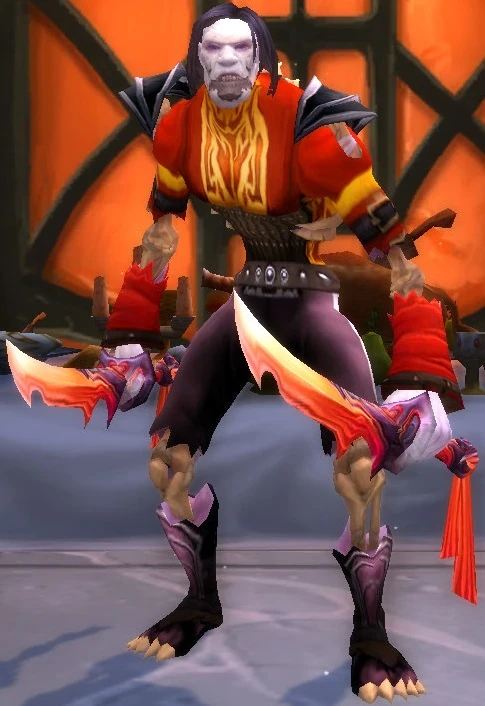
Moroes <Tower Steward> is Karazhan's steward, and can be found tending to guests in the Banquet Hall in Karazhan. Along with four special invited patrons, Moroes fights any uninvited guests to the death. Moroes is the second boss and the first mandatory boss found in this raid instance, and his defeat allows access to the Opera Event.
Background
In The Last Guardian, Moroes was described as Medivh's castellan, or personal house servant. He was an oddly thin man, ghostly in appearance, who wore horse blinders over his eyes in order to escape the wandering visions that plagued Medivh's tower. He described to Khadgar (who had traveled from Dalaran to serve as Medivh's apprentice) how he had seen a vision of himself breaking one of Cook's crystal dishes and — despite trying to avoid doing so — ended up shattering it anyway; he wore the blinders until the day he died. He was killed by Medivh, who was in the final stages of madness, and is now buried beside both his master and Cook outside of Karazhan. It seemed that Moroes wasn't surprised that he was murdered by Medivh, according to The Last Guardian, it said: His eyes were wide and open, but his face was surprsingly composed. Not even death seemed to surprise the castellan.
Moroes has been resurrected by the new master of Karazhan. He is one of the first bosses encountered by adventurers. He has been revived as an undead and wields two wicked daggers when attacking. He seems to have retained much of his personality during life.
The party he "holds" in the tower's Banquet Hall includes ghosts of relatives of Darkshire noblemen as guests. Names of all of the NPCs in the Hall, including Ebonlocke who refuses to take part in the festivities, can be found as names of notable citizens of the Duskwood town.
Abilities
- Basic Melee: 1600–2500 on plate.
- Immune to Taunt
- Vanish: Vanishes without dropping aggro.
- Garrote: A physical DoT applied to a random player character after Vanish. Deals 1000 damage every three seconds for five minutes (100,000 total damage).
- Blind: A poison-based disorient effect that lands on Moroes' closest non-tank target.
- Gouge: A physical stun on Moroes' current target. Breaks on damage. Moroes attacks the target with the second-highest threat while his primary target is stunned.
- Enrage: At 30% health, Moroes Enrages, increasing his damage.
- Berserk: After a certain amount of time Moroes frenzies and throws daggers at random raid members.
Strategy
The Moroes encounter tests your raid's ability to control several targets while also maintaining high DPS. Success requires a solid control strategy for his four dinner guests. If allowed to go free, they will quickly put an end to the squishies. Control must be established immediately on the pull and maintained throughout the fight.
Once control is established, the encounter becomes a race between the raid's damage output and the building damage caused by Garrote. Each time a Garrote is applied, the strain on the healers increases. Moroes must die before the healing needed becomes too much to handle.
The dinner guests (adds)
Moroes has four different random dinner guests (adds) from the following list in every instance. Each add is based off a class and spec. The following table lists them in a good kill order:
| Name | Class | Health | Abilities |
|---|---|---|---|
| Baroness Dorothea Millstipe | Shadow Priest | 67k | |
| Lady Catriona Von'Indi | Holy Priest | 67k | |
| Lady Keira Berrybuck | Holy Paladin | 67k | |
| Baron Rafe Dreuger | Retribution Paladin | 67k | |
| Lord Robin Daris | Arms Warrior | 84k | |
| Lord Crispin Ference | Protection Warrior | 83k |
- Baroness Dorothea Millstipe
- Her mana burn spell is the single most dangerous factor in this fight. It can burn all the mana from a healer, leading to a wipe. Fortunately, her cloth armor makes her easy to kill. Burn her down first, and as quickly as possible. Interrupt, silence, and stun her attempts to cast the mana burn. She does not need a tank, but make sure to heal her target.
- Lady Catriona Von'Indi
- She does not appear to use her Dispel Magic to free the other dinner guests from shackles or traps. Instead, she uses it to remove buffs from players. Her heals must be interrupted. If she is killed, no tank is required.
- Lady Keira Berrybuck
- Her heals and cleanses make her extremely disruptive, as she will release her friends from Shackle Undead and Freezing Trap. Her Blessing of Might adds 550 attack power and is also dangerous, especially on Moroes. Due to her armor and Divine Shield she is more difficult to kill than the priests. Therefore, she is a high priority to keep shackled the whole fight. If she is killed or trapped, warn the raid that shackles and other traps will break early and that priests, hunters, and shamans must get rid of the Blessing of Might. Her Divine Shield can be dispelled with Mass Dispel. If she is to be killed, a tank is a good idea, but not required.
- Baron Rafe Dreuger
- His main threat is his ability to stun his main target with Hammer of Justice and take off after a healer. While he has a documented Cleanse ability, he does not appear to use it much. He may be trapped, so long as the hunter is careful not to let him get close enough to stun. A tank is required to kill him.
- Lord Robin Daris
- His main threat is his powerful Mortal Strike. He will quickly kill anyone but a tank. He should generally be chain-trapped by a hunter, then tanked and killed. If no hunters are available, he should simply be off-tanked (with extra heals) until it is time to kill him. He can also be kept shackled the whole fight, but with great caution; the priest will die in one hit if he gets loose for long enough. Keep him away from the raid, as his whirlwind causes damage if he uses it in a crowd.
- Lord Crispin Ference
- He doesn't do a lot of damage, but takes a long time to kill. Therefore, it's reasonable to attack Moroes while Ference is still alive. Although his disarm ability is annoying, it is reasonable to off-tank him as a "rage battery", especially as a druid bear. Once the other dinner guests are dead or shackled, he can be trapped, turned, or killed when Moroes vanishes.
As many adds as possible should be crowd controlled. The adds can be controlled with the priest's ![]() [Shackle Undead], the paladin's
[Shackle Undead], the paladin's ![]() [Turn Evil], the hunter's
[Turn Evil], the hunter's ![]() [Freezing Trap], off-tanking, snares (with kiting), and stuns. Be careful when using a paladin to fear the adds, since if an add exits the room, the encounter resets.
[Freezing Trap], off-tanking, snares (with kiting), and stuns. Be careful when using a paladin to fear the adds, since if an add exits the room, the encounter resets.
Shackles can be maintained until Moroes is dead. Adds for which no shackle is available should usually be killed before Moroes. One good sequence is to follow the above list from top to bottom - the priests have the least health and require no tank, the paladins can dispel, and the warriors take longer to kill due to their high health (particularly Ference).
Garrote
Moroes vanishes every 30 seconds, and upon return randomly Garrotes a raid member. Garrote is a bleed effect and deals 1,000 damage every three seconds for 300 seconds (5 minutes, for a total of 100,000 damage). After he garrotes, Moroes immediately returns to the highest threat target. Garrote can be removed by the following abilities only:
- Dwarves'
 [Stoneform]
 - Paladins' [Divine Shield] and [Blessing of Protection]
- Mages' [Ice Block]
- Items which remove bleeding effects ( [Luffa] no longer works)
- Death (hopefully followed by a combat resurrection)
- It seems that hunters can avoid Garrote by [Feign Death] during Vanish
Since the possibilities to remove Garrote are limited, there is no choice but to heal through it on most raid members. One active HoT from a well-equipped healer should be enough. Group heals work well when multiple targets are garroted.
In theory, all Garrotes are automatically removed when Moroes is defeated. However, sometimes they persist even after Moroes dies. Resetting the encounter does not remove Garrotes.
Dying from Garrote does not inflict a durability loss penalty. It is a good idea to plan ahead (while clearing other bosses) and save all combat resurrection cooldowns for Moroes. Do not cast soulstones before the encounter, but wait until an important target is garroted, and only then soulstone. This method of garrote removal has the advantage that the resurrection restores some mana. If a raid member is garroted and a combat resurrection is planned, the player should quickly spend all his mana, then just die and be resurrected.
If possible, Garrote should always be removed from a priest that is maintaining a shackle. All healers are important too. Damage-dealing classes should be cured only towards the end of the fight, while the tanks should never get the Garrote removed - they are the main heal targets anyways, and the Garrote breaks the Gouge.
Gouge and the tanks
Generally, two tanks are needed on Moroes. The off-tank must always be second on the threat list, because Moroes periodically gouges the main tank then turns to his target with the second-highest threat. This must be the off-tank. However, it is possible to avoid the gouge by turning your back to him, and backing up slowly until you can use your attacks.
Since the off-tank gets hit only while the main-tank is Gouged, rage may be a problem. To counter rage-starvation, the off-tank can grab one of the adds to act as a rage battery. This also controls that add.
If available, a third tank can handle the adds that require tanking, or one of the two Moroes tanks can do the job.
As a variant, a paladin can tank Moroes and all four adds. The paladin firsts casts Blessing of Sacrifice on a temporary off-tank (Or a warlock who can then use Hellfire to cause the paladin some damage) and later on a Garrote victim. This breaks Gouge as soon as the Garrote ticks or the hellfire passes some damage. If Baron Rafe Dreuger is present, the raid stun-locks, silences, and kills him quickly, so that he cannot stun the tank.
Dealing with Blind
Moroes casts Blind on his closest enemy that is not his current target. This is a poison-based disorient effect that causes the victim to temporarily lose aggro and wander aimlessly for ten seconds. It is broken by damage. It is devastating if Moroes Blinds the off-tank then Gouges the main tank, as he will then generally attack a healer.
To avoid this, assign a non-tank character to stand on top of Moroes at all times. This character takes the Blinds instead of the off-tank.
Naturally, Paladins, Druids, and Shamans should remove the Blind effect. Shamans should keep down a ![]() [Poison Cleansing Totem] to help with this.
[Poison Cleansing Totem] to help with this.
Preparing for battle
Given the random nature of the adds and the raid's composition, every Moroes fight is different. The raid must make a plan before the pull and stick with it. This fight requires more planning than anything that comes before it in the game.
- Clear the entire room of all the trash.
- Mark Moroes and all the dinner guests with raid icons.
- Determine and announce the kill order
- Assign targets to players for:
- Shackling
- Freeze trapping
- Fearing (via Turn Undead)
- Tanking for Moroes, as crowd-control, and for kill targets
- Off-tanking, for Moroes
- Healing, for the tank, off-tank, and the rest of the raid
- Backup duties, should someone die before his assignment is complete
Executing the fight
Once a plan is established, it's time to execute it.
Pull Moroes, kill targets, and off-tank targets to one side of the room. Pull shackle and trap targets to the other side and control them there. This makes it less likely for the crowd-control to break from AoE attacks, dispels, or cleanses. The tanks generate threat on Moroes and any off-tank targets, while the controllers shackle or trap, then switch to healing or attacking as quickly as possible.
Use all cooldown abilities available to attack and kill the first target as quickly as possible. The fight becomes considerably easier to control once one or two targets die. There's no reason to save damage-dealing cooldowns for Moroes. Focus fire on the planned kill targets, in order, until Moroes dies.
The tank calls out when he is gouged, so that healers can switch focus to the off-tank.
Anyone who is controlling an add calls out when there is a problem so that someone else can help.
Once all non-shackled adds are killed, the raid may kill Moroes next to speed up the fight and reduce the pressure from multiple garrotes, or kill the shackled adds to remove the risk of them getting loose and causing trouble.
After Moroes is dead, the raid may kill any remaining adds or despawn them by leaving the room.
Notes
- The encounter can be reset by pulling/fearing an add out of the room or by having the entire raid run out of the room. However, Moroes leaving the room will not reset the encounter.
- If a shackle target gets loose, use taunts, stuns, snares, and fears to give the priest time to re-shackle it.
- Make sure the pets don't attempt to attack a shackled or trapped add when Moroes vanishes
- Since they're all undead, the Argent Dawn trinkets can be most useful here ( [Rune of the Dawn] and [Seal of the Dawn]).
Class Specific Tips
Paladin
Paladins should use Divine Shield to remove Garrote from themselves. They can use Blessing of Protection to remove it from important raid members it lands on, generally priests. A reduced cooldown on Blessing of Protection (![]() [Guardian's Favor]) is a big bonus in this fight.
[Guardian's Favor]) is a big bonus in this fight.
Paladins can use Blessing of Sacrifice on a Garroted party member or the off-tank to mitigate the damage. This can make a difference for low-health casters and breaks Gouge on paladin tanks.
While Turn Evil is not reliable long-term crowd-control, it is useful to protect healers and other crowd-controllers, should a target get loose. To avoid resetting the encounter, do not use it near either of the entrances to the room.
A paladin that is assigned to crowd-control duties can use one of the following macros to cast Turn Evil without losing his current target:
/cast [target=Lord Robin Daris] Turn Evil
/clearfocus [modifier:shift] [target=focus,dead] [target=focus,noexists]
/focus [target=focus,noexists]
/script SetRaidTarget("focus", 1)
/cast [target=focus] Turn Evil
See Useful Priest Macros for detailed examples and explanation.
Priest
Shadow Priests generally have more spell hit than Holy Priests, and are thus better at maintaining Shackles. Re-cast the shackle every ten seconds or so to reduce the possibility of a target getting loose. If a shackle target does get loose, make sure to call for help.
The following macros are useful for casting the shackle without losing your current target:
/cast [target=Lord Robin Daris] shackle undead
/clearfocus [modifier:shift] [target=focus,dead] [target=focus,noexists]
/focus [target=focus,noexists]
/script SetRaidTarget("focus", 1)
/cast [target=focus] Shackle Undead
See Useful Priest Macros for detailed examples and explanation.
An addon called UberShackle can also be helpful in reshackling Moroes adds.
Warlock
The following macro will allow a Warlock Voidwalker to build threat on a shackle target without breaking the shackle. If the shackle breaks, the target will attack the Voidwalker instead of the priest.
/clearfocus [modifier:alt]
/focus [target=focus,noexists]; [target=focus,dead]
/clearfocus [target=focus,help]
/petstay
/petfollow
/cast [pet:voidwalker,target=focus,exists,harm] Torment; Torment
Hit the macro while holding down the alt key to set the focus. Keep the Voidwalker in passive, and repeatedly hit this macro during the fight to use the ![]() [Torment] ability.
[Torment] ability.
Use ![]() [Curse of Tongues] on the caster adds to slow down mana burn and heal spells.
[Curse of Tongues] on the caster adds to slow down mana burn and heal spells.
Hunter
Hunters can chain-trap one add indefinitely. This is made easier by survival talents or the Beast Lord Armor set bonus. They can also kite.
However, given the importance of high damage output in this fight, it is not always a good idea to trap or kite for a long time. If the hunter is busy trapping, he can't put out as much damage. It may be best to pull a target into a trap, drop a second trap, and trust in an off-tank to pick up the trap target before the second trap breaks.
Hunters can use ![]() [Misdirection] to help the off-tank maintain threat on Moroes.
[Misdirection] to help the off-tank maintain threat on Moroes.
Hunters can drop a Freezing Trap on any (player) priest that is keeping a target shackled. If the shackle breaks, this will give the priest time to re-shackle the target instead of taking hits.
Hunter pets specced for armor and stamina can tank kill targets, so long as they get heals.
Warrior
Any spec of warrior can off-tank Moroes and tank kill targets.
Intervene does not appear to catch Garrote.
Shaman
Shamans should drop Poison Cleansing Totems to get rid of Blind. They should also be prepared to die and reincarnate if they get Garroted.
Druid
Druids can switch into bear form and use Growl to protect any healers or crowd-controllers that get unwanted attention. They should generally save their Rebirth battle resurrection for priests that are maintaining shackles.
Mage
Mages can and should use Ice Block to get rid of Garrote.
Rogue
Use ![]() [Mind-Numbing Poison] on the caster adds to slow down mana burns and heals.
[Mind-Numbing Poison] on the caster adds to slow down mana burns and heals.
Quotes
Aggro: Hmm, unannounced visitors, Preparations must be made...
Vanish 1: Now, where was I? Oh yes...[1]
Vanish 2: You rang?
Killing A Player 1: One more for dinner this evening.
Killing A Player 2: Time... Never enough time.
Killing A Player 3: I've gone and made a mess.
Death: How terribly clumsy of me...
Death 2: I've longed for this.
Killing all players: The Master will return from Stormwind soon.
Loot
Bugs
- Even with a successful and documented kill without any wipes or resets, the garrotes from Moroes do not always drop.
- If Moroes dies from DoTs while he is vanished, your raid may not get credit for the kill. A soft reset is required to progress to the Opera event.
Myth
In Greek mythology, Moros ("doom", "fate") is the personification of impending doom, who drives every being, mortal or otherwise, to its fated doom. [1]