No edit summary |
No edit summary |
||
| Line 1: | Line 1: | ||
| − | {{Stub/Strategy}} |
||
| − | {{Stub/Mob}} |
||
{{npcbox |
{{npcbox |
||
| − | |name = |
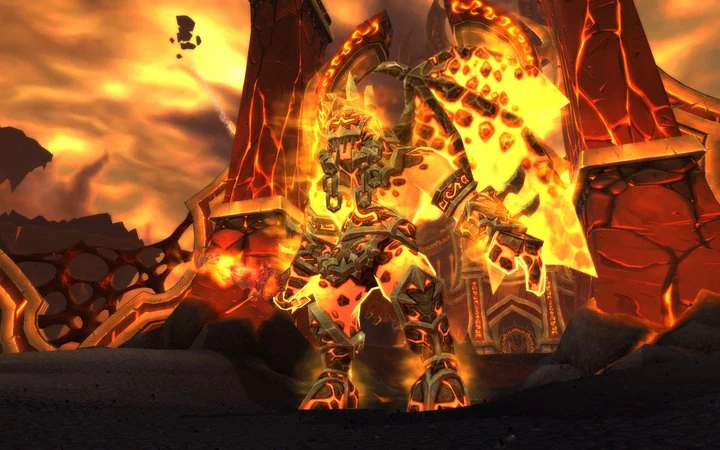
+ | |name = Baleroc |
| + | |title = The Gatekeeper |
||
| − | |image = Lord Rhyolith.png |
||
| + | |image = Baleroc.jpg |
||
| − | |race = Magma giant |
||
| + | |race = Fire elemental |
||
|creature = Elemental |
|creature = Elemental |
||
|type = Boss |
|type = Boss |
||
|level = ?? |
|level = ?? |
||
| − | |location = [[ |
+ | |location = [[Mortal's Demise]], [[Firelands]] |
|faction=Combat |
|faction=Combat |
||
| − | |health = |
+ | |health = 31,565,310 (10-man Normal) |
| − | + | 59,428,676 (10-man Heroic) |
|
| − | + | 99,978,288 (25-man Normal) |
|
| − | + | 166,239,664 (25-man Heroic) |
|
|instance=Firelands |
|instance=Firelands |
||
}} |
}} |
||
| − | :"''Heroes face a difficult challenge: attack this massive magma giant's bulk while forcing him to move against his will among volcanic eruptions that ultimately spell his doom... or yours.''"<ref>[http://us.battle.net/wow/en/blog/2682944#blog Patch 4.2 Preview: The Firelands]</ref> |
||
| + | :"''Baleroc stands before the gate to [[Sulfuron Keep]], amidst a river of combustion that serves as the Sulfuron moat. The bridge to Ragnaros’s blistering chamber can only be crossed by those who find a way to put an end to this towering elemental monstrosity.<ref>[http://us.battle.net/wow/en/blog/2682944#blog Patch 4.2 Preview: The Firelands]</ref>'' |
||
| − | '''Lord Rhyolith''' is one of the most ancient elementals in existence, born from the primordial fires that forged [[Azeroth]] itself. He is responsible for the creation of new elementals in the Firelands and still possesses a searing hatred of the [[titan]]s for what he considers their monumental arrogance in relocating him.<ref>[[Encounter Journal]]</ref> |
||
| + | '''Baleroc''' earned a reputation as a merciless combatant during the elemental wars of ancient Azeroth. Now that he is confined to the Firelands, Baleroc's sanity has dwindled. Few elementals dare disturb him, fearful that they will become victim to his battle lust.<ref>[[Encounter Journal]]</ref> |
||
| − | He appears as one of the bosses in the [[Firelands (instance)|Firelands]] raid instance. |
||
| − | World first ''heroic'' kill on 25-man achieved |
+ | World first ''heroic'' kill on 25-man achieved 7.7.2011 by '''Method - EU-Xavius'''. |
==Abilities== |
==Abilities== |
||
| − | ===Stage One: Nuisances, Nuisances!=== |
||
| − | Lord Rhyolith ignores players while his armor is intact, but they can attack his feet to control his movement. |
||
| + | In all difficulty settings, Baleroc has a hard enrage timer of 6 minutes. |
||
| − | *{{abilities|Obsidian Armor|Lord Rhyolith awakens encrusted in a thick coat of Obsidian Armor, which reduces all damage he takes by 80%. Lord Rhyolith's Obsidian Armor is reduced by 10% every time he steps on an active volcano. In addition, in Heroic Difficulty, 10 Liquid Obsidian creatures spawn around him.|id=98632|image=inv_shield_firelandsraid_d_02}} |
||
| − | **{{abilities|Liquid Obsidian|The Liquid Obsidian moves towards Lord Rhyolith, and casts Fuse when it reaches him.}} |
||
| − | ***{{abilities|Fuse|The Liquid Obsidian fuses with Lord Rhyolith, increasing his damage reduction by 1%.|id=99875|image=inv_misc_armorkit_03}} |
||
| − | *{{abilities|Concussive Stomp|Lord Rhyolith smashes the ground, inflicting 35000 Fire damage to all players. Each stomp creates two to three volcanoes.|id=97282|image=inv_elemental_primal_fire}} |
||
| − | *{{abilities|Volcano|Lord Rhyolith ignites a Volcano, causing it to inflict 12000 Fire damage to 3/6 (10/25) random players every 2 sec. When struck, the player takes 10% additional Fire damage for 14 sec. This effect stacks up to 20 times, and will fade once the activated volcano is destroyed.|id=98492|type=important}} |
||
| − | *{{abilities|Crater|Lord Rhyolith creates a crater when he steps on a volcano. Occasionally, Lord Rhyolith causes streams of lava to flow from a crater. The moving stream of lava inflicts 75000 Fire damage and slightly knocking up any player in its path. After 10 sec. the stream of lava erupts, inflicting 150000 Fire damage to any player standing within a lava stream.|id=97234}} |
||
| − | *{{abilities|Thermal Ignition|Lord Rhyolith releases a jet of cinders, inflicting 15000 Fire damage to players within 7 yards and creates either 5 Fragments of Rhyolith or 1 Spark of Rhyolith. In Heroic Difficulty Lord Rhyolith creates 10 Fragments of Rhyolith instead of 5.}} |
||
| − | **{{abilities|Fragment of Rhyolith|Fragments of Rhyolith have low health. If not slain within 30 sec, they inflict damage equal to 100%/50% (10/25) of their current health to a random player.|type=deadly}} |
||
| − | **{{abilities|Spark of Rhyolith|Sparks of Rhyolith inflicts 8500 Fire damage to all players within 12 yards every second.|id=98598}} |
||
| − | ***{{abilities|Infernal Rage|Sparks of Rhyolith increase their damage dealt by 10% and damage taken by 10% every 5 seconds. This effect stacks up to 20 times.|id=98596|type=deadly|image=spell_fire_elemental_totem}} |
||
| − | *{{abilities|Drink Magma|If Lord Rhyolith reaches the edge of his plateau, he drinks from the liquid magma and inflicts 35000 Fire damage every second on all players for 4 sec.|id=98043|type=deadly|image=spell_shaman_lavaburst}} |
||
| + | *{{abilities|Berserk|Increases the caster's attack and movement speeds by 150% and all damage it deals by 500%. Also grants immunity to Taunt effects.|id=26662|image=spell_shadow_unholyfrenzy|notes=Cast after 6 minutes of combat.}} |
||
| − | ===Stage Two: Now you will BURN!=== |
||
| + | *{{abilities|Blaze of Glory|Baleroc's assault periodically awakens a burning spark within his current target, increasing the target's physical damage taken by 20%, but also raising their maximum health by 20%. Every time Baleroc applies Blaze of Glory, he gains an application of Incendiary Soul.|id=99252|image=ABILITY_MAGE_LIVINGBOMB}} |
||
| − | When Lord Rhyolith reaches 25% remaining health, his Obsidian armor shatters. He becomes attackable and no longer ignores players. |
||
| + | **{{abilities|Incendiary Soul|Every time Baleroc applies Blaze of Glory, he gains an application of Incendiary Soul, increasing his Fire damage dealt by 20%.|id=99369|image=ability_mage_firestarter}} |
||
| − | *{{abilities|Immolation|Lord Rhyolith's fiery presence inflicts 8000 Fire damage to all players every second.|id=99845|image=ability_rhyolith_immolation}} |
||
| + | |||
| − | *{{abilities|Concussive Stomp|Lord Rhyolith smashes the ground, inflicting 35000 Fire damage to all players.|id=97282|image=inv_elemental_primal_fire}} |
||
| + | *{{abilities|Shards of Torment|Baleroc summons a crystal amongst his foes, which continually channels a shadowy beam on the nearest player. In 25 player raids, Baleroc summons two crystals.|image=INV_JEWELCRAFTING_SHADOWSONGAMETHYST_01}} |
||
| − | *{{abilities|Unleashed Flame|Lord Rhyolith unleashes beams of fire which pursue random players, inflicting 10000 Fire damage to all players within 5 yards of the beam's impact location.|id=100974|type=heroic|image=ability_mage_firestarter}} |
||
| + | **{{abilities|Torment|The Shard of Torment inflicts 4000 Shadow damage per application to the nearest player, stacking once per second.|id=99256|image=spell_shadow_twistedfaith}} |
||
| + | **{{abilities|Tormented|When Torment fades from a player, they are afflicted by the Tormented effect, which increases their Shadow damage taken by 250% and reduces the player's healing done by 50% for 40 sec. (Heroic-mode Only) Direct melee contact with any other player will apply a fresh copy of the Tormented effect to that player.|id=99257|image=spell_shadow_gathershadows}} |
||
| + | **{{abilities|Wave of Torment|If no player stands within 15 yards of a Shard of Torment, the Shard pulses this effect, inflicting 15000 Shadow damage each second to all players.|id=99261|image=spell_fire_twilightnova}} |
||
| + | **{{abilities|Vital Spark|If a player casts a direct heal on someone being damaged by Torment, the healer gains an application of Vital Spark for each three stacks of Torment on the target. Casting a single-target direct heal on a target affected by Blaze of Glory will trigger Vital Flame.|id=99262|type=healer|image=inv_elemental_mote_fire01}} |
||
| + | ***{{abilities|Vital Flame|Vital Flame increases healing done to targets affected by Blaze of Glory by 5% per stack of Vital Spark consumed, lasting for 15 sec. When Vital Flame expires, it restores the Vital Spark stacks consumed to create the effect.|id=99263|type=healer|image=inv_elemental_primal_fire}} |
||
| + | |||
| + | *{{abilities|Blades of Baleroc|Baleroc periodically empowers one of his blades with Shadow or Fire energy, and wields it alone for 15 sec.}} |
||
| + | **{{abilities|Decimation Blade|Baleroc's melee strikes do no Physical damage but instead inflict Shadow damage equal to 90% of the target's maximum health, but always at least 250000 damage. This damage cannot be resisted or mitigated but can be dodged. Baleroc's time between attacks increases by 100% while this effect is active.|id=99353|image=spell_shadow_curse}} |
||
| + | **{{abilities|Inferno Blade|Baleroc's melee strikes do no Physical damage but instead inflict 100000 Fire damage.|id=99351|image=inv_sword_09}} |
||
| + | |||
| + | *{{abilities|Countdown| Baleroc links two players to each other for 8 sec. If the chosen players move within 4 yards of each other, the effect dissipates harmlessly. If the effect runs its full course, then both players explode, inflicting 100000 Fire damage to all players within 100 yards.|type=heroic|image=SPELL_NATURE_TIMESTOP}} |
||
==Strategy== |
==Strategy== |
||
| + | ===Tanking=== |
||
| − | === Phase One: Drive his feet === |
||
| + | |||
| + | Baleroc is a 2-tank fight with an Blaze tank and a Decimation tank. |
||
| + | The Decimation Blade mechanic motivates you to have one tank who has a little over 250K health so that he can survive Decimation Blade. The other tank will gain stacks of Blaze of Glory which will eventually cause him to have much more health. |
||
| − | The goal of phase one is to ablate his obsidian armor and damage him enough to start phase two. Causing the boss to step on active volcanoes is critical to this process. However, most of the raid will be concentrating on staying alive by destroying adds and avoiding lava and other environmental damage. |
||
| + | The Decimation tank should start the pull and stack Blaze of Glory until he has just over 250K health. At this point the Blaze tank can wait for safe time (not during an impending Decimation Blade) and taunt off the Decimation tank. |
||
| − | Tanks are not on the boss during phase one. They are instead managing adds. One tank should be responsible for the Sparks, pulling them away from the group, while the other tank gathers the Fragments for AoE. |
||
| + | If the Blaze tank were struck with Decimation Blade late in the fight he would suffer much more than 250K damage, causing unnecessary load on the healers. Conversely, if the Decimation tank were struck by Inferno Blade, he might not have enough health to survive the Incendiary-Soul-augmented damage. This tank swap might remind raiders of the [[Chimaeron]] Break/DA tank option. |
||
| − | When the battle starts a UI element appears which illustrates how players are affecting Rhyolith's navigation. Causing damage to one of Rhyolith's feet causes him to turn toward that foot. A yellow bar, if present, indicates which direction he is turning. Typically only a few players are assigned foot duty. Note: the longer phase 1 lasts, the more damage Rhyolith's phase 2 abilities will last, as he will continue gaining a stacking damage buff once his armor is gone until he reaches 25% and transitions to phase 2. The DPS on foot duty should ''always'' be damaging one of the feet, even if the goal is to keep him moving straight (in this case, split dps between the feet). |
||
| + | When Baleroc empowers his blade, it will be random whether he chooses Decimation Blade or Inferno Blade (note: the first blade will always be Inferno Blade), but you do have a warning to give you time to taunt. Once his blades are empowered they are in that mode for 12 seconds. This means that the Decimation tank can take a total of 3 strikes that do >240K damage. This damage cannot be reduced by cooldowns, absorbs, or blocks, but fortunately it ''can'' be dodged or parried. Unfortunately this is not reliable, so healers still need to get him back >90% health during the 5 seconds between swings. If the healers are having difficulty doing this reliably the Blaze tank can taunt until the Decimation tank is restored. This is a desperate tactic because the healers then have to heal up the Blaze tank from near death, and in the late stages of the fight it is not unusual for the Blaze tank to have more than a million health. |
||
| − | The exact rules governing this foot-driving are poorly understood at this point, but the feet will steadily restore toward center, and this occurs more quickly the faster he is turning. What is well-understood is that if he is not maneuvered correctly he will reach the lava at the edge of the platform and Drink Magma, causing massive damage to the raid and very likely a wipe. Also, you want to drive him over ''active'' volcanoes to ablate his Obsidian Armor. Another desirable result of volcano-stomping is that it ends that volcano's fire damage plaguing the raid. Inactive volcanoes can be run over as well. This will not reduce his armor, but will prevent that volcano from being activated later in the fight. |
||
| + | The random nature of the blades and the chance to avoid Decimation Blade does, along with the rapidly ballooning healing output, does mean that losing the Decimation tank late in the fight is not necessarily an instant wipe. The Blaze tank can survive a single Decimation Blade, and healers can often (though with difficulty) manage to heal through the vastly increased damage if they've been stacking Vital Spark properly, and it's possible to randomly get Inferno Blade (instead of Decimation Blade) repeatedly. In addition, if a tank is resurrected, he retains his stacks of Blaze of Glory, so it is possible for him to resume his role. |
||
| − | While the foot team is managing Rhyolith's position the rest of the raid is dealing with the Fragments and Sparks that spawn periodically throughout the fight. Fragments spawn in a swarm and should be destroyed before their explosions (30 second timer) damage the raid. Sparks spawn one at a time and have a pulsing aura that damages nearby players. As long as they are alive they are stacking Infernal Rage which increases the damage they deal to the tank and other nearby players. |
||
| − | === |
+ | ===Shards of Torment=== |
| + | Baleroc drops Shards of Torment: 1 in 10-man, 2 in 25-man. The shards will spawn on the closest non-tank to Baleroc, generally one of the melee, so it is a good idea to have the melee stack up at a particular location before each shard spawn to ensure a predictable location. |
||
| − | Once the boss reaches 25%, he becomes molten, becomes tankable, and can be attacked directly. The raid should group up behind the boss for AoE healing and burn the boss down as quickly as possible. |
||
| + | |||
| + | If no one is near a Shard of Torment, it inflicts Wave of Torment upon the entire raid. Do not let this happen. When players are in range of a shard the closest one gets stacked with Torment. ''Torment must be taken by DPS.'' Healers and especially Tanks never ever want to get Torment, because the Tormented debuff that follows halves their healing performed and will cause the Tank to take deadly damage from Inferno and Decimation Blade. |
||
| + | |||
| + | The stacks of Torment cause increasing shadow damage. The shard "tank" wants to let Torment stack as high as possible before running away and letting another DPS "tank" the shard. The high stacks of Torment allow healers to stack Vital Spark faster. Each shard will apply a total of 24-25 stacks of Torment, so either 2 dps taking 12 stacks apiece (topping out at 48000 shadow damage per second to the shard tank) or 3 dps taking 8 stacks apiece (topping out at 32000 shadow damage per second to the shard tank) is recommended. An alternate strategy is to have one dps with a large damage reduction cooldown (a Retribution paladin with Divine Protection glyphed is a good candidate due to the short CD) take 15-18 stacks, with another dps taking the remaining 8-10. This allows healers to gain an extremely large number of Vital Spark stacks from that shard phase. |
||
| + | |||
| + | Once a player has stopped tanking a shard, they will lose their Torment stacks after 1-2 seconds and gain Tormented instead. Tormented significantly increases shadow damage taken, meaning it would be a really bad idea for a Tormented player to get any Torment stacks until the Tormented has fallen off. This means that DPS will have to take turns tanking the shard. However it is important to note that the Torment channel does not refresh the Tormented debuff. This only happens if you gain, then lose the Torment debuff. Tormented lasts 40 seconds. If using 3 DPS per shard (8 stacks each), this means a minimum of 5 dps will need to be in the shard rotation, as the Tormented debuff will fall off again just as the first player needs to take it from the 5th. |
||
| + | |||
| + | This Tormented debuff also means it is ''extremely'' important that the Decimation Blade tank doesn't accidentally take a tick of the shard and gain the debuff, as Decimation Blade will one-shot that tank with it up. |
||
| + | |||
| + | On Heroic mode, Tormented will spread to all nearby players. Because of this, extra care needs to be taken that Tormented Players are stacked away from other players (but not too far, due to Countdown), that the tank(s) ''never'' get Tormented, and that healers get it as little as possible. |
||
| + | |||
| + | ===Healing=== |
||
| + | |||
| + | Healers can be divided into two teams. One team will heal the boss tank while the other team heals the shard tanks suffering from the Torment debuff. |
||
| + | |||
| + | Using direct heals (not AoE or HoT heals) on a player with Torment stacks Vital Spark. |
||
| + | |||
| + | When a healer with Vital Spark casts a heal on a player with Blaze of Glory (either of the boss tanks) then it converts spark stacks to Vital Flame, increasing healing done to the Blaze of Glory player. |
||
| + | |||
| + | After 15 seconds the Vital Flame will convert back into Vital Spark with the same number of stacks it had previously. |
||
| + | |||
| + | Once the Vital Flame ends the healing teams should swap duties. The ones that were previously stacking Vital Spark by healing Torment victims should start healing the boss tanks and activate their Vital Flame. The ones that were healing the boss tanks should start healing Torment victims and stack more Vital Sparks. Alternatively, to reduce target swapping and ramp-up time on healing, healers can stay on the tank for two Vital Flame cycles, then swap off for two. This results in healers swapping every 30 seconds rather than every minute. Since the shards last approximately 28 seconds apiece, this swap lines up well with them and can be used as a rough gauge of swap timing. |
||
| + | |||
| + | ===Countdown=== |
||
| + | |||
| + | If you are a Countdown victim, move to the other player and hold still until the debuff falls off. If you fail to do this, or move too slowly, (or run away too soon), you will both explode and do massive damage to most of your teammates. If one player has Tormented, it is possible with perfect execution to avoid spreading the debuff; however, this can be almost impossible in actual circumstances (for instance, due to latency). Backup healers and soakers must be prepared to take over in case a healer or shard soaker receives Tormented as a result of Countdown. |
||
| + | |||
| + | ===Enrage=== |
||
| + | |||
| + | On all difficulties, Baleroc has a hard enrage timer of 6 minutes. Notably, his enrage does not immediately wipe the raid, and it is possible with kiting and a good string of avoidance to kill him after his berserk. |
||
==Loot== |
==Loot== |
||
{{lootbox|Normal Mode |
{{lootbox|Normal Mode |
||
| + | |Gatecrasher |
||
| − | |Dreadfire Drape |
||
| + | |Mantle of Closed Doors |
||
| ⚫ | |||
| + | |Breastplate of the Incendiary Soul |
||
| − | |Arbalest of Erupting Fury |
||
| + | |Shoulderpads of the Forgotten Gate |
||
| − | |Incendic Chestguard |
||
| ⚫ | |||
| − | |Hood of Rampant Disdain |
||
| + | |Gatekeeper's Embrace |
||
| − | |Flaming Core Chestguard |
||
| + | |Decimation Treads |
||
| − | |Lava Line Wristbands |
||
| + | |Molten Scream |
||
| − | |Heartstone of Rhyolith |
||
| ⚫ | |||
| − | |Cracked Obsidian Stompers |
||
| + | |Casque of Flame |
||
| − | |Fireskin Gauntlets |
||
| + | |Helm of Blazing Glory |
||
| − | |Grips of the Raging Giant |
||
| + | |Shard of Torment |
||
| ⚫ | |||
| + | |Necromantic Focus |
||
| − | |Volcanospike |
||
}} |
}} |
||
| + | |||
| − | |||
{{lootbox|Heroic Mode |
{{lootbox|Heroic Mode |
||
| − | | |
+ | |Gatecrasher (heroic) |
| − | | |
+ | |Mantle of Closed Doors (heroic) |
| − | | |
+ | |Breastplate of the Incendiary Soul (heroic) |
| − | | |
+ | |Shoulderpads of the Forgotten Gate (heroic) |
| − | | |
+ | |Glowing Wing Bracers (heroic) |
| − | | |
+ | |Gatekeeper's Embrace (heroic) |
| − | | |
+ | |Decimation Treads (heroic) |
| − | | |
+ | |Molten Scream (heroic) |
| − | | |
+ | |Flickering Handguards (heroic) |
| − | | |
+ | |Casque of Flame (heroic) |
| − | | |
+ | |Helm of Blazing Glory (heroic) |
| − | | |
+ | |Shard of Torment (heroic) |
| − | | |
+ | |Necromantic Focus (heroic) |
|Crystallized Firestone |
|Crystallized Firestone |
||
}} |
}} |
||
| Line 100: | Line 129: | ||
==Quotes== |
==Quotes== |
||
;Aggro |
;Aggro |
||
| − | + | *{{text|yell|You are forbidden from my master's domain, mortals.}} |
|
| + | ;Shards of Torment |
||
| ⚫ | |||
| − | *{{text|yell| |
+ | *{{text|yell|Fool mortals. Hurl yourselves into your own demise!}} |
| − | *{{text|yell|Finished.}} |
||
| − | *{{text|yell|Squeak, little pest.}} |
||
| + | ;Baleroc Readies his Inferno Blade! |
||
| − | ;Spawning Adds |
||
| − | *{{text|yell| |
+ | *{{text|yell|Burn beneath my molten fury!}} |
| − | *{{text|yell|Shatter the bones!}} |
||
| + | ;Baleroc Readies his Decimation Blade! |
||
| − | ;Stomp |
||
| − | *{{text|yell| |
+ | *{{text|yell|By the Firelord's command, you, too, shall perish!}} |
| − | *{{text|yell|Stomp now.}} |
||
| + | ;Berserk |
||
| − | ;Activating Volcano |
||
| − | *{{text|yell| |
+ | *{{text|yell|Your flesh is forfeit to the fires of this realm.}} |
| − | *{{text|yell|Succumb to living flame.}} |
||
| − | *{{text|yell|My inner fire can never die!}} |
||
| − | *{{text|yell|Consuuuuuuume!}} |
||
| − | *{{text|yell|Flesh, buuurrrns.}} |
||
| ⚫ | |||
| − | ;Armor Weakened |
||
| − | *{{text|yell| |
+ | *{{text|yell|You have been judged.}} |
| − | *{{text|yell| |
+ | *{{text|yell|Behold your weakness.}} |
| − | *{{text|yell| |
+ | *{{text|yell|None shall pass!}} |
| − | *{{text|yell|Oww now hey.}} |
||
| − | *{{text|yell|Uurrghh now you... you infuriate me!}} |
||
| − | |||
| − | ;Armor Shattered |
||
| − | *{{text|yell|Eons I have slept undisturbed... Now this... Creatures of flesh, now you will BURN!}} |
||
;Death |
;Death |
||
| − | *{{text|yell| |
+ | *{{text|yell|Mortal filth... the master's keep is forbidden...}} |
| − | |||
| − | ==Related Achievements== |
||
| − | *{{achievement|Heroic: Lord Rhyolith}} |
||
| − | *{{achievement|Not an Ambi-Turner}} |
||
| − | *{{achievement|Firelands (Achievement)}} |
||
==Videos== |
==Videos== |
||
| Line 144: | Line 155: | ||
===10-man Heroic=== |
===10-man Heroic=== |
||
| − | *{{#vlink: |
+ | *{{#vlink:9w-o4nhbwbo|Vagrant Corps - 1080p}} |
===10-man Normal=== |
===10-man Normal=== |
||
| − | *{{#vlink: |
+ | *{{#vlink:9h8VwZN6-yI|Vagrant Corps - 1080p}} |
| − | *{{#vlink: |
+ | *{{#vlink:v43NBadlVZE|Learntoraid Normal 10-man Strategy Guide}} |
===25-man Normal=== |
===25-man Normal=== |
||
| − | *{{#vlink: |
+ | *{{#vlink:gRkmuC69a2E|TankSpot}} |
| − | |||
| − | ===Additional videos=== |
||
| − | *{{#vlink:7ojAxMVdBBk|Bless the Martyr HD, achv Not an ambi turner}} |
||
==Patches and hotfixes== |
==Patches and hotfixes== |
||
| − | * |
+ | *{{Hotfix|date=2011-09-20|bluenote= |
| − | **Health and damage have been reduced by |
+ | **Health and damage have been reduced by 25% on normal difficulty. Health and damage have been reduced by 15% on Heroic difficulty. |
| + | **Baleroc now swings 25% slower while Decimation Blade is active. |
||
| − | **The |
+ | **The duration of Tormented has been reduced on normal difficulty.|link=http://us.battle.net/wow/en/blog/3019413}} |
| ⚫ | |||
| + | * {{Hotfix|date=2011-07-26|bluenote=On 25-player Heroic difficulty, Torment now grants a stack of Vital Spark per 5 applications, up from 3. To compensate, Baleroc’s health has been reduced on 25-player Heroic difficulty.|link=http://us.battle.net/wow/en/blog/3019413}} |
||
| ⚫ | |||
| ⚫ | |||
| − | **Eruption now increases fire damage taken by 5% per stack, down from 10%. |
||
| ⚫ | |||
| − | **The Eruption debuff is now cleared when transitioning into phase 2 of the fight.|link=http://us.battle.net/wow/en/blog/3019413}} |
||
| ⚫ | |||
| − | *{{Hotfix|date=2011-07-08|bluenote= |
||
| + | ** Baleroc's gate now despawns properly when he resets. |
||
| − | **Multiple volcanoes casting Eruption will now create separate stacks. Crushing a volcano will cause its stacks of Eruption to fade shortly after. |
||
| − | ** |
+ | ** Shards of Torment despawn when Baleroc resets even if they are spawned after Baleroc has despawned.|link=http://us.battle.net/wow/en/blog/3019413}} |
| + | * {{Hotfix|date=2011-07-01|bluenote=Baleroc's gate will now properly unlock itself again after a wipe, even if Shannox is still alive.|link=http://us.battle.net/wow/en/blog/3019413}} |
||
| − | *{{Hotfix|date=2011-07-06|bluenote= |
||
| ⚫ | |||
| − | **Lord Rhyolith can now be quickly snapped from left to right, or right to left, if the appropriate amount of damage is dealt to the opposite foot. |
||
| − | **Lord Rhyolith now prefers to activate volcanoes that are in front of him over volcanoes that are behind him. |
||
| − | **Lord Rhyolith now spawns slightly further back on his platform, allowing players to stand on the edge of the terrain and not aggro him. |
||
| − | **Lord Rhyolith no longer despawns when reaching the end of the encounter area, and does not despawn when casting Drink Magma from any of the possible locations. |
||
| − | **Lord Rhyolith now summons in volcanoes when intended, and it is no longer possible for the first set of volcanoes to be ignored.|link=http://us.battle.net/wow/en/blog/3019413}} |
||
| ⚫ | |||
| ⚫ | |||
==References== |
==References== |
||
| Line 184: | Line 186: | ||
Repeat violations may result in a BAN. |
Repeat violations may result in a BAN. |
||
Have a nice day. :) --> |
Have a nice day. :) --> |
||
| − | {{elinks-NPC| |
+ | {{elinks-NPC|53494}} |
| − | {{elink|icon=25man|site=25man.com|link=http://25man.com/firelands/ |
+ | {{elink|icon=25man|site=25man.com|link=http://25man.com/firelands/baleroc|desc=Baleroc Tactics & Strategy Guide}} |
| − | {{elink|icon=icyveinscom|site=Icy Veins|link=http://www.icy-veins.com/ |
+ | {{elink|icon=icyveinscom|site=Icy Veins|link=http://www.icy-veins.com/baleroc-detailed-strategy|desc=Comprehensive Baleroc strategy guide (includes perspective guides for tanks, healers, and DPS, as well as Heroic mode)}} |
| − | {{elink|icon=L2R|site=LearnToRaid.com|link=http://www.learntoraid.com/2011/ |
+ | {{elink|icon=L2R|site=LearnToRaid.com|link=http://www.learntoraid.com/2011/07/03/baleroc-video-strategy-guide-10-normal/|desc=Baleroc Video Strategy Guide}} |
| − | |||
| − | {{DEFAULTSORT:Rhyolith, Lord}} |
||
[[Category:Fire elementals]] |
[[Category:Fire elementals]] |
||
[[Category:Bosses]] |
[[Category:Bosses]] |
||
Revision as of 08:54, 17 January 2012
 | |
| Title | <The Gatekeeper> |
| Race | Fire elemental (Elemental) |
| Level | ?? Boss |
| Location | Mortal's Demise, Firelands |
- "Baleroc stands before the gate to Sulfuron Keep, amidst a river of combustion that serves as the Sulfuron moat. The bridge to Ragnaros’s blistering chamber can only be crossed by those who find a way to put an end to this towering elemental monstrosity.[1]
Baleroc earned a reputation as a merciless combatant during the elemental wars of ancient Azeroth. Now that he is confined to the Firelands, Baleroc's sanity has dwindled. Few elementals dare disturb him, fearful that they will become victim to his battle lust.[2]
World first heroic kill on 25-man achieved 7.7.2011 by Method - EU-Xavius.
Abilities
In all difficulty settings, Baleroc has a hard enrage timer of 6 minutes.
 Berserk — Increases the caster's attack and movement speeds by 150% and all damage it deals by 500%. Also grants immunity to Taunt effects. Cast after 6 minutes of combat.
- Blaze of Glory — Baleroc's assault periodically awakens a burning spark within his current target, increasing the target's physical damage taken by 20%, but also raising their maximum health by 20%. Every time Baleroc applies Blaze of Glory, he gains an application of Incendiary Soul.
- Incendiary Soul — Every time Baleroc applies Blaze of Glory, he gains an application of Incendiary Soul, increasing his Fire damage dealt by 20%.
- Shards of Torment — Baleroc summons a crystal amongst his foes, which continually channels a shadowy beam on the nearest player. In 25 player raids, Baleroc summons two crystals.
- Torment — The Shard of Torment inflicts 4000 Shadow damage per application to the nearest player, stacking once per second.
- Tormented — When Torment fades from a player, they are afflicted by the Tormented effect, which increases their Shadow damage taken by 250% and reduces the player's healing done by 50% for 40 sec. (Heroic-mode Only) Direct melee contact with any other player will apply a fresh copy of the Tormented effect to that player.
- Wave of Torment — If no player stands within 15 yards of a Shard of Torment, the Shard pulses this effect, inflicting 15000 Shadow damage each second to all players.
- Vital Spark — If a player casts a direct heal on someone being damaged by Torment, the healer gains an application of Vital Spark for each three stacks of Torment on the target. Casting a single-target direct heal on a target affected by Blaze of Glory will trigger Vital Flame.
- Vital Flame — Vital Flame increases healing done to targets affected by Blaze of Glory by 5% per stack of Vital Spark consumed, lasting for 15 sec. When Vital Flame expires, it restores the Vital Spark stacks consumed to create the effect.
- Blades of Baleroc — Baleroc periodically empowers one of his blades with Shadow or Fire energy, and wields it alone for 15 sec.
- Decimation Blade — Baleroc's melee strikes do no Physical damage but instead inflict Shadow damage equal to 90% of the target's maximum health, but always at least 250000 damage. This damage cannot be resisted or mitigated but can be dodged. Baleroc's time between attacks increases by 100% while this effect is active.
- Inferno Blade — Baleroc's melee strikes do no Physical damage but instead inflict 100000 Fire damage.
- Countdown — Baleroc links two players to each other for 8 sec. If the chosen players move within 4 yards of each other, the effect dissipates harmlessly. If the effect runs its full course, then both players explode, inflicting 100000 Fire damage to all players within 100 yards.
Strategy
Tanking
Baleroc is a 2-tank fight with an Blaze tank and a Decimation tank.
The Decimation Blade mechanic motivates you to have one tank who has a little over 250K health so that he can survive Decimation Blade. The other tank will gain stacks of Blaze of Glory which will eventually cause him to have much more health.
The Decimation tank should start the pull and stack Blaze of Glory until he has just over 250K health. At this point the Blaze tank can wait for safe time (not during an impending Decimation Blade) and taunt off the Decimation tank.
If the Blaze tank were struck with Decimation Blade late in the fight he would suffer much more than 250K damage, causing unnecessary load on the healers. Conversely, if the Decimation tank were struck by Inferno Blade, he might not have enough health to survive the Incendiary-Soul-augmented damage. This tank swap might remind raiders of the Chimaeron Break/DA tank option.
When Baleroc empowers his blade, it will be random whether he chooses Decimation Blade or Inferno Blade (note: the first blade will always be Inferno Blade), but you do have a warning to give you time to taunt. Once his blades are empowered they are in that mode for 12 seconds. This means that the Decimation tank can take a total of 3 strikes that do >240K damage. This damage cannot be reduced by cooldowns, absorbs, or blocks, but fortunately it can be dodged or parried. Unfortunately this is not reliable, so healers still need to get him back >90% health during the 5 seconds between swings. If the healers are having difficulty doing this reliably the Blaze tank can taunt until the Decimation tank is restored. This is a desperate tactic because the healers then have to heal up the Blaze tank from near death, and in the late stages of the fight it is not unusual for the Blaze tank to have more than a million health.
The random nature of the blades and the chance to avoid Decimation Blade does, along with the rapidly ballooning healing output, does mean that losing the Decimation tank late in the fight is not necessarily an instant wipe. The Blaze tank can survive a single Decimation Blade, and healers can often (though with difficulty) manage to heal through the vastly increased damage if they've been stacking Vital Spark properly, and it's possible to randomly get Inferno Blade (instead of Decimation Blade) repeatedly. In addition, if a tank is resurrected, he retains his stacks of Blaze of Glory, so it is possible for him to resume his role.
Shards of Torment
Baleroc drops Shards of Torment: 1 in 10-man, 2 in 25-man. The shards will spawn on the closest non-tank to Baleroc, generally one of the melee, so it is a good idea to have the melee stack up at a particular location before each shard spawn to ensure a predictable location.
If no one is near a Shard of Torment, it inflicts Wave of Torment upon the entire raid. Do not let this happen. When players are in range of a shard the closest one gets stacked with Torment. Torment must be taken by DPS. Healers and especially Tanks never ever want to get Torment, because the Tormented debuff that follows halves their healing performed and will cause the Tank to take deadly damage from Inferno and Decimation Blade.
The stacks of Torment cause increasing shadow damage. The shard "tank" wants to let Torment stack as high as possible before running away and letting another DPS "tank" the shard. The high stacks of Torment allow healers to stack Vital Spark faster. Each shard will apply a total of 24-25 stacks of Torment, so either 2 dps taking 12 stacks apiece (topping out at 48000 shadow damage per second to the shard tank) or 3 dps taking 8 stacks apiece (topping out at 32000 shadow damage per second to the shard tank) is recommended. An alternate strategy is to have one dps with a large damage reduction cooldown (a Retribution paladin with Divine Protection glyphed is a good candidate due to the short CD) take 15-18 stacks, with another dps taking the remaining 8-10. This allows healers to gain an extremely large number of Vital Spark stacks from that shard phase.
Once a player has stopped tanking a shard, they will lose their Torment stacks after 1-2 seconds and gain Tormented instead. Tormented significantly increases shadow damage taken, meaning it would be a really bad idea for a Tormented player to get any Torment stacks until the Tormented has fallen off. This means that DPS will have to take turns tanking the shard. However it is important to note that the Torment channel does not refresh the Tormented debuff. This only happens if you gain, then lose the Torment debuff. Tormented lasts 40 seconds. If using 3 DPS per shard (8 stacks each), this means a minimum of 5 dps will need to be in the shard rotation, as the Tormented debuff will fall off again just as the first player needs to take it from the 5th.
This Tormented debuff also means it is extremely important that the Decimation Blade tank doesn't accidentally take a tick of the shard and gain the debuff, as Decimation Blade will one-shot that tank with it up.
On Heroic mode, Tormented will spread to all nearby players. Because of this, extra care needs to be taken that Tormented Players are stacked away from other players (but not too far, due to Countdown), that the tank(s) never get Tormented, and that healers get it as little as possible.
Healing
Healers can be divided into two teams. One team will heal the boss tank while the other team heals the shard tanks suffering from the Torment debuff.
Using direct heals (not AoE or HoT heals) on a player with Torment stacks Vital Spark.
When a healer with Vital Spark casts a heal on a player with Blaze of Glory (either of the boss tanks) then it converts spark stacks to Vital Flame, increasing healing done to the Blaze of Glory player.
After 15 seconds the Vital Flame will convert back into Vital Spark with the same number of stacks it had previously.
Once the Vital Flame ends the healing teams should swap duties. The ones that were previously stacking Vital Spark by healing Torment victims should start healing the boss tanks and activate their Vital Flame. The ones that were healing the boss tanks should start healing Torment victims and stack more Vital Sparks. Alternatively, to reduce target swapping and ramp-up time on healing, healers can stay on the tank for two Vital Flame cycles, then swap off for two. This results in healers swapping every 30 seconds rather than every minute. Since the shards last approximately 28 seconds apiece, this swap lines up well with them and can be used as a rough gauge of swap timing.
Countdown
If you are a Countdown victim, move to the other player and hold still until the debuff falls off. If you fail to do this, or move too slowly, (or run away too soon), you will both explode and do massive damage to most of your teammates. If one player has Tormented, it is possible with perfect execution to avoid spreading the debuff; however, this can be almost impossible in actual circumstances (for instance, due to latency). Backup healers and soakers must be prepared to take over in case a healer or shard soaker receives Tormented as a result of Countdown.
Enrage
On all difficulties, Baleroc has a hard enrage timer of 6 minutes. Notably, his enrage does not immediately wipe the raid, and it is possible with kiting and a good string of avoidance to kill him after his berserk.
Loot
|
Quotes
- Aggro
- You are forbidden from my master's domain, mortals.
- Shards of Torment
- Fool mortals. Hurl yourselves into your own demise!
- Baleroc Readies his Inferno Blade!
- Burn beneath my molten fury!
- Baleroc Readies his Decimation Blade!
- By the Firelord's command, you, too, shall perish!
- Berserk
- Your flesh is forfeit to the fires of this realm.
- Killing a player
- You have been judged.
- Behold your weakness.
- None shall pass!
- Death
- Mortal filth... the master's keep is forbidden...
Videos
10-man Heroic
10-man Normal
25-man Normal
Patches and hotfixes
- Hotfix (2011-09-20):
- Health and damage have been reduced by 25% on normal difficulty. Health and damage have been reduced by 15% on Heroic difficulty.
- Baleroc now swings 25% slower while Decimation Blade is active.
- The duration of Tormented has been reduced on normal difficulty.
- Hotfix (2011-07-26): On 25-player Heroic difficulty, Torment now grants a stack of Vital Spark per 5 applications, up from 3. To compensate, Baleroc’s health has been reduced on 25-player Heroic difficulty.
- Hotfix (2011-07-08): Death knight Bloodworms are no longer removing stacks of Torment when they explode to heal other players.
- Hotfix (2011-07-06):
- Baleroc’s health has been increased on 10-player Heroic difficulty.
- Baleroc's gate now despawns properly when he resets.
- Shards of Torment despawn when Baleroc resets even if they are spawned after Baleroc has despawned.
- Hotfix (2011-07-01): Baleroc's gate will now properly unlock itself again after a wipe, even if Shannox is still alive.
- Patch 4.2.0 (2011-06-28): Added.