| Line 1: | Line 1: | ||
| + | :''Were you looking for <small>[[Wowpedia:WoW Icons]], [[Wowpedia:List of mini icons]], [[Wowpedia:List of small icons]] or [[Wowpedia:List of race icons]]</small>?'' |
||
| − | {| style="{{tooltipcss}}" |
||
| + | ---- |
||
| − | | colspan=2 | {{common|Large Obsidian Shard}} |
||
| + | ==[[Warcraft: Orcs & Humans]]== |
||
| + | ===Units=== |
||
| + | ====Portraits==== |
||
| + | {| cellpadding="0" cellspacing="0" width="100%" |
||
|- |
|- |
||
| + | |valign="top" width="40%"| |
||
| − | | colspan=2 | Sells for {{s|50}} to vendors |
||
| + | ;Human portraits |
||
| + | {| cellpadding="0" cellspacing="0" width="100%" |
||
|- |
|- |
||
| + | |valign="top" width="50%"| |
||
| − | | colspan=2 | Item Level 1 |
||
| + | *[[Image:WC1PPeasant.gif]] - 54x38 (gif) |
||
| + | *[[Image:WC1PFootman.gif]] - 54x38 (gif) |
||
| + | *[[Image:WC1PArcher.gif]] - 54x38 (gif) |
||
| + | *[[Image:WC1PKnight.gif]] - 54x38 (gif) |
||
| + | *[[Image:WC1PHCatapult.gif]] - 54x38 (gif) |
||
| + | |valign="top" width="50%"| |
||
| + | *[[Image:WC1PCleric.gif]] - 54x38 (gif) |
||
| + | *[[Image:Warcraft Orcs and Humans - Wounded icon.jpg|54px]] - 58x43 (jpg) |
||
| + | *[[Image:WC1PConjurer.gif]] - 54x38 (gif) |
||
| + | *[[Image:WC1PScorpions.gif]] - 54x38 (gif) |
||
| + | *[[Image:WC1PWaterElemental.gif]] - 54x38 (gif) |
||
| + | |} |
||
| + | |valign="top" width="40%"| |
||
| + | ;Orc portraits |
||
| + | {| cellpadding="0" cellspacing="0" width="100%" |
||
| + | |- |
||
| + | |valign="top" width="50%"| |
||
| + | *[[Image:WC1PPeon.gif]] - 54x38 (gif) |
||
| + | *[[Image:WC1PGrunt.gif]] - 54x38 (gif) |
||
| + | *[[Image:WC1PSpearman.gif]] - 54x38 (gif) |
||
| + | *[[Image:WC1PWolfRaider.gif]] - 54x38 (gif) |
||
| + | *[[Image:WC1POCatapult.gif]] - 54x38 (gif) |
||
| + | |valign="top" width="50%"| |
||
| + | *[[Image:WC1PNecrolyte.gif]] - 54x38 (gif) |
||
| + | *[[Image:WC1POrcSkeleton.gif]] - 54x38 (gif) |
||
| + | *[[Image:WC1PWarlock.gif]] - 54x38 (gif) |
||
| + | *[[Image:WC1PSpiders.gif]] - 54x38 (gif) |
||
| + | *[[Image:WC1PDaemon.gif]] - 54x38 (gif) |
||
| + | |} |
||
| + | |valign="top" width="20%"| |
||
| + | ;Neutral portraits |
||
| + | {| cellpadding="0" cellspacing="0" width="100%" |
||
| + | |- |
||
| + | |valign="top"| |
||
| + | *[[Image:WC1POgre.gif]] - 54x38 (gif) |
||
| + | *[[Image:WC1PBrigand.gif]] - 54x38 (gif) |
||
| + | *[[Image:WC1PSlime.gif]] - 54x38 (gif) |
||
| + | *[[Image:WC1PSkeleton.gif]] - 54x38 (gif) |
||
| + | *[[Image:WC1PFireElemental.gif]] - 54x38 (gif) |
||
| + | |} |
||
|} |
|} |
||
| − | [[Image:INV_Stone_15.png|left]] |
||
| − | <!--- Use the icon for the item above. If you upload the picture, don't change the icon name to ---> |
||
| − | <!--- match the item. Leave the icon name the same so it can be reused by others. ---> |
||
| − | '''Large Obsidian Shards''' are pieces of dark volcanic rock that are strong and can be used by [[Blacksmithing|Blacksmiths]] to craft strong armors with anti-magical powers. |
||
| + | ====Models==== |
||
| + | {| cellpadding="0" cellspacing="0" width="100%" |
||
| + | |- |
||
| + | |valign="top" width="40%"| |
||
| + | ;Human models |
||
| + | {| cellpadding="0" cellspacing="0" width="100%" |
||
| + | |- |
||
| + | |valign="top" width="50%"| |
||
| + | *[[Image:WC1Peasant.gif]] - 24x24 (gif) |
||
| + | *[[Image:WC1Footman.gif]] - 36x38 (gif) |
||
| + | *[[Image:WC1Archer.gif]] - 38x28 (gif) |
||
| + | *[[Image:WC1Knight.gif]] - 56x34 (gif) |
||
| + | *[[Image:WC1Catapult.gif]] - 50x40 (gif) |
||
| + | |valign="top" width="50%"| |
||
| + | *[[Image:WC1Cleric.gif]] - 30x26 (gif) |
||
| + | *[[Image:WC1Wounded.gif]] - 48x24 (gif) |
||
| + | *[[Image:WC1Conjurer.gif]] - 38x24 (gif) |
||
| + | *[[Image:WC1Scorpion.gif]] - 46x34 (gif) |
||
| + | *[[Image:WC1WaterElemental.gif]] - 64x56 (gif) |
||
| + | |} |
||
| + | |valign="top" width="40%"| |
||
| + | ;Orc models |
||
| + | {| cellpadding="0" cellspacing="0" width="100%" |
||
| + | |- |
||
| + | |valign="top" width="50%"| |
||
| + | *[[Image:WC1Peon.gif]] - 32x26 (gif) |
||
| + | *[[Image:WC1Grunt.gif]] - 32x30 (gif) |
||
| + | *[[Image:WC1Spearman.gif]] - 30x28 (gif) |
||
| + | *[[Image:WC1WolfRaider.gif]] - 60x46 (gif) |
||
| + | *[[Image:WC1Catapult.gif]] - 50x40 (gif) |
||
| + | |valign="top" width="50%"| |
||
| + | *[[Image:WC1Necrolyte.gif]] - 34x26 (gif) |
||
| + | *[[Image:WC1Skeleton.gif]] - 24x36 (gif) |
||
| + | *[[Image:WC1Warlock.gif]] - 34x26 (gif) |
||
| + | *[[Image:WC1Spider.gif]] - 38x40 (gif) |
||
| + | *[[Image:WC1Daemon.gif]] - 70x52 (gif) |
||
| + | |} |
||
| + | |valign="top" width="20%"| |
||
| + | ;Neutral models |
||
| + | {| cellpadding="0" cellspacing="0" width="100%" |
||
| + | |- |
||
| + | |valign="top"| |
||
| + | *[[Image:WC1Ogre.gif]] - 40x38 (gif) |
||
| + | *[[Image:WC1Brigand.gif]] - 30x24 (gif) |
||
| + | *[[Image:WC1Slime.gif]] - 48x48 (gif) |
||
| + | *[[Image:WC1Skeleton.gif]] - 24x26 (gif) |
||
| + | *[[Image:WC1FireElemental.gif]] - 70x38 (gif) |
||
| + | |} |
||
| + | |} |
||
| + | ===Characters=== |
||
| + | ====Portraits==== |
||
| + | {| cellpadding="0" cellspacing="0" width="80%" |
||
| + | |- |
||
| + | |valign="top" width="40%"| |
||
| + | ;Human portraits |
||
| + | {| cellpadding="0" cellspacing="0" width="100%" |
||
| + | |- |
||
| + | |valign="top" width="50%"| |
||
| + | *[[Image:WC1PLothar.gif|58px]] - 54x38 (gif) |
||
| + | |valign="top" width="50%"| |
||
| + | *[[Image:WC1PMedivh.gif]] - 54x38 (gif) |
||
| + | |} |
||
| + | |valign="top" width="40%"| |
||
| + | ;Orc portraits |
||
| + | {| cellpadding="0" cellspacing="0" width="100%" |
||
| + | |- |
||
| + | |valign="top" width="50%"| |
||
| + | *[[Image:WC1PGarona.gif]] - 54x38 (gif) |
||
| + | |valign="top" width="50%"| |
||
| + | *[[Image:WC1PGriselda.gif]] - 54x38 (gif) |
||
| + | |} |
||
| + | |} |
||
| + | ====Models==== |
||
| + | {| cellpadding="0" cellspacing="0" width="80%" |
||
| + | |- |
||
| + | |valign="top" width="40%"| |
||
| + | ;Human models |
||
| + | {| cellpadding="0" cellspacing="0" width="100%" |
||
| + | |- |
||
| + | |valign="top" width="50%"| |
||
| + | *[[Image:WC1Lothar.gif]] - 42x38 (gif) |
||
| + | |valign="top" width="50%"| |
||
| + | *[[Image:WC1Medivh.gif]] - 26x32 (gif) |
||
| + | |} |
||
| + | |valign="top" width="40%"| |
||
| + | ;Orc models |
||
| + | {| cellpadding="0" cellspacing="0" width="100%" |
||
| + | |- |
||
| + | |valign="top" width="50%"| |
||
| + | *[[Image:WC1Garona.gif]] - 34x26 (gif) |
||
| + | |valign="top" width="50%"| |
||
| + | *[[Image:WC1Griselda.gif]] - 34x26 (gif) |
||
| + | |} |
||
| + | |} |
||
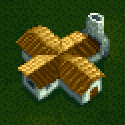
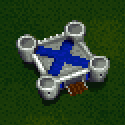
| + | ===Buildings=== |
||
| − | <!--- Extra lines so icon doesn't force the section title 'Source' to the side. Can't use {{clr}} since that will push ---> |
||
| + | {| cellpadding="0" cellspacing="0" width="100%" |
||
| − | <!--- 'Source' section below the Tooltip box. ---> |
||
| + | |- |
||
| − | =Source= |
||
| + | |valign="top" width="50%"| |
||
| − | '''Large Obsidian Shard''' can be found by mining [[Small Obsidian Chunk]]s and [[Large Obsidian Chunk]]s which will sometimes appear after defeating certain mobs inside [[Ahn'Qiraj]] such as, the [[Anubisath Defender]], the [[Obsidian Eradicator]], and [[Moam]]. A [[Mining]] skill of 305 is required to mine the chunks. |
||
| + | ;Human Structures |
||
| + | {| cellpadding="0" cellspacing="0" width="100%" |
||
| + | |- |
||
| + | |valign="top" align="center" width="50%"| |
||
| + | *[[Image:WC1HumanTownHall.gif]]<br/>125x125 (gif) |
||
| + | *[[Image:WC1HumanFarm.gif]]<br/>125x125 (gif) |
||
| + | *[[Image:WC1HumanLumberMill.gif]]<br/>125x125 (gif) |
||
| + | *[[Image:WC1HumanBarracks.gif]]<br/>125x125 (gif) |
||
| + | *[[Image:WC1HumanBlacksmith.gif]]<br/>125x125 (gif) |
||
| + | |valign="top" align="center" width="50%"| |
||
| + | *[[Image:WC1HumanChurch.gif]]<br/>125x125 (gif) |
||
| + | *[[Image:WC1HumanStables.gif]]<br/>125x125 (gif) |
||
| + | *[[Image:WC1HumanTower.gif]]<br/>125x125 (gif) |
||
| + | *[[Image:WC1HumanRoad.gif]]<br/>125x125 (gif) |
||
| + | *[[Image:WC1HumanWall.gif]]<br/>125x125 (gif) |
||
| + | |} |
||
| + | |valign="top" width="50%"| |
||
| − | =Large Obsidian Shards as an Ingredient= |
||
| + | ;Orc Structures |
||
| − | '''Large Obsidian Shards''' are used in the following recipes: |
||
| + | {| cellpadding="0" cellspacing="0" width="100%" |
||
| − | ===[[Blacksmithing]]=== |
||
| + | |- |
||
| − | *[[Black Grasp of the Destroyer]] |
||
| + | |valign="top" align="center" width="50%"| |
||
| − | *[[Jagged Obsidian Shield]] |
||
| + | *[[Image:WC1OrcTownHall.gif]]<br/>125x125 (gif) |
||
| − | *[[Obsidian Mail Tunic]] |
||
| + | *[[Image:WC1OrcFarm.gif]]<br/>125x125 (gif) |
||
| − | *[[Thick Obsidian Breastplate]] |
||
| + | *[[Image:WC1OrcLumberMill.gif]]<br/>125x125 (gif) |
||
| + | *[[Image:WC1OrcBarracks.gif]]<br/>125x125 (gif) |
||
| + | *[[Image:WC1OrcBlacksmith.gif]]<br/>125x125 (gif) |
||
| + | |valign="top" align="center" width="50%"| |
||
| + | *[[Image:WC1OrcTemple.gif]]<br/>125x125 (gif) |
||
| + | *[[Image:WC1OrcKennel.gif]]<br/>125x125 (gif) |
||
| + | *[[Image:WC1OrcTower.gif]]<br/>125x125 (gif) |
||
| + | *[[Image:WC1OrcRoad.gif]]<br/>125x125 (gif) |
||
| + | *[[Image:WC1OrcWall.gif]]<br/>125x125 (gif) |
||
| + | |} |
||
| + | |- |
||
| − | =Notes= |
||
| + | |valign="top" align="center" width="50%"| |
||
| + | *[[Image:WC1Stormwind.gif]]<br/>200x200 (gif) |
||
| + | |valign="top" align="center" width="50%"| |
||
| + | *[[Image:WC1BlackRock.gif]]<br/>200x200 (gif) |
||
| + | |- |
||
| − | =External Links= |
||
| + | |valign="top" align="left" width="20%"| |
||
| − | *[http://www.thottbot.com/?i=53172 Thottbot] |
||
| + | ;Neutral Structures |
||
| − | *[http://wow.allakhazam.com/db/item.html?witem=22203 Allakhazam] |
||
| + | *[[Image:WC1GoldMine.gif]]<br/>125x125 (gif) |
||
| + | |} |
||
| + | ===Spells=== |
||
| + | {| cellpadding="0" cellspacing="0" width="80%" |
||
| + | |- |
||
| + | |valign="top" width="40%"| |
||
| + | ;Human portraits |
||
| + | {| cellpadding="0" cellspacing="0" width="100%" |
||
| + | |- |
||
| + | |valign="top" width="50%"| |
||
| + | *[[Image:WC1HolyLance.gif]] - 54x38 (gif) |
||
| + | *[[Image:WC1Healing.gif]] - 54x38 (gif) |
||
| + | *[[Image:WC1FarSeeing.gif]] - 54x38 (gif) |
||
| + | *[[Image:WC1Invisibility.gif]] - 54x38 (gif) |
||
| + | |valign="top" width="50%"| |
||
| + | *[[Image:WC1Elemental Blast.gif]] - 54x38 (gif) |
||
| + | *[[Image:WC1PScorpions.gif]] - 54x38 (gif) |
||
| + | *[[Image:WC1RainofFire.gif]] - 54x38 (gif) |
||
| + | *[[Image:WC1PWaterElemental.gif]] - 54x38 (gif) |
||
| + | |} |
||
| + | |valign="top" width="40%"| |
||
| + | ;Orc portraits |
||
| + | {| cellpadding="0" cellspacing="0" width="100%" |
||
| + | |- |
||
| + | |valign="top" width="50%"| |
||
| + | *[[Image:WC1ShadowSpear.gif]] - 54x38 (gif) |
||
| + | *[[Image:WC1RaiseDead.gif]] - 54x38 (gif) |
||
| + | *[[Image:WC1DarkVision.gif]] - 54x38 (gif) |
||
| + | *[[Image:WC1UnholyArmor.gif]] - 54x38 (gif) |
||
| + | |valign="top" width="50%"| |
||
| + | *[[Image:WC1Fireball.gif]] - 54x38 (gif) |
||
| + | *[[Image:WC1PSpiders.gif]] - 54x38 (gif) |
||
| + | *[[Image:WC1PoisonCloud.gif]] - 54x38 (gif) |
||
| + | *[[Image:WC1PDaemon.gif]] - 54x38 (gif) |
||
| + | |} |
||
| + | |} |
||
| + | |||
| + | ===Upgrades=== |
||
| + | {| cellpadding="0" cellspacing="0" width="80%" |
||
| + | |- |
||
| + | |valign="top" width="40%"| |
||
| + | ;Human portraits |
||
| + | {| cellpadding="0" cellspacing="0" width="100%" |
||
| + | |- |
||
| + | |valign="top" width="50%"| |
||
| + | *[[Image:WC1Sword.gif]] - 54x38 (gif) |
||
| + | *[[Image:WC1UpgradeSwordStrength1.gif]] - 54x38 (gif) |
||
| + | *[[Image:WC1UpgradeSwordStrength2.gif]] - 54x38 (gif) |
||
| + | *[[Image:WC1HShield.gif]] - 54x38 (gif) |
||
| + | *[[Image:WC1HUpgradeShieldStrength1.gif]] - 54x38 (gif) |
||
| + | *[[Image:WC1HUpgradeShieldStrength2.gif]] - 54x38 (gif) |
||
| + | |valign="top" width="50%"| |
||
| + | *[[Image:WC1Arrow.gif]] - 54x38 (gif) |
||
| + | *[[Image:WC1UpgradeArrowStrength1.gif]] - 54x38 (gif) |
||
| + | *[[Image:WC1UpgradeArrowStrength2.gif]] - 54x38 (gif) |
||
| + | *[[Image:WC1BreedFasterHorses1.gif]] - 54x38 (gif) |
||
| + | *[[Image:WC1BreedFasterHorses2.gif]] - 54x38 (gif) |
||
| + | |} |
||
| + | |valign="top" width="40%"| |
||
| + | ;Orc portraits |
||
| + | {| cellpadding="0" cellspacing="0" width="100%" |
||
| + | |- |
||
| + | |valign="top" width="50%"| |
||
| + | *[[Image:WC1Axe.gif]] - 54x38 (gif) |
||
| + | *[[Image:WC1UpgradeAxeStrength1.gif]] - 54x38 (gif) |
||
| + | *[[Image:WC1UpgradeAxeStrength2.gif]] - 54x38 (gif) |
||
| + | *[[Image:WC1OShield.gif]] - 54x38 (gif) |
||
| + | *[[Image:WC1OUpgradeShieldStrength1.gif]] - 54x38 (gif) |
||
| + | *[[Image:WC1OUpgradeShieldStrength2.gif]] - 54x38 (gif) |
||
| + | |valign="top" width="50%"| |
||
| + | *[[Image:WC1Spear.gif]] - 54x38 (gif) |
||
| + | *[[Image:WC1UpgradeSpearStrength1.gif]] - 54x38 (gif) |
||
| + | *[[Image:WC1UpgradeSpearStrength2.gif]] - 54x38 (gif) |
||
| + | *[[Image:WC1BreedFasterWolves1.gif]] - 54x38 (gif) |
||
| + | *[[Image:WC1BreedFasterWolves2.gif]] - 54x38 (gif) |
||
| + | |} |
||
| + | |} |
||
| + | |||
| + | |||
| + | ===Doodads=== |
||
| + | {| cellpadding="0" cellspacing="0" width="100%" |
||
| + | |- |
||
| + | |valign="top" width="25%"| |
||
| + | ;Decorations |
||
| + | {| cellpadding="0" cellspacing="0" width="100%" |
||
| + | |- |
||
| + | |valign="top" width="50%"| |
||
| + | *[[Image:Bushes.gif|55px]] - 75x82 (gif) |
||
| + | *[[Image:Rocks.gif|55px]] - 96x96 (gif) |
||
| + | *[[Image:Cave rocks.gif|55px]] - 57x55 (gif) |
||
| + | *[[Image:Bones of dead.gif]] - 55x52 (gif) |
||
| + | *[[Image:Dead Human.gif|55px]] - 77x74 (gif) |
||
| + | *[[Image:Bones doodad.gif]] - 32x47(gif) |
||
| + | *[[Image:Demoniac circle.gif|55px]] - 83x84 (gif) |
||
| + | |} |
||
| + | |valign="top" width="50%"| |
||
| + | ;Cave |
||
| + | {| cellpadding="0" cellspacing="0" width="100%" |
||
| + | |- |
||
| + | |valign="top" width="50%"| |
||
| + | *[[Image:Wardrobe.gif]] - 44x42 (gif) |
||
| + | *[[Image:Big shelf.gif]] - 63x48(gif) |
||
| + | *[[Image:Small shelf.gif]] - 35x43 (gif) |
||
| + | *[[Image:Bed.gif]] - 59x30 (gif) |
||
| + | *[[Image:Chair.gif]] - 30x40 (gif) |
||
| + | *[[Image:Table.gif]] - 80x42 (gif) |
||
| + | |valign="top" width="50%"| |
||
| + | *[[Image:Treasure table.gif|52px]] - 84x48 (gif) |
||
| + | *[[Image:Barrels.gif|52px]] - 83x51 (gif) |
||
| + | *[[Image:Bonfire.gif|52px]] - 64x63(gif) |
||
| + | *[[Image:Chest.gif]] - 52x53 (gif) |
||
| + | *[[Image:Treasures.gif|52px]] - 88x60 (gif) |
||
| + | *[[Image:Gate.gif|52px]] - 69x71 (gif) |
||
| + | |} |
||
| + | |valign="top" width="50%"| |
||
| + | ;Outside |
||
| + | {| cellpadding="0" cellspacing="0" width="100%" |
||
| + | |- |
||
| + | |valign="top"| |
||
| + | *[[Image:Lumber.gif]] - 125x125 (gif) |
||
| + | *[[Image:Lumber2.gif]] - 125x125 (gif) |
||
| + | *[[Image:Bridge.gif|125px]] - 220x122 (gif) |
||
| + | *[[Image:Bridge2.gif|125px]] - 219x149 (gif) |
||
| + | |} |
||
| + | |} |
||
| + | |||
| + | ==Warcraft II== |
||
| + | ===Units=== |
||
| + | ====Portraits==== |
||
| + | {| cellpadding="0" cellspacing="0" width="100%" |
||
| + | |- |
||
| + | |valign="top" width="40%"| |
||
| + | ;Human portraits |
||
| + | {| cellpadding="0" cellspacing="0" width="100%" |
||
| + | |- |
||
| + | |valign="top" width="50%"| |
||
| + | *[[Image:Peasant.gif]] - 38x46 (gif) |
||
| + | *[[Image:Foot.gif]] - 38x46 (gif) |
||
| + | *[[Image:Aface.gif]] - 38x46 (gif) |
||
| + | *[[Image:Wc2ranger.gif]] - 38x46 (gif) |
||
| + | *[[Image:Night.gif]] - 38x46 (gif) |
||
| + | *[[Image:Paladin.gif]] - 38x46 (gif) |
||
| + | *[[Image:Bal.gif]] - 38x46 (gif) |
||
| + | *[[Image:Demo.gif]] - 38x46 (gif) |
||
| + | |valign="top" width="50%"| |
||
| + | *[[Image:Mage.gif]] - 38x46 (gif) |
||
| + | *[[Image:Fly.gif]] - 38x46 (gif) |
||
| + | *[[Image:Gryph.gif]] - 38x46 (gif) |
||
| + | *[[Image:Humantanker.gif]] - 38x46 (gif) |
||
| + | *[[Image:Transport.gif]] - 38x46 (gif) |
||
| + | *[[Image:Destroyerwc2.gif]] - 38x46 (gif) |
||
| + | *[[Image:Battleship.gif]] - 38x46 (gif) |
||
| + | *[[Image:Submarine.gif]] - 38x46 (gif) |
||
| + | |} |
||
| + | |valign="top" width="40%"| |
||
| + | ;Orc portraits |
||
| + | {| cellpadding="0" cellspacing="0" width="100%" |
||
| + | |- |
||
| + | |valign="top" width="50%"| |
||
| + | *[[Image:Peon.gif]] - 38x46 (gif) |
||
| + | *[[Image:Grunt.gif]] - 38x46 (gif) |
||
| + | *[[Image:Axe.gif]] - 38x46 (gif) |
||
| + | *[[Image:Berserker.gif]] - 38x46 (gif) |
||
| + | *[[Image:Ogre.gif]] - 38x46 (gif) |
||
| + | *[[Image:OgreMage.gif]] - 38x46 (gif) |
||
| + | *[[Image:Cat.gif]] - 38x46 (gif) |
||
| + | *[[Image:Sapp.gif]] - 38x46 (gif) |
||
| + | |valign="top" width="50%"| |
||
| + | *[[Image:Dkwc2.gif]] - 38x46 (gif) |
||
| + | *[[Image:Zepp.gif]] - 38x46 (gif) |
||
| + | *[[Image:Dragon.gif]] - 38x46 (gif) |
||
| + | *[[Image:OrcTanker.gif]] - 38x46 (gif) |
||
| + | *[[Image:OrcTranny.gif]] - 38x46 (gif) |
||
| + | *[[Image:TrollDestroyerwc2.gif]] - 38x46 (gif) |
||
| + | *[[Image:Juggernaut.gif]] - 38x46 (gif) |
||
| + | *[[Image:Turtle.gif]] - 38x46 (gif) |
||
| + | |} |
||
| + | |valign="top" width="20%"| |
||
| + | ;Neutral portraits |
||
| + | {| cellpadding="0" cellspacing="0" width="100%" |
||
| + | |- |
||
| + | |valign="top"| |
||
| + | *[[Image:Daemonwc2.jpg]] - 38x46 (gif) |
||
| + | *[[Image:Raisedeadico.gif]] - 38x46 (gif) |
||
| + | *[[Image:CritterSheepWC2.gif]] - 38x46 (gif) |
||
| + | *[[Image:CritterSealWC2.gif]] - 38x46 (gif) |
||
| + | *[[Image:CritterBoarWC2.gif]] - 38x46 (gif) |
||
| + | *[[Image:CritterHelBoarWC2.gif]] - 38x46 (gif) |
||
| + | |} |
||
| + | |} |
||
| + | |||
| + | ====Models==== |
||
| + | {| cellpadding="0" cellspacing="0" width="100%" |
||
| + | |- |
||
| + | |valign="top" width="40%"| |
||
| + | ;Human models |
||
| + | {| cellpadding="0" cellspacing="0" width="100%" |
||
| + | |- |
||
| + | |valign="top" width="50%"| |
||
| + | *[[Image:HumanPeasant.gif]] - 22x31 (gif) |
||
| + | *[[Image:HumanFootman.gif]] - 40x35 (gif) |
||
| + | *[[Image:ElfArcher.gif]] - 42x37 (gif) |
||
| + | *[[Image:HumanKnight.gif]] - 47x40 (gif) |
||
| + | *[[Image:HumanBallista.gif]] - 62x62 (gif) |
||
| + | *[[Image:Dwarfdemo.gif]] - 44x39 (gif) |
||
| + | *[[Image:HumanMage.gif]] - 24x34 (gif) |
||
| + | *[[Image:HumanFlying.gif]] - 70x95 (gif) |
||
| + | *[[Image:HumanGryphon.gif]] - 74x91 (gif) |
||
| + | |valign="top" width="50%"| |
||
| + | *[[Image:WC2HumanTanker.gif]] - 38x46 (gif) |
||
| + | *[[Image:WC2HumanTransport.gif]] - 38x46 (gif) |
||
| + | *[[Image:WC2HumanDestroyer.gif]] - 38x46 (gif) |
||
| + | *[[Image:WC2HumanBattleship.gif]] - 38x46 (gif) |
||
| + | *[[Image:WC2HumanSubmarine.gif]] - 38x46 (gif) |
||
| + | |} |
||
| + | |valign="top" width="40%"| |
||
| + | ;Orc models |
||
| + | {| cellpadding="0" cellspacing="0" width="100%" |
||
| + | |- |
||
| + | |valign="top" width="50%"| |
||
| + | *[[Image:OrcPeon.gif]] - 23x29 (gif) |
||
| + | *[[Image:OrcGrunt.gif]] - 32x38 (gif) |
||
| + | *[[Image:TrollAxethwr.gif]] - 39x42 (gif) |
||
| + | *[[Image:OrcOgre.gif]] - 39x44 (gif) |
||
| + | *[[Image:OrCatapult.gif]] - 59x59 (gif) |
||
| + | *[[Image:Gobsappers.gif]] - 36x32 (gif) |
||
| + | *[[Image:OrcDeathknight.gif]] - 50x47 (gif) |
||
| + | *[[Image:OrcZeppelin.gif]] - 70x95 (gif) |
||
| + | *[[Image:OrcDragon.gif]] - 74x91 (gif) |
||
| + | |valign="top" width="50%"| |
||
| + | *[[Image:OrcOilTankerWC2.gif]] - 38x46 (gif) |
||
| + | *[[Image:OrcTransportWC2.gif]] - 38x46 (gif) |
||
| + | *[[Image:OrcTrollDestroyerWC2.gif]] - 38x46 (gif) |
||
| + | *[[Image:OrcJuggernautWC2.gif]] - 38x46 (gif) |
||
| + | *[[Image:OrcTurtleWC2.gif]] - 38x46 (gif) |
||
| + | |} |
||
| + | |valign="top" width="20%"| |
||
| + | ;Neutral models |
||
| + | *[[Image:DaemonWC2.gif]] - 58x78 (gif) |
||
| + | *[[Image:SkeletonWC2.gif]] - 28x31 (gif) |
||
| + | *[[Image:CritterUSheepWC2.gif]] - 32x32 (gif) |
||
| + | *[[Image:CritterUSealWC2.gif]] - 32x32 (gif) |
||
| + | *[[Image:CritterUBoarWC2.gif]] - 32x32 (gif) |
||
| + | *[[Image:CritterUHelboarWC2.gif]] - 32x32 (gif) |
||
| + | |} |
||
| + | |||
| + | ===Characters=== |
||
| + | ====Portraits==== |
||
| + | {| cellpadding="0" cellspacing="0" width="80%" |
||
| + | |- |
||
| + | |valign="top" width="40%"| |
||
| + | ;Human portraits |
||
| + | {| cellpadding="0" cellspacing="0" width="100%" |
||
| + | |- |
||
| + | |valign="top" width="50%"| |
||
| + | *[[Image:HeroPLotharWC2.gif]] - 38x46 (gif) |
||
| + | *[[Image:HeroPUtherLightbringerWC2.gif]] - 38x46 (gif) |
||
| + | *[[Image:HeroPTuralyonWC2.gif]] - 38x46 (gif) |
||
| + | *[[Image:HeroPAlleriaWC2.gif]] - 38x46 (gif) |
||
| + | |valign="top" width="50%"| |
||
| + | *[[Image:HeroPDanathWC2.gif]] - 38x46 (gif) |
||
| + | *[[Image:HeroPKhadgarWC2.gif]] - 38x46 (gif) |
||
| + | *[[Image:HeroPKurdranWC2.gif]] - 38x46 (gif) |
||
| + | |} |
||
| + | |valign="top" width="40%"| |
||
| + | ;Orc portraits |
||
| + | {| cellpadding="0" cellspacing="0" width="100%" |
||
| + | |- |
||
| + | |valign="top" width="50%"| |
||
| + | *[[Image:HeroPGromHellscreamWC2.gif]] - 38x46 (gif) |
||
| + | *[[Image:HeroPKargathWC2.gif]] - 38x46 (gif) |
||
| + | *[[Image:HeroPZuljinWC2.gif]] - 38x46 (gif) |
||
| + | *[[Image:HeroPChogallWC2.gif]] - 38x46 (gif) |
||
| + | *[[Image:HeroPDentargWC2.gif]] - 38x46 (gif) |
||
| + | |valign="top" width="50%"| |
||
| + | *[[Image:HeroPMogorWC2.gif]] - 38x46 (gif) |
||
| + | *[[Image:HeroPGuldanWC2.gif]] - 38x46 (gif) |
||
| + | *[[Image:HeroPTeronGorefiendWC2.gif]] - 38x46 (gif) |
||
| + | *[[Image:HeroPDeathWingWC2.gif]] - 38x46 (gif) |
||
| + | |} |
||
| + | |} |
||
| + | |||
| + | ====Models==== |
||
| + | {| cellpadding="0" cellspacing="0" width="100%" |
||
| + | |- |
||
| + | |valign="top" width="50%"| |
||
| + | ;Human Characters Portrait & Unit |
||
| + | |||
| + | [[Image:HeroLotharWC2.gif]] |
||
| + | [[Image:HeroUtherLightbringerWC2.gif]] |
||
| + | [[Image:HeroTuralyonWC2.gif]] |
||
| + | [[Image:HeroAlleriaWC2.gif]] |
||
| + | [[Image:HeroDanathWC2.gif]] |
||
| + | |||
| + | |valign="top" width="50%"| |
||
| + | ;Orc Characters Portrait & Unit |
||
| + | |||
| + | [[Image:HeroGromHellscreamWC2.gif]] |
||
| + | [[Image:HeroKargathWC2.gif]] |
||
| + | [[Image:HeroZuljinWC2.gif]] |
||
| + | [[Image:HeroChogallWC2.gif]] |
||
| + | [[Image:HeroDentargWC2.gif]] |
||
| + | |||
| + | |||
| + | |- |
||
| + | |valign="top" width="50%"| |
||
| + | |||
| + | [[Image:HeroKhadgarWC2.gif]] |
||
| + | [[Image:HeroKurdranWC2.gif]] |
||
| + | |||
| + | |valign="top" width="50%"| |
||
| + | |||
| + | [[Image:HeroMogorWC2.gif]] |
||
| + | [[Image:HeroGuldanWC2.gif]] |
||
| + | [[Image:HeroTeronGorefiendWC2.gif]] |
||
| + | [[Image:HeroDeathWingWC2.gif]] |
||
| + | |} |
||
| + | |||
| + | ===Spells=== |
||
| + | {| cellpadding="0" cellspacing="0" width="100%" |
||
| + | |- |
||
| + | |valign="top" width="33%"| |
||
| + | ;Human spells |
||
| + | {| cellpadding="0" cellspacing="0" width="100%" |
||
| + | |- |
||
| + | |valign="top" width="50%"| |
||
| + | *[[Image:Holyvisionico.gif]] - 46x38 (gif) |
||
| + | *[[Image:Healingico.gif]] - 46x38 (gif) |
||
| + | *[[Image:Exorcismico.gif]] - 46x38 (gif) |
||
| + | *[[Image:Lightningico.gif]] - 46x38 (gif) |
||
| + | *[[Image:Fireballico.gif]] - 46x38 (gif) |
||
| + | |valign="top" width="50%"| |
||
| + | *[[Image:Flameshieldico.gif]]- 46x38 (gif) |
||
| + | *[[Image:Slowico.gif]] - 46x38 (gif) |
||
| + | *[[Image:Invisico.gif]] - 46x38 (gif) |
||
| + | *[[Image:Blizzardico.gif]] - 46x38 (gif) |
||
| + | *[[Image:Polymorphico.gif]] - 46x38 (gif) |
||
| + | |} |
||
| + | |valign="top" width="33%"| |
||
| + | ;Orc spells |
||
| + | {| cellpadding="0" cellspacing="0" width="100%" |
||
| + | |- |
||
| + | |valign="top" width="50%"| |
||
| + | *[[Image:Eyeofkilroggico.gif]] - 46x38 (gif) |
||
| + | *[[Image:Bloodlustico.gif]] - 46x38 (gif) |
||
| + | *[[Image:Runesico.gif]] - 46x38 (gif) |
||
| + | *[[Image:Todarknessico.gif]] - 46x38 (gif) |
||
| + | *[[Image:Deathcoilico.gif]] - 46x38 (gif) |
||
| + | |valign="top" width="50%"| |
||
| + | *[[Image:Hasteico.gif]] - 46x38 (gif) |
||
| + | *[[Image:Unholyico.gif]] - 46x38 (gif) |
||
| + | *[[Image:Dndecayico.gif]] - 46x38 (gif) |
||
| + | *[[Image:Whirlwindico.gif]] - 46x38 (gif) |
||
| + | *[[Image:Raisedeadico.gif]] - 46x38 (gif) |
||
| + | |} |
||
| + | |valign="top" width="33%"| |
||
| + | ;Beta spells |
||
| + | {| cellpadding="0" cellspacing="0" width="100%" |
||
| + | |- |
||
| + | |valign="top" width="50%"| |
||
| + | *[[Image:IconUnholyVision.gif]] - 46x38 (gif) |
||
| + | *[[Image:BloodlustBeta.gif]] - 46x38 (gif) |
||
| + | *[[Image:IconBurn.gif]] - 46x38 (gif) |
||
| + | *[[Image:IconSearchforoil.gif]] - 46x38 (gif) |
||
| + | |valign="top" width="50%"| |
||
| + | *[[Image:IconSummonScorpions.gif]] - 46x38 (gif) |
||
| + | *[[Image:IconSummonWaterElemental.gif]] - 46x38 (gif) |
||
| + | *[[Image:IconSummonSpiders.gif]] - 46x38 (gif) |
||
| + | *[[Image:IconSummonDaemon.gif]] - 46x38 (gif) |
||
| + | |} |
||
| + | |} |
||
| + | |||
| + | ===Buildings=== |
||
| + | {| cellpadding="0" cellspacing="0" width="100%" |
||
| + | |- |
||
| + | |valign="top" width="50%"| |
||
| + | ;Human buildings |
||
| + | {| cellpadding="0" cellspacing="0" width="100%" |
||
| + | |- |
||
| + | |valign="top" width="50%"| |
||
| + | *[[Image:HumanTownhall.gif]] - 104x119 (gif) |
||
| + | *[[Image:HumanKeep.gif]] - 118x122 (gif) |
||
| + | *[[Image:HumanCastle.gif]] - 128x128 (gif) |
||
| + | *[[Image:HumanFarm.gif]] - 62x64 (gif) |
||
| + | *[[Image:HumanBarracks.gif]] - 95x96 (gif) |
||
| + | *[[Image:HumanLumbermill.gif]] - 85x95 (gif) |
||
| + | *[[Image:HumanBlacksmith.gif]] - 96x96 (gif) |
||
| + | *[[Image:HumanTower1.gif]] - 63x58 (gif) |
||
| + | *[[Image:HumanTower2.gif]] - 63x58 (gif) |
||
| + | *[[Image:HumanTower3.gif]] - 63x58 (gif) |
||
| + | |||
| + | |valign="top" width="50%"| |
||
| + | *[[Image:HumanShipyard.gif]] - 96x96 (gif) |
||
| + | *[[Image:HumanRefinery.gif]] - 92x97 (gif) |
||
| + | *[[Image:HumanFoundry.gif]] - 94x97 (gif) |
||
| + | *[[Image:HumanStables.gif]] - 96x95 (gif) |
||
| + | *[[Image:HumanChurch.gif]] - 96x94 (gif) |
||
| + | *[[Image:HumanInventor.gif]] - 96x96 (gif) |
||
| + | *[[Image:HumanAviary.gif]] - 94x96 (gif) |
||
| + | *[[Image:HumanMagetower.gif]] - 94x94 (gif) |
||
| + | *[[Image:HumanRig.gif]] - 64x63 (gif) |
||
| + | |} |
||
| + | |valign="top" width="50%"| |
||
| + | ;Orc buildings |
||
| + | {| cellpadding="0" cellspacing="0" width="100%" |
||
| + | |- |
||
| + | |valign="top" width="50%"| |
||
| + | *[[Image:OrcTownhall.gif]] - 116x119 (gif) |
||
| + | *[[Image:OrcStronghold.gif]] - 118x118 (gif) |
||
| + | *[[Image:OrcFortress.gif]] - 128x128 (gif) |
||
| + | *[[Image:OrcFarm.gif]] - 64x64 (gif) |
||
| + | *[[Image:OrcBarracks.gif]] - 96x95 (gif) |
||
| + | *[[Image:OrcLumbermill.gif]] - 85x95 (gif) |
||
| + | *[[Image:OrcBlacksmith.gif]] - 92x96 (gif) |
||
| + | *[[Image:OrcTower1.gif]] - 64x63 (gif) |
||
| + | *[[Image:OrcTower2.gif]] - 64x60 (gif) |
||
| + | *[[Image:OrcTower3.gif]] - 64x63 (gif) |
||
| + | |||
| + | |valign="top" width="50%"| |
||
| + | *[[Image:OrcShipyard.gif]] - 96x96 (gif) |
||
| + | *[[Image:OrcRefinery.gif]] - 96x96 (gif) |
||
| + | *[[Image:OrcFoundry.gif]] - 96x93 (gif) |
||
| + | *[[Image:OrcMound.gif]] - 90x96 (gif) |
||
| + | *[[Image:OrcAltar.png]] - 96x96 (png) |
||
| + | *[[Image:OrcAlchemist.gif]] - 91x96 (gif) |
||
| + | *[[Image:OrcRoost.gif]] - 96x96 (gif) |
||
| + | *[[Image:OrcTemple.gif]] - 83x94 (gif) |
||
| + | *[[Image:OrcRig.gif]] - 64x59 (gif) |
||
| + | |||
| + | |} |
||
| + | |} |
||
| + | {| cellpadding="0" cellspacing="0" width="100%" |
||
| + | |- |
||
| + | |valign="top" width="50%"| |
||
| + | *[[Image:HumanTowers.gif]] - 66x198 (gif) |
||
| + | |valign="top" width="50%"| |
||
| + | *[[Image:Orctowers.gif]] - 66x198 (gif) |
||
| + | |} |
||
| + | |||
| + | ===Neutral=== |
||
| + | {| cellpadding="0" cellspacing="0" width="100%" |
||
| + | |- colspan=4 valign="top" |
||
| + | | |
||
| + | ;Warcraft II (Neutral) |
||
| + | *[[Image:WC2Gold.gif]] - 89x96 (gif) |
||
| + | *[[Image:WC2Lumber.gif]] - 89x96 (gif) |
||
| + | *[[Image:WC2Oil.gif]] - 89x96 (gif) |
||
| + | | |
||
| + | *[[File:WC2DarkPortal.gif]] - 128x128 (gif) |
||
| + | *[[File:WC2Runestone.gif]] - 58x68 (gif) |
||
| + | |} |
||
| − | [[Category: |
+ | [[Category:Wowpedia icons]] |
| − | [[Category:Ingredients]] |
||
| − | [[Category:Blacksmithing Ingredients]] |
||
Revision as of 19:27, 8 January 2011
- Were you looking for Wowpedia:WoW Icons, Wowpedia:List of mini icons, Wowpedia:List of small icons or Wowpedia:List of race icons?
Warcraft: Orcs & Humans
Units
Portraits
|
|
|
Models
|
|
|


Characters
Portraits
|
|
Models
|
|
Buildings
|
| ||||
|
| ||||
|


Spells
|
|
Upgrades
|
|
Doodads
|
|
|
Warcraft II
Units
Portraits
|
|
|
Models
|
|
|


Characters
Portraits
|
|
Models
|
|
|
|


Spells
|
|
|
Buildings
|
|


|
|
Neutral
|
|


