Template:Stub/BC Template:Raid Dungeons Template:Bc
Raid dungeon in Blade's Edge Mountains. [1]
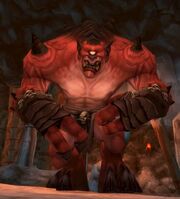
An "Onyxia-sized" instance containing two encounters, Gruul's Lair is a level 70 raid instance with a 25 player maximum.
High King Maulgar
High King Maulgar, the Lord of the Ogres, is found along with his council, Kiggler the Crazed, Blindeye the Seer, Olm the Summoner and Krosh Firehand.
- Maulgar (Warrior) hits the main tank hard and requires a well geared tank. He will randomly move around and whirlwind on occasion.
- Krosh Firehand (Mage) has a Magic Ward which a mage can spell-steal. It reduces magical damage taken by 75%. He spams greater fireballs that can hit for over 9000 damage. He is obviously designed to be tanked by a mage, who should gear for stamina (10k+ Hit Points) and intelligence (10k+ Mana, spell steal is expensive). Melee DPS is forbidden due to his deadly Fire Nova's 20-yard range.
- Olm the Summoner (Warlock) uses a heavy shadow DoT, summons felhounds, and will occasionally cast Death Coil. He should be tanked by two tanks and maybe with his own felhounds (via enslave).
- Kiggler the Crazed (Shaman) typically attacks with ranged lightning bolts. Must be tanked at range as he hits plate for 2500 extremely quickly. He also uses Arcane Shock for 657-843, which disarms and causes an aggro loss. Make sure whoever is tanking him is staying out of range of this. Periodically Greater Polymorphs (undispellable) his highest aggro target so he may be tanked by 2 hunters with stamina and nature resist gear, or a moonkin so he doesn't get polymorphed.
- Blindeye the Seer (Priest) uses huge AoE heal, interruptable. Can PW:Shield himself, then cast the heal (he can't be interrupted when the shield is up and can't be dispelled). Typically tanked by a warrior. Can be affected by Deadly- and Mind-numbing Poison.
- Typical kill order is: Priest, then Warlock, then Mage, then Shaman, and finally Maulgar. Priest and Warlock can both be focus-fired by melee and ranged together, so they go down quickly. Shaman and Mage are ranged-only DPS and die more slowly.
- Obviously ranged DPS is more of an asset than melee DPS for this specific fight, due to many of the ogres having anti-melee damage (fire nova, lightning shield, Maulgar's whirlwind)
How to fight High King Maulgar and his Adds
The key to get into this fight is the pull. Everything needs to stand at the right position so that the area-effects won't hurt anyone.
- The mage, tanking Krosh Firehand, should place himself complete to the right and move straight forward. Just in front of Krosh Firehand there's slight "clip" and that is where you stand before the pull takes place. When High King Maulgar gets aggro'd you shoot any instant-spell you got and spellsteal his shield.
- High King Maulgar gets pulled to the other side of where he\\\'s standing. He remains all time of the fight on his position.
- As for Olm the Summoner the Warriors and the Warlocks run straight to him. Beware the Blastwave of Krosh Firehand. He should be tanked in the back of the room.
- The Shaman Kiggler the Crazed is pulled by 2 Hunters. One of them will get hexed shortly after, so the second Hunter needs to have some Aggro, too!
- The Priest Blindeye the Seer has to be pulled in the way of the entrance. Warriors and every Melee is on the Priest and do Damage.
Now the key is to have enough damage to make Blindeye the Seer's shield disappear. Have someone giving information when the shield is up and then just burst his shield down. If the shield is down, just interrupt his healing ability Two until three shield needs to be damaged down, then all the melees go to the Warlock Olm the Summoner. All Ranged DPS concentrates on Krosh Firehand the mage. The time you walk to those two encounters make sure you don't mess up and get to close to the Mage, cause his Blast wave sure will wipe out some of your people. Stay calm, be cautious and bring those 2 adds down. When the Warlock is down, the Mage should follow right after. Now everyone makes Ranged DPS only on the shaman. He should be down pretty quick then.
After all 4 adds are down, ensure your healers have mana. All free healers should recover some mana before entering the fight against High King Maulgar. Same goes for Caster-DPS. Melees don't enter the fight right away, they have to wait until High King Maulgar does his Whirlwind. The time the Whirlwind vanishes you can enter the fight for about 25-35 seconds, then you should go away to prevent his Whirlwind to hit you!
Just make good DPS and keep the Maintank alive. At around 30% High King Maulgar starts his Random-charges and if you're unlucky the Whirlwinds trough the raid. Your Maintank has to give everything to bring High King Maulgar back to his position. He isn't untankable, but he is unstable! At this time just DPS him down, it shouldn't last too long!
High King Maulgar's loot
Tier 4 Shoulder Tokens
| Template:Epic | |
| Binds when picked up | |
| Classes: Paladin, Rogue, Shaman | |
| Required Level 70 |
| Template:Epic | |
| Binds when picked up | |
| Classes: Warrior, Priest, Druid | |
| Required Level 70 |
| Template:Epic | |
| Binds when picked up | |
| Classes: Hunter, Mage, Warlock | |
| Required Level 70 |
Gruul

Gruul
See Gruul the Dragonkiller, the legendary dragon-slaying Gronn.
| ||||||||

