Rolandius@legacy41568095 (talk | contribs) m (Corrected spelling/grammar) |
Ilphin25941@legacy41546419 (talk | contribs) m (→Loot) |
||
| Line 66: | Line 66: | ||
Mandokir drops several important items. High-end guilds will kill him for his [[Primal Hakkari Idol]], which leads to a very powerful class specific enchant. |
Mandokir drops several important items. High-end guilds will kill him for his [[Primal Hakkari Idol]], which leads to a very powerful class specific enchant. |
||
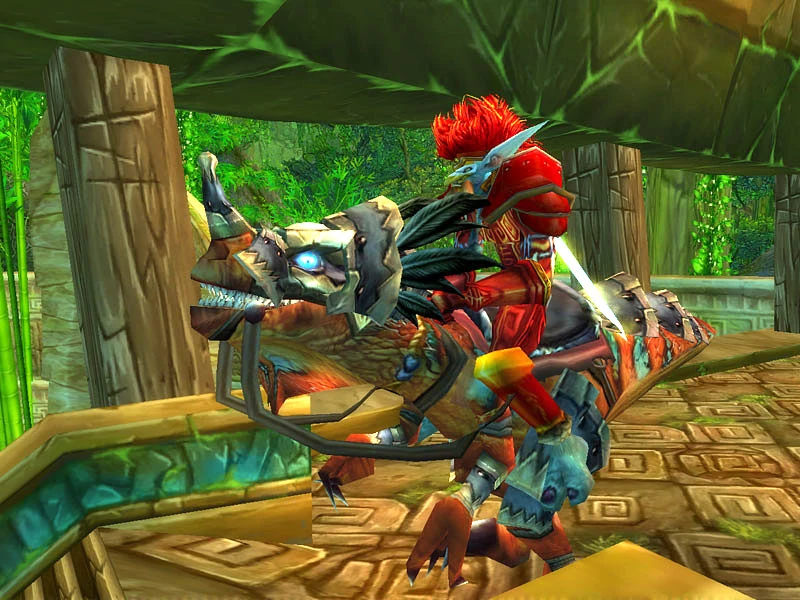
| − | In addition to that, he also drops a very rare epic mount. It is called the [[Swift Razzashi Raptor]] and it is the only possibility for Alliance members to ride a raptor. Horde members can ride it, too, including [[tauren]] |
+ | In addition to that, he also drops a very rare epic mount. It is called the [[Swift Razzashi Raptor]] and it is the only possibility for Alliance members to ride a raptor. Horde members can ride it, too, including [[tauren]]. |
Mandokir, along with [[Jin'do the Hexxer]], has a high drop rate on the [[Primal Hakkari Kossack]], [[Primal Hakkari Aegis]], and [[Primal Hakkari Tabard]], which are otherwise rare. |
Mandokir, along with [[Jin'do the Hexxer]], has a high drop rate on the [[Primal Hakkari Kossack]], [[Primal Hakkari Aegis]], and [[Primal Hakkari Tabard]], which are otherwise rare. |
||
Revision as of 12:48, 11 February 2009
 | |||||||||||
| Race | Troll (Humanoid) | ||||||||||
| Level | ?? Boss | ||||||||||
| Location | Zul'Gurub | ||||||||||
| Status | Killable | ||||||||||
| |||||||||||
Bloodlord Mandokir is the raptor-rider boss of Zul'Gurub. Mandokir begins the fight on his raptor mount, Ohgan. He attacks as soon as the Speaker is killed. He dismounts and both Ohgan and Mandokir engage the raid. Mandokir can ![]() [Whirlwind],
[Whirlwind], ![]() [Cleave],
[Cleave], ![]() [Charge] (which also deaggros), and he can also 'watch' someone in the raid. While 'watched', if that person takes any action, Mandokir will charge and likely one-shot that person. Finally, when someone dies, ghosts approach the fallen and offer to resurrect- but for every three people Mandokir kills, he levels up, becoming larger and more powerful. Unlike High Priestess Jeklik or High Priest Venoxis, this encounter cannot be reset by running out of the immediate encounter area.
[Charge] (which also deaggros), and he can also 'watch' someone in the raid. While 'watched', if that person takes any action, Mandokir will charge and likely one-shot that person. Finally, when someone dies, ghosts approach the fallen and offer to resurrect- but for every three people Mandokir kills, he levels up, becoming larger and more powerful. Unlike High Priestess Jeklik or High Priest Venoxis, this encounter cannot be reset by running out of the immediate encounter area.
Abilities
- Charge
- The Bloodlord can and will charge random people.
See Controlling Mandokir.
- Cleave
- Typical cleave.
- Fear
- Mandokir will AoE Fear if there are people within melee range, including as little as two people.
- Whirlwind
- He has a whirlwind attack that lasts several seconds. When it is over, it can do up to 2500 dmg. The second you see this start to happen, strafe away. Do not backstep or you will be hit.
- Watch
- Lookout all. When Mandokir is watching someone (and you know by the emote), be prepared to stop everything. When the buff ticks to zero, and the character is doing something at that time, Mandokir will charge and likely kill the character. Some raid mods will announce who is being watched (he does as well), so be prepared to yell at them to stop activity. When he is watching the tank, make sure to watch the aggro levels very closely since the MT will have to stop for a second or two — which could cause a wipe if there is a player running the upper threat threshold.
- Enrage
- When Ohgan is slain, Mandokir will enrage for around one min increasing his physical damage done by 50 and attack speed by 65%.
Ding!
"Grats!" yells Jin'do the Hexxer. The Bloodlord has one more very tricky thing. When you die, he gains experience. Three deaths will level him, making him hit harder, take less physical damage, and grow in size. If this happens more than a couple times, it will almost certainly be a wipe. Try not to let this happen. It is fairly easy to tell when he levels, as he has the same animation as a normal character will when he or she levels.
There are also spirits around that will resurrect you when you die, with full stats. They randomly choose a corpse to resurrect, so use it when you get it. But attempt to stay alive as best you can, as your death fuels his strength.
Priests should be aware that the ghosts are currently bugged and will not resurrect you if you have the spirit of redeption talent. Clicking it off immediately may allow it to work (this remains untested).
Strategy
The Bloodlord is a much more difficult fight than the snake and bat aspects. He levels with your deaths, and has an extremely fast moving, quite deadly raptor.
There are two primary methods of dealing with him, each with their separate strategies. To begin with either, begin the fight by pulling the speaker. Kill him; he only has a few thousand HP. Then, you must first separate the raptor and the Bloodlord. Many groups pull the raptor up to behind the stakes, though that is up to the raid leader. Meanwhile, the Bloodlord remains beneath the stakes in almost all cases. Both strategies consist of having the main tank on the Bloodlord and the offtank on the raptor. In either case, have the Mages in the raid group place Amplify Magic on every character, as this fight is purely physical.
1
The focus of this strategy is to avoid the Bloodlord's enrage when Ohgan dies; it significantly increases his attack power, and it is also suspected to increase the variability of his charges. In affect, the raptor is to be offtanked until the Bloodlord is dead, at which point, the raid may finish the encounter by killing the raptor. The raptor has a stackable debuff affect which decreases the target's armor by a high amount; 7 to 8 sunders will make the tank wearing them squishy as a cloth wearer. Make sure to switch tanks between 3 and 5 sunders. This fight does require 3 tanks. This makes this strategy difficult for the healers; without gear, this makes the fight near impossible for the healers and their mana to survive.
2
The alternative is to kill the raptor first and the Bloodlord second. This is more dangerous for the raid overall, but it probably amounts to the same difficulty as the first strategy, as your healers are all focused on either the MT or the random person who gets hit by the charge. Again, leave the MT on the Bloodlord, with two offtanks on the raptor, switching off as prescribed in the first strategy. When the raptor falls, the Bloodlord will enrage, increasing attack power, as well as (it seems) increase the randomness with his attacks. The enrage lasts for approximately a minute, but it does make him hit very hard. Every healer should be on the main tank, and the tank should be prepared to make last minute saves, such as Shield Wall.
Controlling Mandokir
The main issue in fighting this boss is getting the aggro back on the MT as quickly as possible after he charges. He seems to charge randomly, but in actuality, he charges anyone who is singled out away from the group and DPSing. Thusly, the easiest way to control him is to deliberately give him someone to single out, while the rest of the group huddles. Hunters work well, as they can Feign Death to aid in the MT's recovery of Mandokir. After Mandokir charges, he will move on the next highest aggro, which is not the MT since he partially dumps the threat associated with the highest aggro producer prior to the charge. This makes it necessary for the one who has the highest threat to run for the MT. DPS should pause after he charges, to enable the tank to easily reestablish his threat.
Exploitation of the encounter
It is possible to exploit the encounter, using the spears bunker to the right of the entrance. Due to changes in the geometry you can no longer stand in the same place you used to in pre 1.12; you must stand behind the pikes (the ones going up into a triangle like shape) to the right of the normal spot. If the entire raid stands behind it the Bloodlord will fight the exact same way as he did before (Not charging any player, as he has no LOS on them), and you can cast/attack through the pikes also.
Almost exploiting
It is possible to use the pyramid (make sure to clear all the groups) to also tweak the encounter. The first step is to have the MT take Mandokir to the bottom left of the pyramid, in the training yard. Next, the OT should take the raptor down the road. It is then killed. During the subsequent enrage period, all healers spam heal on main tank while all ranged DPS go up the pyramid, or on the intermediary platform of the pyramid, and start doing max DPS. As soon as rage ends, healers can, one-by-one, move to the top of the pyramid. Basically, the boss is left downstairs with only the melee classes to keep him company. Proceed to killing him, following the rule of stopping when you are being watched.
Not able to be exploited anymore?
It seems that whenever a player is not in his line of sight and he wants to charge that player, or maybe just when he realizes that player is out of line of sight, he teleports the player(s) out of it and charges the player(s) and Whirlwinds and Intimidating Shouts...
Loot
Mandokir drops several important items. High-end guilds will kill him for his ![]() [Primal Hakkari Idol], which leads to a very powerful class specific enchant.
[Primal Hakkari Idol], which leads to a very powerful class specific enchant.
In addition to that, he also drops a very rare epic mount. It is called the ![]() [Swift Razzashi Raptor] and it is the only possibility for Alliance members to ride a raptor. Horde members can ride it, too, including tauren.
[Swift Razzashi Raptor] and it is the only possibility for Alliance members to ride a raptor. Horde members can ride it, too, including tauren.
Mandokir, along with Jin'do the Hexxer, has a high drop rate on the ![]() [Primal Hakkari Kossack],
[Primal Hakkari Kossack], ![]() [Primal Hakkari Aegis], and
[Primal Hakkari Aegis], and ![]() [Primal Hakkari Tabard], which are otherwise rare.
[Primal Hakkari Tabard], which are otherwise rare.
|