 | |||||||||||||||||||||||||||
| Race | Titanic watcher (Giant) | ||||||||||||||||||||||||||
| Level | ?? Boss | ||||||||||||||||||||||||||
| Location | The Observation Ring | ||||||||||||||||||||||||||
| Status | Killable | ||||||||||||||||||||||||||
| |||||||||||||||||||||||||||
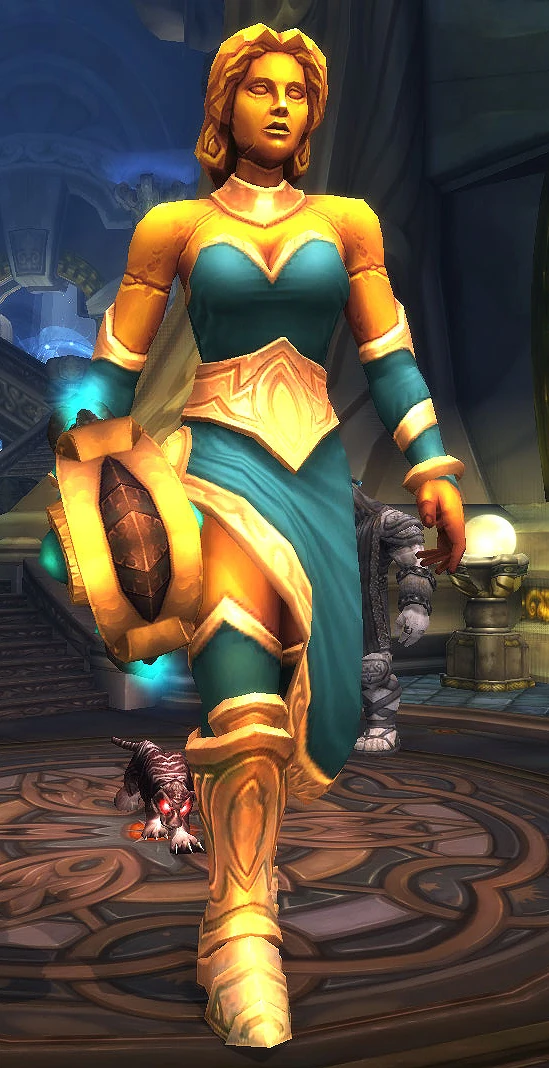
Auriaya is a boss encounter in Ulduar after defeating Kologarn. She roams around the Observation Ring, the area beyond the Shattered Walkway. She is an optional boss, and can be snuck past to reach additional areas.
She has an enrage timer of 10 minutes on both difficulties.
Background
Auriaya was Ulduar's archivist. The long years of solitude took their toll on her, and Yogg-Saron's growing influence seems to have destroyed whatever remained of her sanity.[1]
25-man abilities
 Terrifying Screech - The screech strikes fear into the hearts of all nearby enemies, causing them to flee in horror for 5 seconds.
- Sentinel Blast - Inflicts 5500 Shadow damage and increases Shadow damage taken by 100% for 5 seconds. Stacks 5 times. It is interruptable. The ability has a pre-cast time in which Auriaya "sets up", and then a channeled portion in which the raid starts taking stacking damage. This cast seems to always follow the fear, so one player must have a fear break and an interrupt prepped and ready to go or this ability will wipe the raid.
- Sonic Screech - A Sonic Shockwave that deals 185000 to 215000 Physical damage to all enemies in its path. The Shockwave damage is split between all targets in its path.
- Summon Swarming Guardian - Summons a swarm of smaller panthers.
Sanctum Sentry
- 4 adds
- 557,800 HP
- File:Ability Druid FerociousBite.png Savage Pounce - A savage pounce that inflicts 7400 to 8600 Physical damage and an additional 7400 to 8600 Physical damage every second for 5 seconds.
- Rip Flesh - A deadly attack that inflicts 4625 to 5375 Physical damage every 2 sec for 20 sec. Stacks up to 100 times.
- Strength of the Pack - The presence of other members of the pack increases damage done by 50% to all members of the pack within 20 yards.
Feral Defender
- 600,000 HP
- Spawns about 1 minute into the fight
- Feral Essence - Each essence increases the damage dealt by the Feral Defender by 50%. The Feral Defender can revive himself at the cost of one of his Feral Essences. This starts out stacked to 9.
- Feral Pounce - The Feral Defender pounces the target stunning them for 4 seconds and inflicting 602 to 698 Shadow damage every second.
- File:Ability Druid Mangle.png Feral Rush - Charges an enemy, dealing 1609 to 1691 Physical damage and causing them to bleed for 0 additional damage over 6 seconds. Also interrupts casting.
- When the Feral Defender dies, it leaves behind Seeping Feral Essence.
- Seeping Feral Essence - The Seeping Essence from the Feral Defender inflicts 9000 Shadow damage every second. This is basically a void zone.
10-man abilities
- Terrifying Screech - The screech strikes fear into the hearts of all nearby enemies, causing them to flee in horror for 5 seconds.
- Sentinel Blast - Inflicts 5500 Shadow damage and increases Shadow damage taken by 100% for 5 seconds. Stacks 5 times.
- Sonic Screech - A Sonic Shockwave that deals 74000 to 86000 Shadow damage to all enemies in its path. The Shockwave damage is split between all targets in its path.
- Summon Swarming Guardian - Summons a swarm of smaller panthers.
Sanctum Sentry
- 2 adds
- 335,000 HP
- File:Ability Druid FerociousBite.png Savage Pounce - A savage pounce that inflicts 9250 to 10750 Physical damage and an additional 4625 to 5375 Physical damage every second for 5 second.
- Strength of the Pack - The presence of other members of the pack increases damage done by 30% to all members of the pack within 20 yards.
Feral Defender
- 200,000 HP
- Spawns about 1 minute into the fight
- The Feral Defender is tauntable, but not tankable. It will randomly aggro and jump from one target to the next.
- Feral Essence - Each essence increases the damage dealt by the Feral Defender by 50%. The Feral Defender can revive himself at the cost of one of his Feral Essences. This starts out stacked to 9.
- Feral Pounce - The Feral Defender pounces the target stunning them for 4 secconds and inflicting 417 to 483 Shadow damage every second.
- File:Ability Druid Mangle.png Feral Rush - Charges an enemy, dealing 927 to 973 Physical damage and causing them to bleed for 0 additional damage over 6 seconds. Also interrupts casting.
- When the Feral Defender dies it leaves behind Seeping Feral Essence.
- Seeping Feral Essence - The Seeping Essence of the Feral Defender Inflicts 6500 Shadow damage every second. This is basically a void zone.
Strategy
10-man
Positioning
Have your offtank stand at least 20 yards away from where Auriaya will be tanked. The rest of the raid except for the two tanks and a hunter should stand out of line of sight of Auriaya to ensure the sentries don't pounce them. After the add's are both under control, the raid should move between them, staying grouped up for ![]() [Sonic Screech]. After a fear always group back up.
[Sonic Screech]. After a fear always group back up.
The pull
The pull is the most crucial element to the fight, and it is not uncommon for groups to spend longer learning how to pull than actually learning the fight. The two panther adds that follow the boss will ![]() [Pounce] on the initial aggro target if they are out of melee range but within line of sight. The goal is to not have the 2 adds Pounce anyone, so the pull must be done while both tanks are out of LoS from the boss until she is within melee range.
[Pounce] on the initial aggro target if they are out of melee range but within line of sight. The goal is to not have the 2 adds Pounce anyone, so the pull must be done while both tanks are out of LoS from the boss until she is within melee range.
A good place for the tanks to stand at the beginning is in the small enclave with the urn to the side of the stairs. Various classes have abilities that can be used to pull the boss, it is recommended that your group contains at least one of these classes:
- Shaman: Totems can be placed in the center of the circular area at the end of the path the boss takes. Auriaya will gain contact aggro onto the shaman, and will walk up the stairs into melee range of the tanks hiding in the enclave, who will then taunt their targets. Due to the
 [Tremor Totem] recommendation for this fight, totems will be the standard pull mechanic for most 10-man groups unless a Hunter is available.
 - Hunter: [Misdirection] can and should be used, or traps placed on the ground similar to totems. Snake traps are particularly easy to pull from.
- Death Knight: Death and Decay can be placed in the center from range similar to traps or totems. The timing is important, if the Death Knight is too slow to run back around into the enclave, he will be pounced. This works best if the Death Knight in question is one of the tanks.
- Paladin: As soon as Auriaya comes near the point where she will turn around, a Paladin can run in with [Divine Shield]. This will put the whole raid into combat and cause the boss to run to the camp, which stands waiting right around the corner.
- Engineers: Engineers can place an [Explosive Decoy] as per a DKs Death and Decay. Auriaya and the sentries will aggro on this and start the encounter.
- Brewfest trinkets have the virtue of being available to any profession or class, and are easily camped during Brewfest. Use in the same way as shaman totem(s).
The panthers also buff themselves if they're within close range to each other so splitting them up is highly recommended.
The fight
Kill the two Sentries. If the off tank is going to pick up the remaining Sentry after his target is dead, they need to be sure not to taunt from outside of melee range because the Sentry will still pounce even after the fight begins. Once the adds are dead, focus on Auriaya until she summons the Feral Defender. Always be sure to have the ranged grouped up, and have the main tank facing the boss towards the raid. That way, melee dpsers behind the boss are the only ones that need to move for ![]() [Sonic Screech]. A well placed
[Sonic Screech]. A well placed ![]() [Tremor Totem] can cover the raid group, main tank, and possibly the melee with this setup.
[Tremor Totem] can cover the raid group, main tank, and possibly the melee with this setup.
Have your dps ready once the Feral Defender spawns. Although it can be taunted, it can't be tanked, and it will jump around all over the place. Having your dps stack on it will keep it in one spot and avoid repeated pounces. Killing it gives you 30 seconds or so to focus solely on Auriaya, but creates a void zone that can cause issues when people are feared through it at low health. Always make sure to try to kill the Feral Defender outside of where your raid is standing to minimize the risk of people running through it while feared. Each time you kill the defender, its damage will be halved, so if you kill it a few times, it will probably be safe to ignore it and focus on the boss.
Alternating between killing the Feral Defender and killing Auriaya will let you kill her with plenty of time left. If you're going for the achievement ![]() Nine Lives, simply repeat this sequence without doing too much dps to Auriaya while waiting for the Feral Defender to repop.
Nine Lives, simply repeat this sequence without doing too much dps to Auriaya while waiting for the Feral Defender to repop.
Alternately, a raid can completely ignore the Feral Defender and solely focus on Auriaya so long as it stays grouped up and has an off tank for the Defender. Even the Feral Defender tank should stay stacked up to prevent pounces. Should a Feral Defender die to AoE damage simply hug the edge of the resulting void zone so the emerging Feral Defender has no room to pounce. This method will turn the fight into more of a traditional tank and spank with the added mechanic of running back to the same spot after every fear.
25-man
Positioning
You should have your raid and healers out of line of sight, to avoid being pounced on the pull. Your sentry tanks should be spread out and be ready to quickly taunt to weaken the sentries. After the pull is made, the kill target sentry can be dragged back to where the dps are to ensure that it does not get significant damage buffs.
The pull
You can place a ![]() [Snake Trap] down to where Auriaya will pat, along with various totems, and the tanks can pick off the snakes and totems. The snakes will keep auriaya busy for a small bit of time, and also the totems have a small chance of being pounced. It is advisable to have tanks and healers pop cooldowns on the pull, because two pounces can take down a tank in an instant. For example, you could have a prot paladin pop his bubble wall, along with a
[Snake Trap] down to where Auriaya will pat, along with various totems, and the tanks can pick off the snakes and totems. The snakes will keep auriaya busy for a small bit of time, and also the totems have a small chance of being pounced. It is advisable to have tanks and healers pop cooldowns on the pull, because two pounces can take down a tank in an instant. For example, you could have a prot paladin pop his bubble wall, along with a ![]() [Divine Guardian], then throw a frisbee to pull before quickly moving out of line of sight. A priest could also aid with the pull by using
[Divine Guardian], then throw a frisbee to pull before quickly moving out of line of sight. A priest could also aid with the pull by using ![]() [Pain Suppression] and
[Pain Suppression] and ![]() [Guardian Spirit] on the tank. A good pull should result in minimal pounce damage or potentially none at all. However the pull can often be disastrous, because the tanks may drop quickly from bad RNG.
[Guardian Spirit] on the tank. A good pull should result in minimal pounce damage or potentially none at all. However the pull can often be disastrous, because the tanks may drop quickly from bad RNG.
If you have 3 tanks, (1 on Auriaya, 2 on the sentries), each sentry tank must tank 2 adds. While the adds are up, those tanks will require lots of healing. With 4 tanks, while you have less dps, you may find the fight more forgiving.
The fight
You must quickly burn the sentries, especially if you have 2 tanks tanking the sentries, because the pounces are deadly. If you are having trouble with the initial adds, utilize ![]() [Heroism] and other defensive cooldowns and trinkets.
[Heroism] and other defensive cooldowns and trinkets.
After the sentries are down, you'll have a little bit of time to dps Auriaya before she summons her Feral Defender. When the defender spawns, the tanks previously used for sentries must pick him up. However, the defender will jump around, occasionally Feral Rushing for large amounts of damage. If the Defender does not rush, it will pounce for ~4-5k and lockout your casting for ~6 seconds (similar to ![]() [Pummel] only longer). If the entire raid stacks up on the tank, the Feral Defender will not jump around, allowing both ranged and melee dps to down it fast. It is advisable to kill the defender a few times to reduce its damage because of the strength of Feral Rush. However, unless you are going for the achievement, killing the Defender 3 to 4 times should be sufficient. It is likely that you will hit the enrage timer (10 minutes) if you attempt to kill the Feral Defender all 10 times.
[Pummel] only longer). If the entire raid stacks up on the tank, the Feral Defender will not jump around, allowing both ranged and melee dps to down it fast. It is advisable to kill the defender a few times to reduce its damage because of the strength of Feral Rush. However, unless you are going for the achievement, killing the Defender 3 to 4 times should be sufficient. It is likely that you will hit the enrage timer (10 minutes) if you attempt to kill the Feral Defender all 10 times.
The Defender also spawns a void zone doing 9k damage a second when it dies. The placement of these can be particularly brutal since raid members can be feared into them. The Defender also jumps around; if you kill it while it's jumping, chances are it will drop the void zone in the raid (or worse, on the main tank). When the Defender gets low on health (around 10% hp), your tank should pull it out of the raid, then stun it, and kill it. You should not stun it before it gets low because the stuns have a diminishing return on the defender. If the Defender becomes immune to stuns while you kill it, it may drop a void zone in your raid party from all the jumping around. After killing it 2-3 times on one of the circles, you should move the entire raid to the opposite circle to reduce the chances of being feared into a void zone.
While dealing with the Defender, you also have to watch out for the fears and the Sonic Screeches. Immediately after a fear, Auriaya will typically cast Sentinel Blast, which will require interruption or else it will do massive damage to the raid. Because of this, ![]() [Tremor Totem],
[Tremor Totem], ![]() [Fear Ward], and
[Fear Ward], and ![]() [Mass Dispel] are critical. Warriors are a good choice for main tank for this encounter since they can
[Mass Dispel] are critical. Warriors are a good choice for main tank for this encounter since they can ![]() [Berserker Rage] to prevent the fear and
[Berserker Rage] to prevent the fear and ![]() [Shield Bash] to interrupt Sentinel Blast. Other fear removing effects work such as Every Man for Himself or PvP trinkets. After a fear has worn off, be sure to group up quickly before the next
[Shield Bash] to interrupt Sentinel Blast. Other fear removing effects work such as Every Man for Himself or PvP trinkets. After a fear has worn off, be sure to group up quickly before the next ![]() [Sonic Blast]. Even with a few people down, grouping should prevent a wipe. Typically Sonic Blast will deal anywhere from 8k-14k damage if you are grouping well and enough people are still alive.
[Sonic Blast]. Even with a few people down, grouping should prevent a wipe. Typically Sonic Blast will deal anywhere from 8k-14k damage if you are grouping well and enough people are still alive.
Quotes
Aggro:
- Some things are better left alone!
Killing a player:
- The secret dies with you!
- There is no escape!
Berserk:
- You waste my time!
Death:
- <Screams in agony>
Sound files
See Sound Files of Ulduar: Auriaya
Drops
Related achievements
Auriaya does not have a hard mode.[2]
Videos
10-man encounter
25-man encounter
Trivia
As referenced by her screaming abilities, numerous feline companions, and two of her obviously-named achievements, one can imagine that Auriaya is a titan variation of "crazy cat lady", commonly seen in many kinds of comedy (especially well noted in the Simpsons). It is yet to be determined as to exactly this would mean concerning her role in titan society, or as to whether her behavior is a result of Yogg-Saron's influence.
Auriaya having cats can also be attributed towards Lovecraft mythos, in which cats are known to be denizens of the dream-city Ulthar. They exact retribution on those who slay felines within the city's walls.
Patch changes
- Template:Patched
- Template:Patched
- Template:Patched
- Template:Patched
References
- ^ http://www.worldofwarcraft.com/info/underdev/3p1/bosstiary.html
- ^ Daelo 2009-03-24. World of Warcraft - English (NA) Forums -> Ulduar Hard Modes - Who has 'em?. Retrieved on 2009-04-17.